LiDAR connection check
This sections provides a step by step method to troubleshoot issues related to your LiDAR's connection.
1. Verify your cable connections
The LiDAR should be powered with its standard power adapter and connected to the computer through a LAN cable. Depending on the models, LiDARs can come with a media converter, make sure that media converter is properly powered as well.
2. Verify network settings
Your LiDAR and computer must be on the same subnet. For instance:
LiDAR:      ip: 192.168.6.190, netmask: 255.255.255.0
Computer:   ip: 192.168.6.XX,  netmask: 255.255.255.0

You can refer to our physical installation page for more details.
3. Verify your computer's internal firewall is deactivated
Ubuntu comes with an internal firewall that filters traffic in and out of your computer. That firewall can generate connectivity issues with your LiDAR.
Type the following command to check that firewall's status:
sudo ufw status

If its status is set to active, use the following command to turn it off:
sudo ufw disable
4. Ping your LiDAR
Make sure your LiDAR and computer can exchange packets.
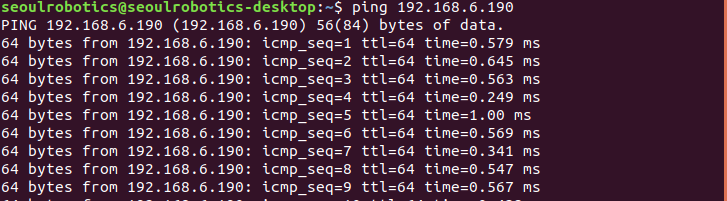
Let's assume the LiDAR's ip address is 192.168.6.190, in a terminal type
ping [your_LiDAR_ip]
If your LiDAR and computer are well connected, you should get the following result.
5. Verify your connection and LiDAR ip address
If the ping test fails or you cannot find your LiDAR's ip address, you can investigate using Wireshark.
Wireshark is an open-source packet analyzer, it is frequently used to debug network issues.
- Install Wireshark
sudo apt-get install wireshark
- Identify your ethernet connection name If it is not installed, install net-tools to get information on your network connections:
sudo apt install net-tools
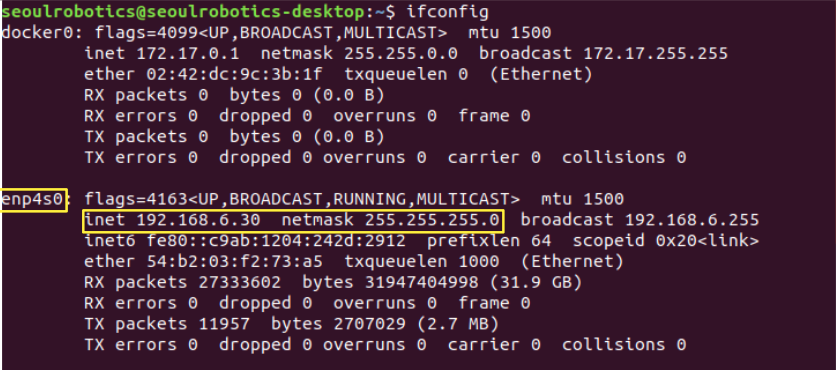
Then type the following command to find your network interface name
ifconfig
On the picture below, the computer's ip address is set to 192.168.6.30, and the corresponding network interface name is enp4s0
- Monitor traffic in Wireshark
In a terminal type the following to open Wireshark:
sudo wireshark

Select the network interface identified at step 2.
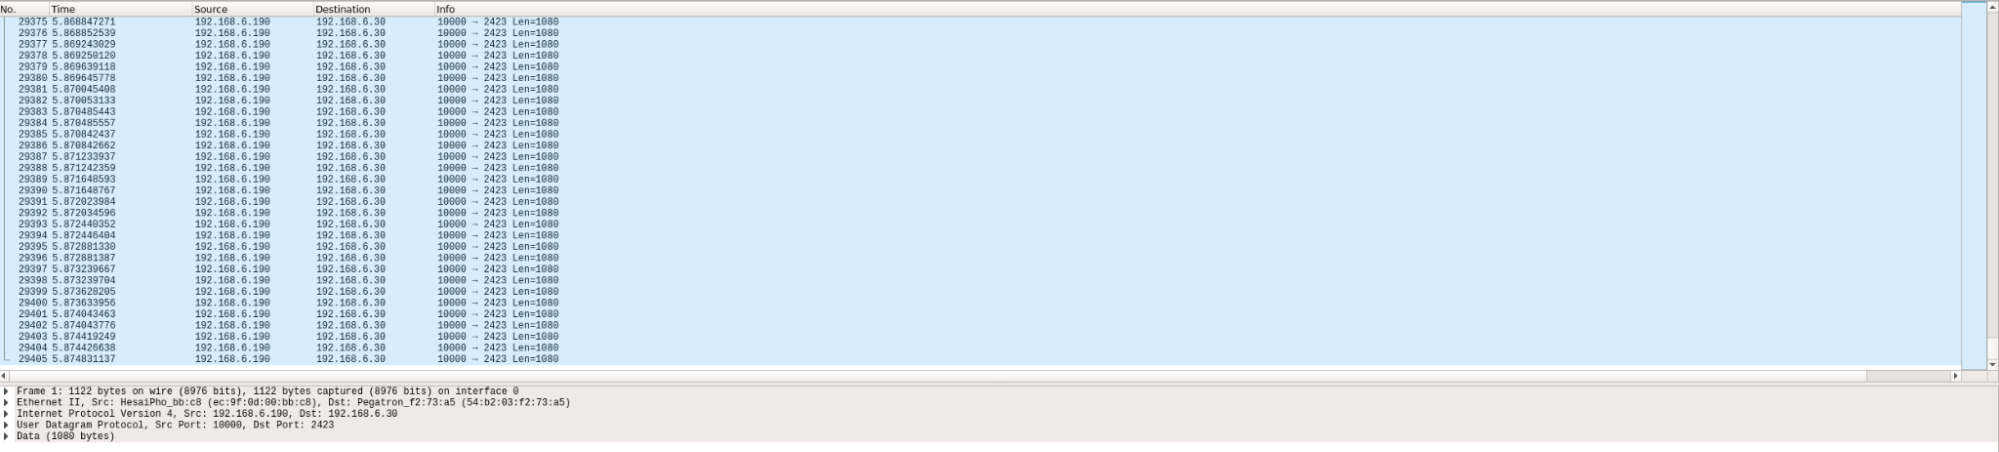
- Identify the connection status:
If your LiDAR and computer are able to communicate properly, the packet messages appear in blue as illustrated below:
If the communication is not working, you can identify your LiDAR's ip address by checking the address uner source on the yellow messsages like the picture below. In that case the LiDAR's ip address is 192.168.6.190:
![]()
- Check your routing table
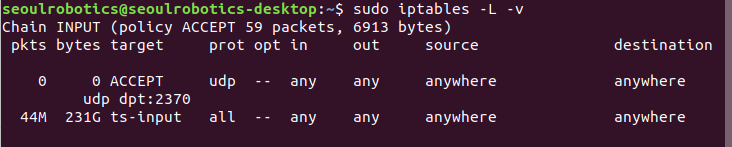
If the steps above did not solve the issue, you can add the LiDAR's port number to your computer's routing table using the command below:
sudo iptables -I INPUT -p udp --dport [lidar_port_number] -j ACCEPT
After adding the port number, you can verify the results by typing the command below, in this example the port number is set to 2370.
You can identify your LiDAR's port number using wireshark by clicking on a packet and using the variable Dst Port or by checking your LiDAR's default port value in the LiDAR Tips section.
sudo iptables -L -v