Maintenance Instructions
Preventive maintenance
System Restart
As for most IT systems, it is essential to restart the SENSR and its host every 3 months to prevent data cluttering and maintain optimal performance. Restarting the system clears temporary data and helps ensure system efficiency. The system restart can be performed on site, over an ssh session, using an application such as Teamviewer or be programmed using a crontab script. To restart the system, follow these steps:
- Safely stop SENSR using either the SR Launcher or the command
sr-launcher-cli stop sensr, - Restart the host using the command
sudo reboot, - Wait for a few moments before the system comes back up,
- Run SENSR again using the SR Launcher or the command
sr-launcher-cli run sensr, if you are using the web Front End, usesr-launcher-cli run web-fe-serverto run it back.
Regular system restarts are crucial to maintain the system's performance and reliability.
System Update
Regular system updates are recommended every 6 months. These ensure you benefit from Seoul Robotics' latest improvements. To update the system, you can follow the steps below for either the SR-Launcher or the SR-Launcher-CLI.
SR Launcher
- Run the SR-Launcher.
- Access the Settings section on the left-hand panels.
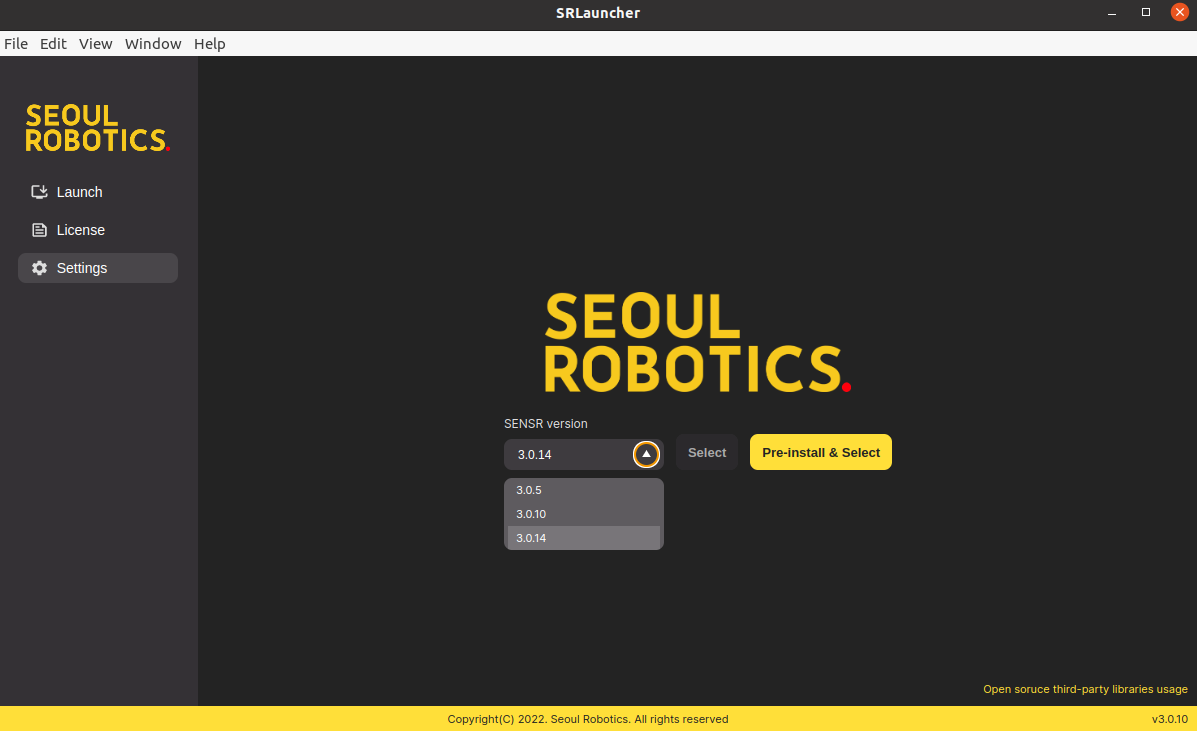
- Select the desired version number for the update in the dropdown menu and click Pre-install & Select.
- After the pre-installation is complete, In the Launch menu, click Install to deploy the new version in the machine.
Note: It is recommended to remove older files in the /opt/seoulrobotics/sr-launcher/resources/docker directory to free up disk space and ensure smooth system operation.
SR Launcher CLI
- In a terminal, type
sr-launcher-cli set version - Select the latest version or the one you would like to install
- Select the architecture you would like to use
amd, arm or both - After the pre-installation is complete, type
sr-launcher-cli run isntall -f cluster.jsonto install sensr as described here - Run sensr using
sr-launcher-cli run sensr
Note: It is recommended to remove older files in the /opt/seoulrobotics/sr-launcher/resources/docker directory to free up disk space and ensure smooth system operation.
Disk Space Monitoring
To prevent operational failures, monitor the available disk space on the host machine. The available disk must have over 10Gb of space at all times.
Cleaning LiDARs
Clean the LiDARs once a year to ensure optimal functionality. Over time, dust, debris, or contaminants can accumulate on the LiDAR's window, affecting its performance. To clean the LiDAR's window, follow these steps:
- Gently clean the LiDAR's window using recommended cleaning materials and techniques. Avoid using abrasive substances or excessive force to prevent damage.
- After cleaning, make sure in SENSR that the calibration has not changed due to the maintenance works.
Regular cleaning of the LiDAR's window ensures reliable operation and accurate perception.
Condition-based monitoring
SENSR offers a variety of messages through its output websocket that can be used to monitor the system's status in real time. The data can be found in the output specification:
- Master node status: 0 = None, 1 = OK
- Node status: 0 = None, 1 = OK, 2 = ROS Error, 3 = Lost Connection, 4 = Invalid GPU Config
- Sensor status: 0 = sensor dead, 1 = sensor alive, 2 = sensor erroneous, 3 = sensor tilted
Corrective maintenance
LiDAR re-adjustment
SENSR constantly monitor whether the LiDAR has been tilted since its first operation in Runtime mode. If a calibration change has been detected, an alert is sent in the Health message. The user can also see that the perception quality has dropped by visualizing SENSR User interface through its native GUI or the Web Frontend. If the LiDAR's calibration has changed too much, affecting the system performaces you can either:
- Recalibrate the system in SENSR See calibration guide
- Adjust the LiDAR on site and recalibrate it in SENSR, See calibration guide
Calibration verification
Perform a calibration check every 3 months to ensure the system remains accurate. To check the calibration, follow these steps:
- Access the system's graphical user interface (GUI) in project mode.
- Verify that the ground is well-aligned by visually inspecting the display.
- Utilize the ground profiling mode to confirm that ground points are displayed in red and not white, indicating proper alignment.
- Additionally, cross-check against landmarks or known reference points to further validate the system's calibration.
Regular calibration checks help maintain accurate performance of the LiDAR-based perception system.