Hesai LiDAR Setting
This chapter provides instructions on how to adjust settings of your Hesai LiDARs.
Default network settings
By default, all Hesai LiDARs are set with the following:
- IPv4 Address: 192.168.1.201
- LiDAR Destination Port: 2368
In case you do not know your device's network settings, you can follow these instructions.
Change network settings
Hesai used to provide a web interface for changing LiDAR configurations. However, for new products, they have started providing an application program instead of a web interface. In this section, Seoulrobotics will explain how to change the network settings of the LiDAR using both the web interface and the application program.
Web interface
- Power the LiDAR and connect it to your computer
- Set the computer's IP address in the same subnet as the Hesai LiDAR
- In a browser, type the LiDAR's IP address
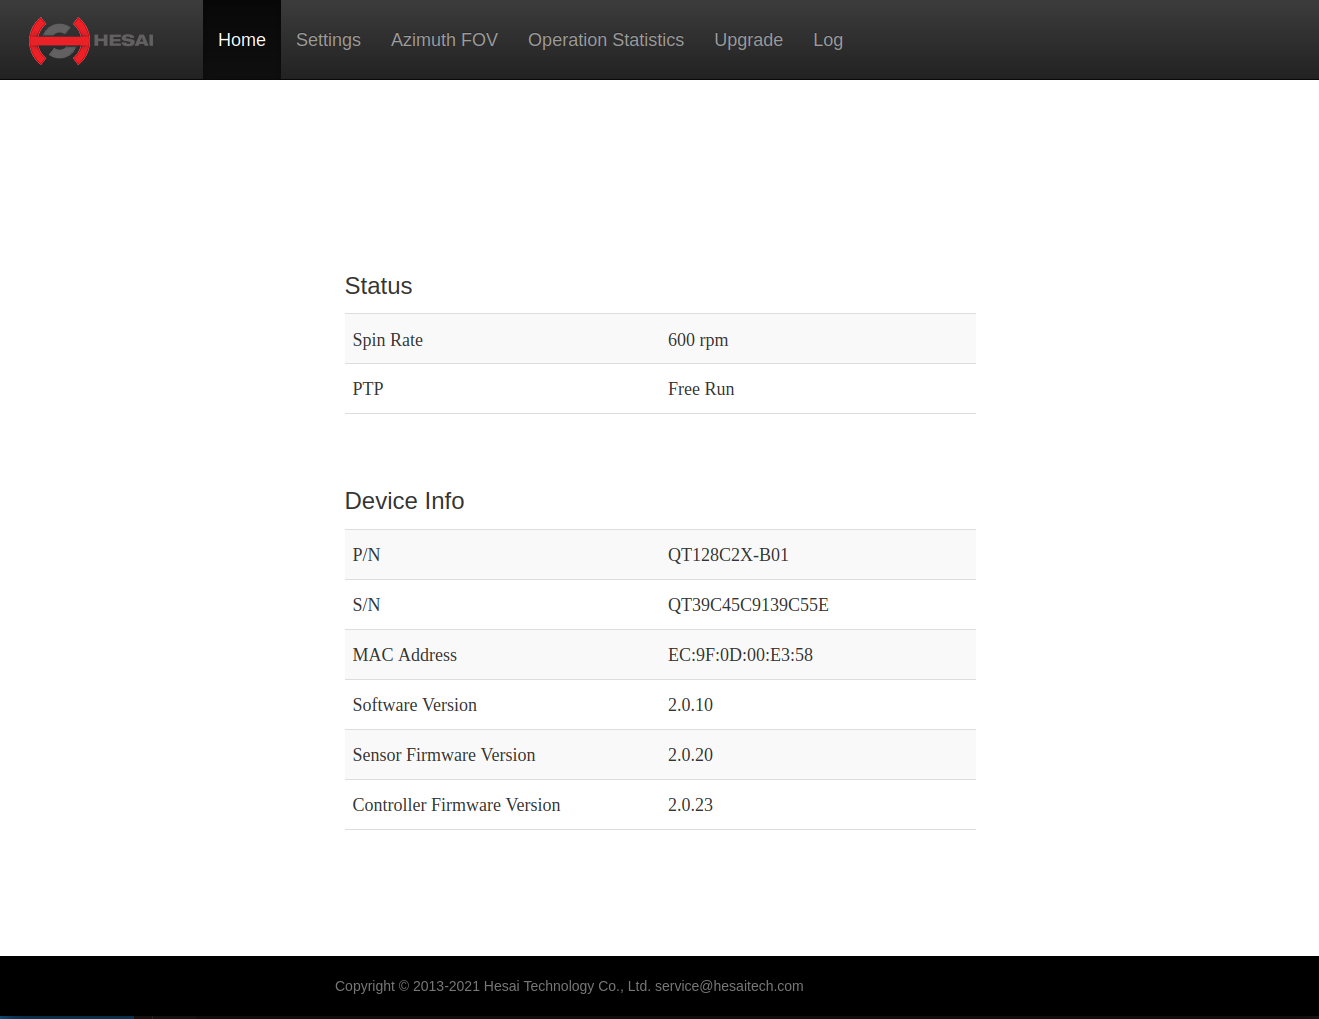
- In the console, navigate to Settings
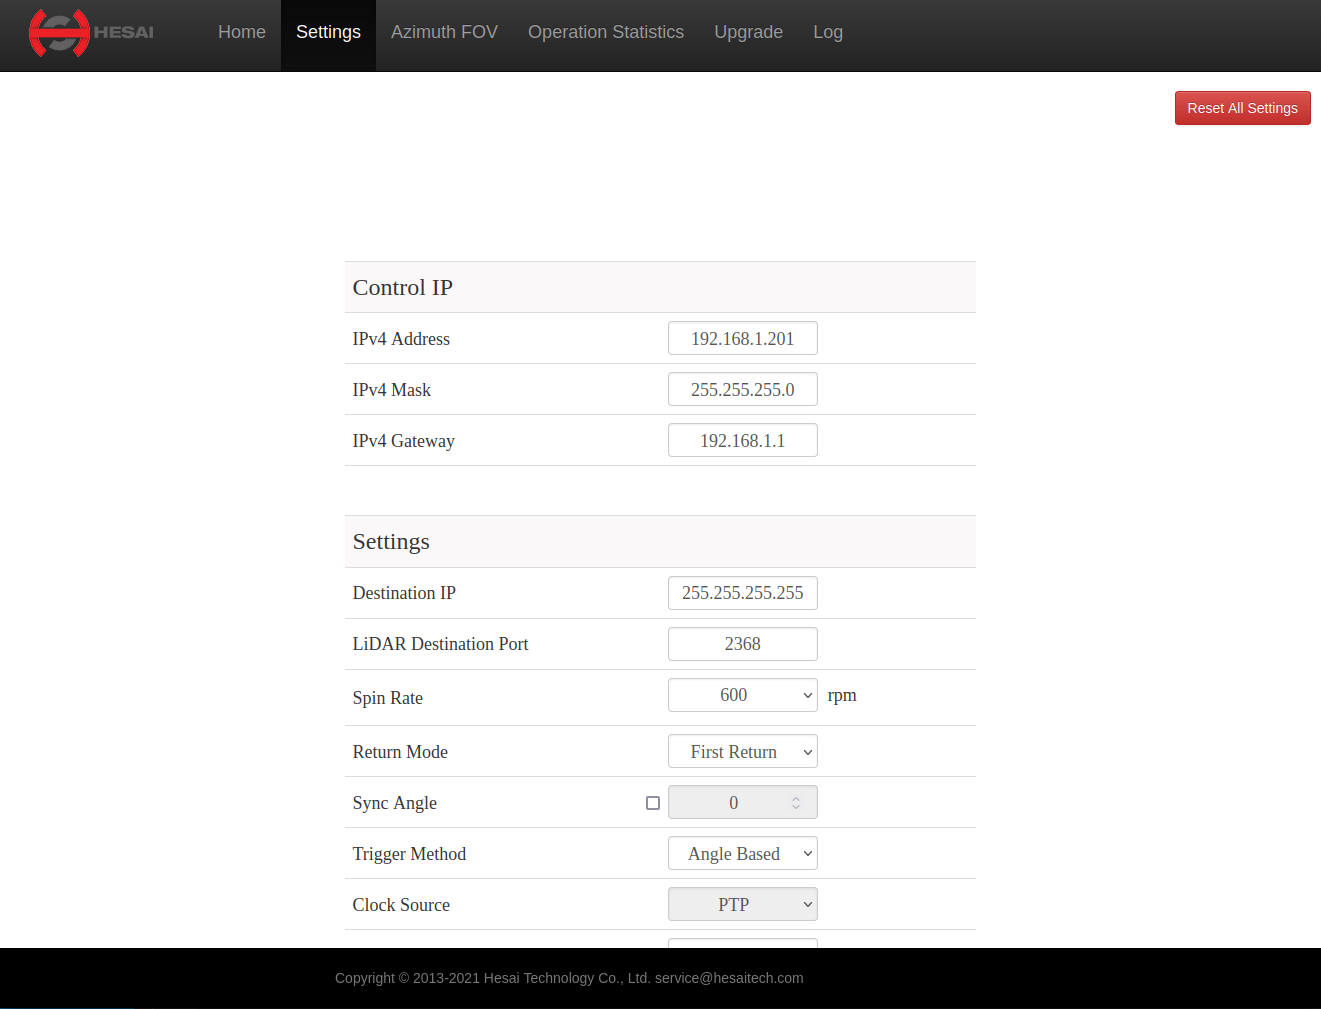
- In IPv4 Address, enter the desired IP address for the LiDAR
- In LiDAR Destination Port, enter the desired Port
- At the bottom of the page, click Save.
Application program
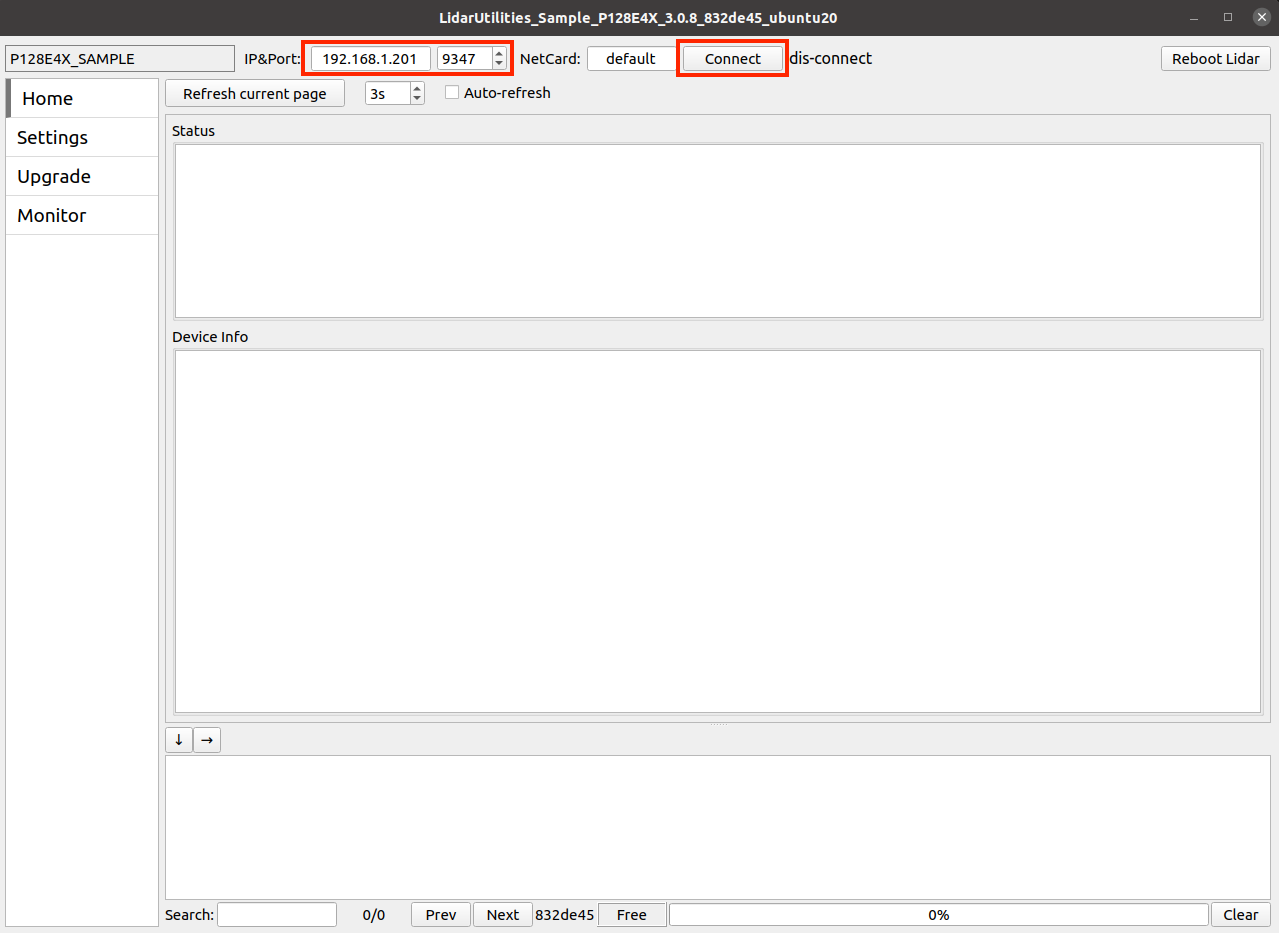
- Power the LiDAR and connect it to your computer
- Set the computer's IP address in the same subnet as the Hesai LiDAR
- Download application program
- Open application program
- Ubuntu: Open the terminal and use the command to open the file.
./{Downloaded file name}- Window: Double-click the download program file.
- Set LiDAR IP in program main screen and click Connect button
- If the LiDAR is successfully connected to the program, you can view the corresponding screen.
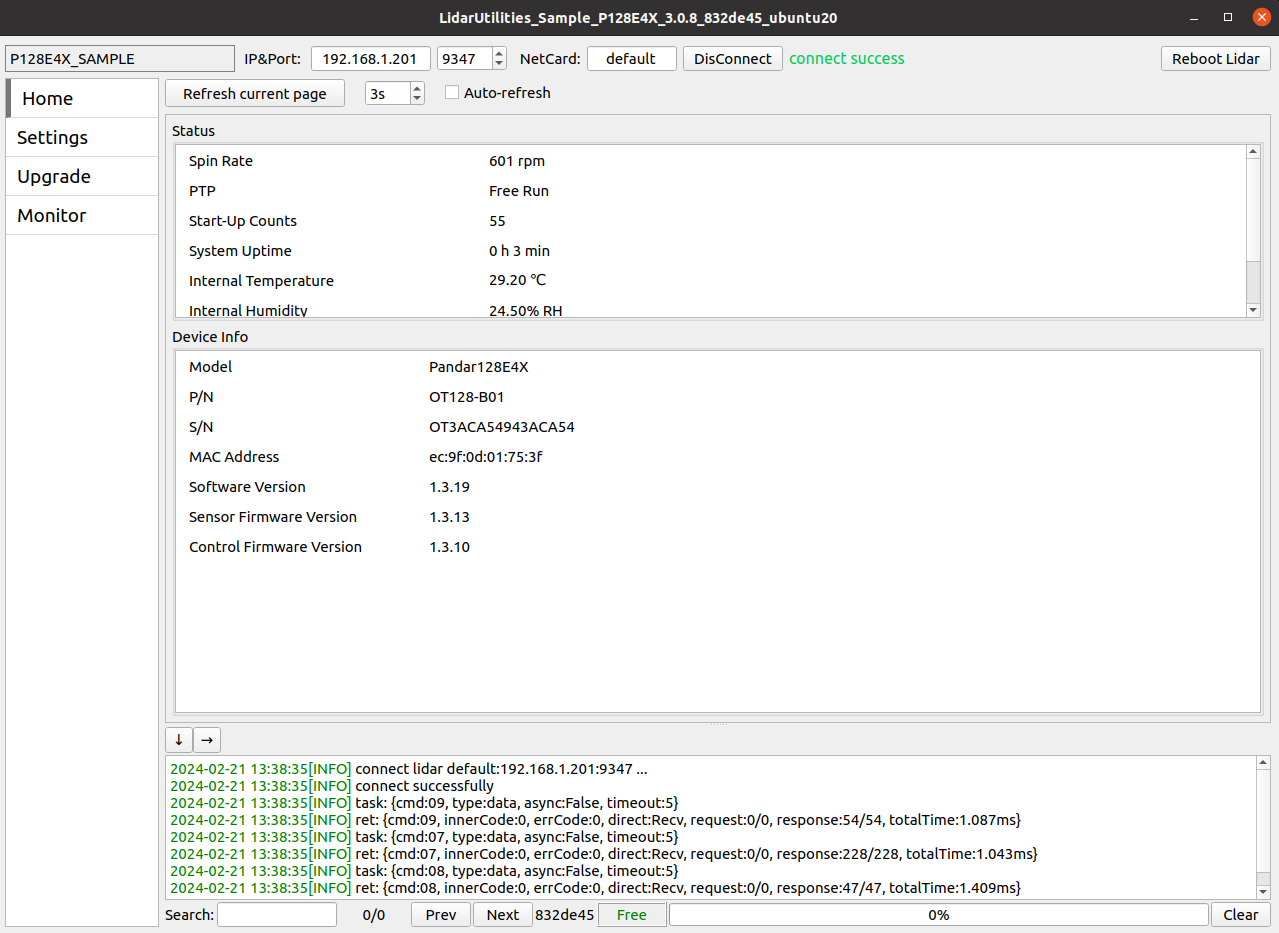 7.Click on the Setting tab.
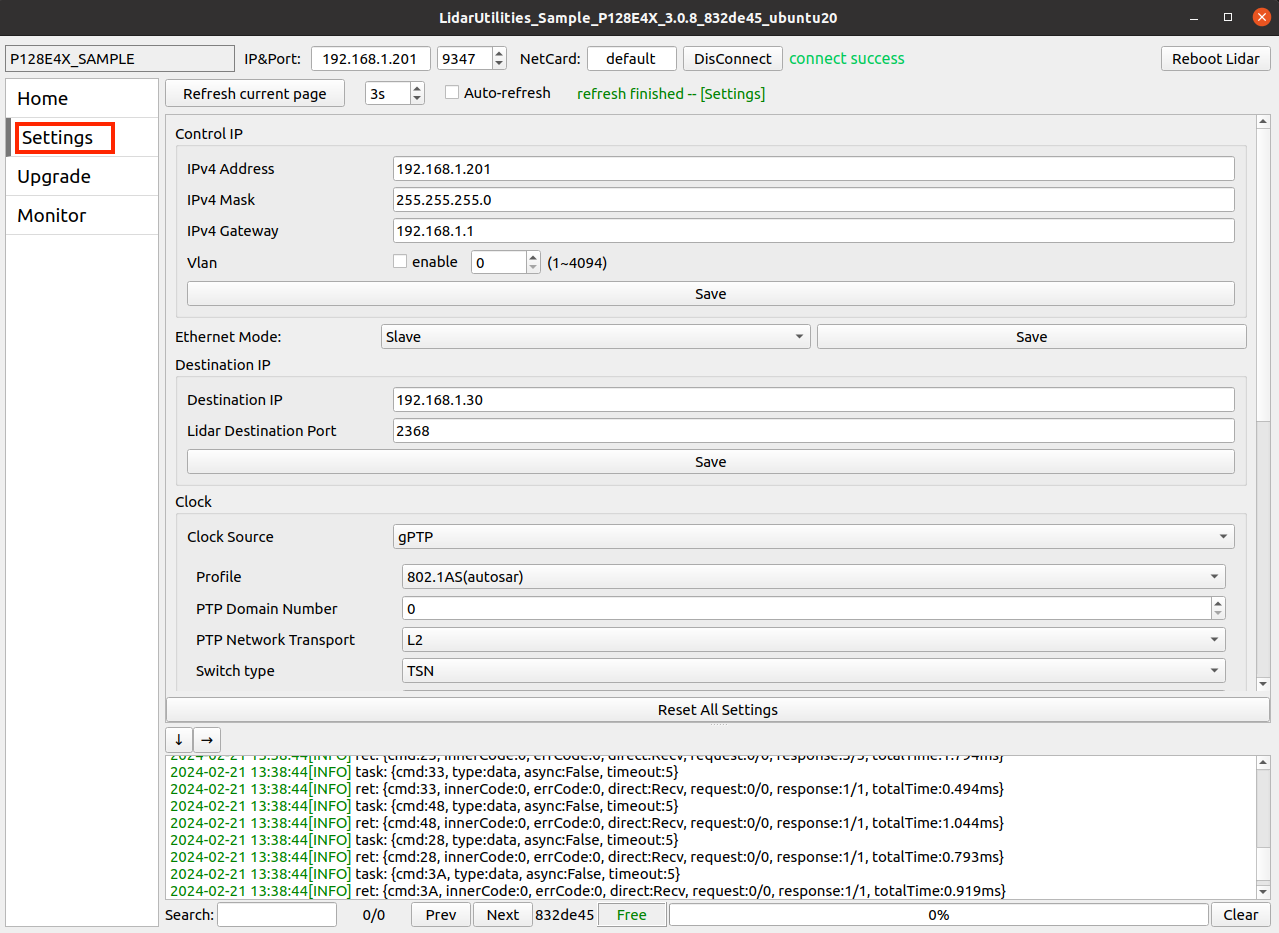
- Enter the desired IP address for the LiDAR in Control IP > IP Address 9.Enter the desired Port in Destination IP > LiDAR Destination Port
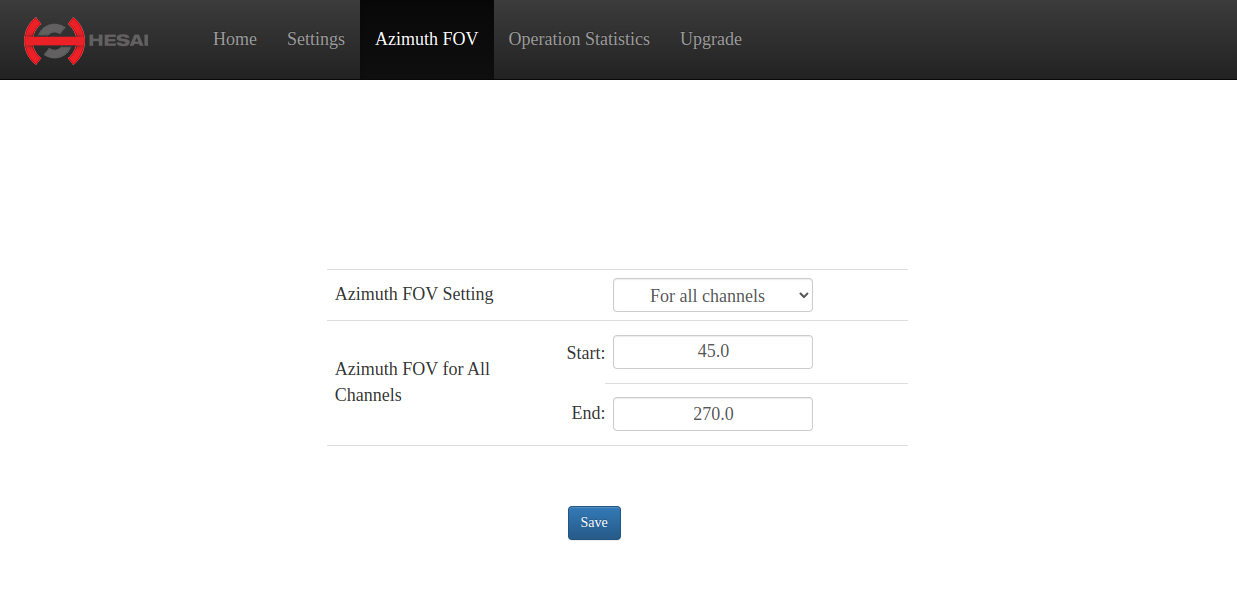
Limit the Azimuth FOV
To reduce data traffic, Hesai 360 degree LiDARs natively integrate a function for ignoring pointcloud data from areas that do need to be monitored. This function is based on limiting the Azimuth FOV. By limiting the FOV of Hesai LiDAR to a specific angle range, the amount of data sent by your LiDAR will be reduced using less computing power and network bandwidth.
- Go to Hesai's web controller page by opening web browser and entering your LiDAR's IP address.
- Go to Azimuth FOV tab and put the numbers for 'Start' and 'End' corresponding to the angles that you want to see. (default values are 0 and 360, respectively.)
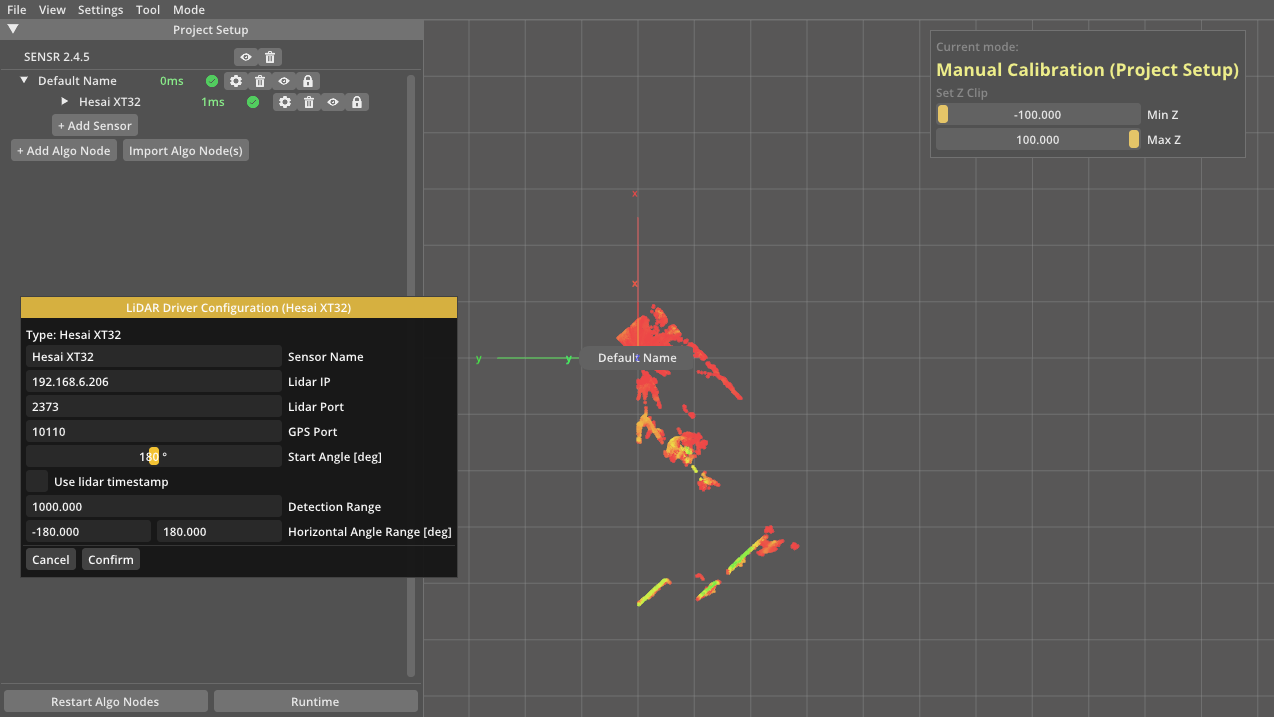
- Change 'start_angle' for the sensor in Project Setup mode as shown on the picture below.
- Keep in mind that 'start angle' should be in the range of from 'start' and 'end' recorded in Hesai web controller.
- For example, assuming A : 'start' value in Hesai web controller, B : 'start angle' in Sensor setting, C : 'end' value in Hesai web controller. Values should be as follows A < B < C.
- For example, assuming A : 'start' value in Hesai web controller, B : 'start angle' in Sensor setting, C : 'end' value in Hesai web controller. Values should be as follows A < B < C.
- Keep in mind that 'start angle' should be in the range of from 'start' and 'end' recorded in Hesai web controller.
- You can make sure the settings have been appplied by checking the shape of the Point Cloud in SENSR.