Upgrade guide to 2.4.X
Unlike previous update, users need to keep in mind that SENRS-I 2.4 has a breaking change of Licensing part. We introduced License Server, so one more step is needed to update SENSR-I to version >= 2.4.X.
Step 1. Install and Activate License Server
Except for the bold texts below, the installation method is the same as general License Server installation method.
- Get License Server installation file from Seoul Robotics' Support Enginner. And put it to the computer where your SENSR is installed.
- Extract downloaded
.tarfiletar -xvf dist.tar - Install license server with following command
cd ./dist
sh ./install.sh - When installation is done, you can check
~/seoulrobotics/licenses/is made. - Copy current license file (LICENSE_NAME.lic) to the path,
~/seoulrobotics/licenses/. Be sure that copied file has .lic extension. - Now License Server is activated.
Step 2. Upgrade SENSR-I
It is strongly recommended to make a backup of your existing version by moving or renaming the folder where your SENSR-I is installed. For example, rename ‘sensr’ to ‘sensr_backup’. Or simply select another installation path in SR Launcher for the new version of SENSR.
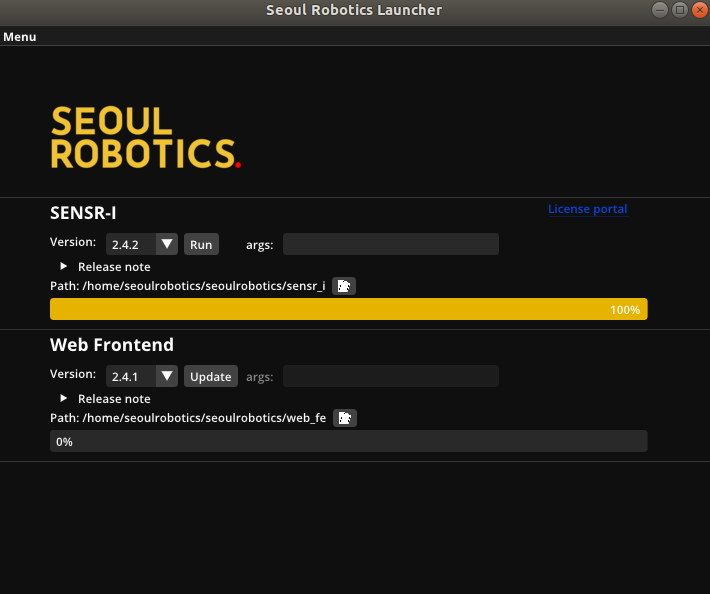
Using SR Launcher
- Open SR Launcher by clicking in the Application menu or typing
sr-launcherin the terminal - Select a version what you want to install under SENSR-I category and click ‘Update’
- You can optionally select install path via Path icon
- SR Launcher automatically downloads the version and asks you to type your password to install SENSR-I.
- After the successful installation, you will see the below screen.
- Open SR Launcher by clicking in the Application menu or typing
Manual Upgrade
Although not recommended, SENSR-I also supports installation without SR Launcher. (We recommend you to get installation file for SR Launcher and upgrade the version.)
- Get
sensr_i_X.Y.Z_[arch].debfile from Seoul Robotics' Support engineer and save it into a folder on the target computer. - Unzip the file. Then you can find the folder named
sensr. - Open terminal in the folder 'sensr'.
- Type command
./install.sh- Don't use
sudocommand.
- Don't use
- (If you're using dockerized SENSR-I) Be sure to reboot the machine right after installation.
- Get
Step 3. Connect license server and SENSR-I instance
In fact, this process should be carried out after launching SENSR-I
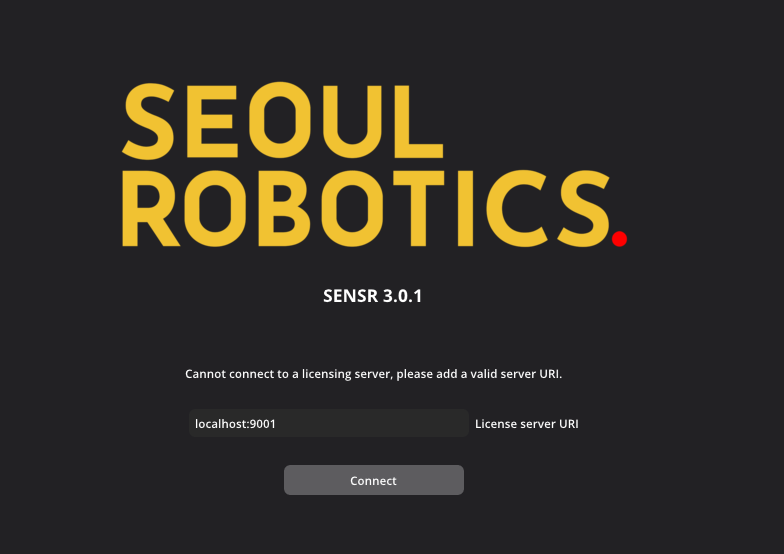
When SENSR-I is executed for the first time or the connection with the License Server is disconnected, you must enter the IP address of the License Server for connection. License Server port is fixed at 9001, and default IP is localhost.