Deploy Ubuntu 20.04 in LPU-B
Ubuntu 18.04 support for hardware and maintenance updates will be dropped from April 2023. So Seoul Robotics strongly recommends SENSR users upgrade the LPU-B's OS to Ubuntu 20.04. This chapter describes how to upgrade LPU-Bs from Ubuntu 18.04 to Ubuntu 20.04.
warning
Before upgrading to Ubuntu 20.04, make sure you back up the important files (such as the SENSR project file and customized SDK-based scripts) in your LPU-B by transferring them to external storage. After the upgrade, all folders and files in the LPU-B will be deleted.
Equipment needed
- LPU-B
- Model name: mic-710aix
- Monitor and HDMI cable
- Used connect LPU-B
- Keyboard and Mouse
- A laptop or computer with Ubuntu 18.04 installed
- The available volume of the machine must be more than 15GB
- 5-pin USB Micro-B to USB cable
- Used to connect the LPU-B and laptop (computer)
- Screwdriver
- Access to the internet from both LPU-B and the laptop
- Nvidia account (more the detail, check this part)
Access recovery mode
caution
For safety, disconnect the LPU-B power cable before starting.
Turn the LPU-B over, remove the screws at the bottom, and open the bottom cover.
- Depending on the revision, there may also be screws on the side.
After opening the bottom cover, connect the power cable to the LPU-B.
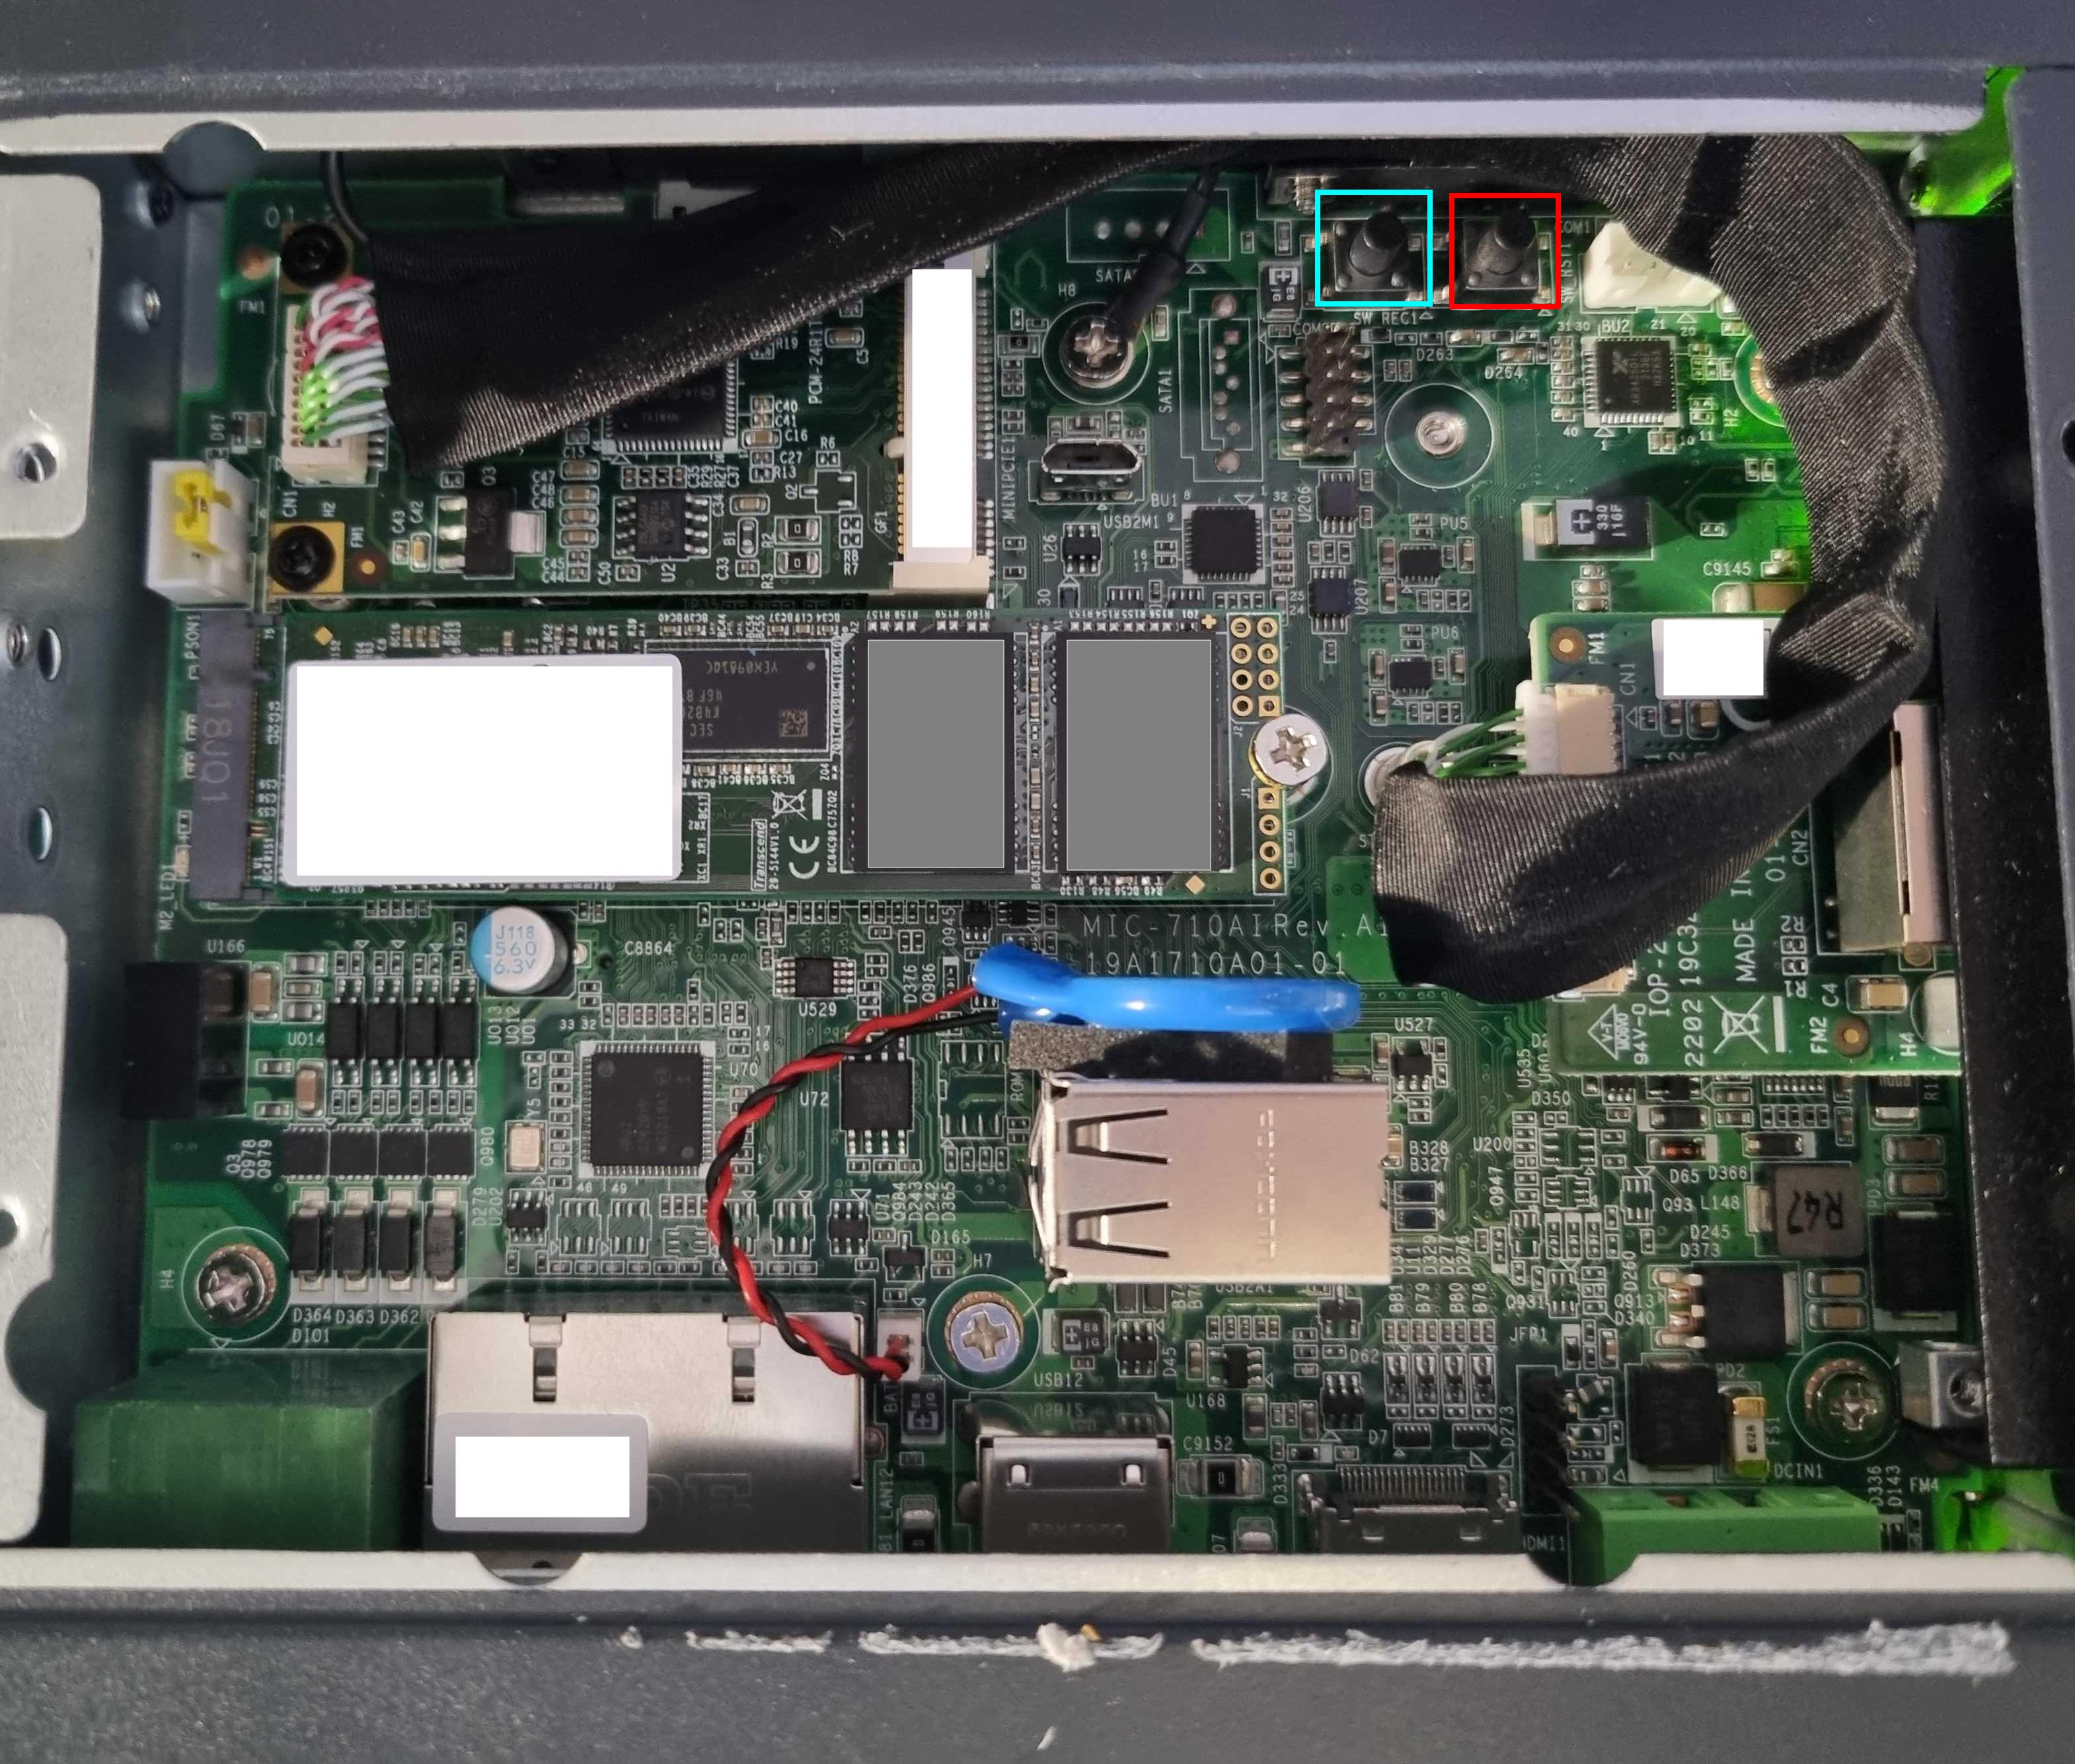
As described in the picture below, locate the 2 black buttons:
- Button1(red box): turn the device off
- Button2(blue box): access recovery mode
Press the buttons in the following order:
1) Press Button1 and Button2 simultaneously for about 2 seconds.
2) Release Button1 and press only Button2 for about 5 seconds.
Before connecting the LPU-B to your laptop, in a Terminal on your laptop, enter the command
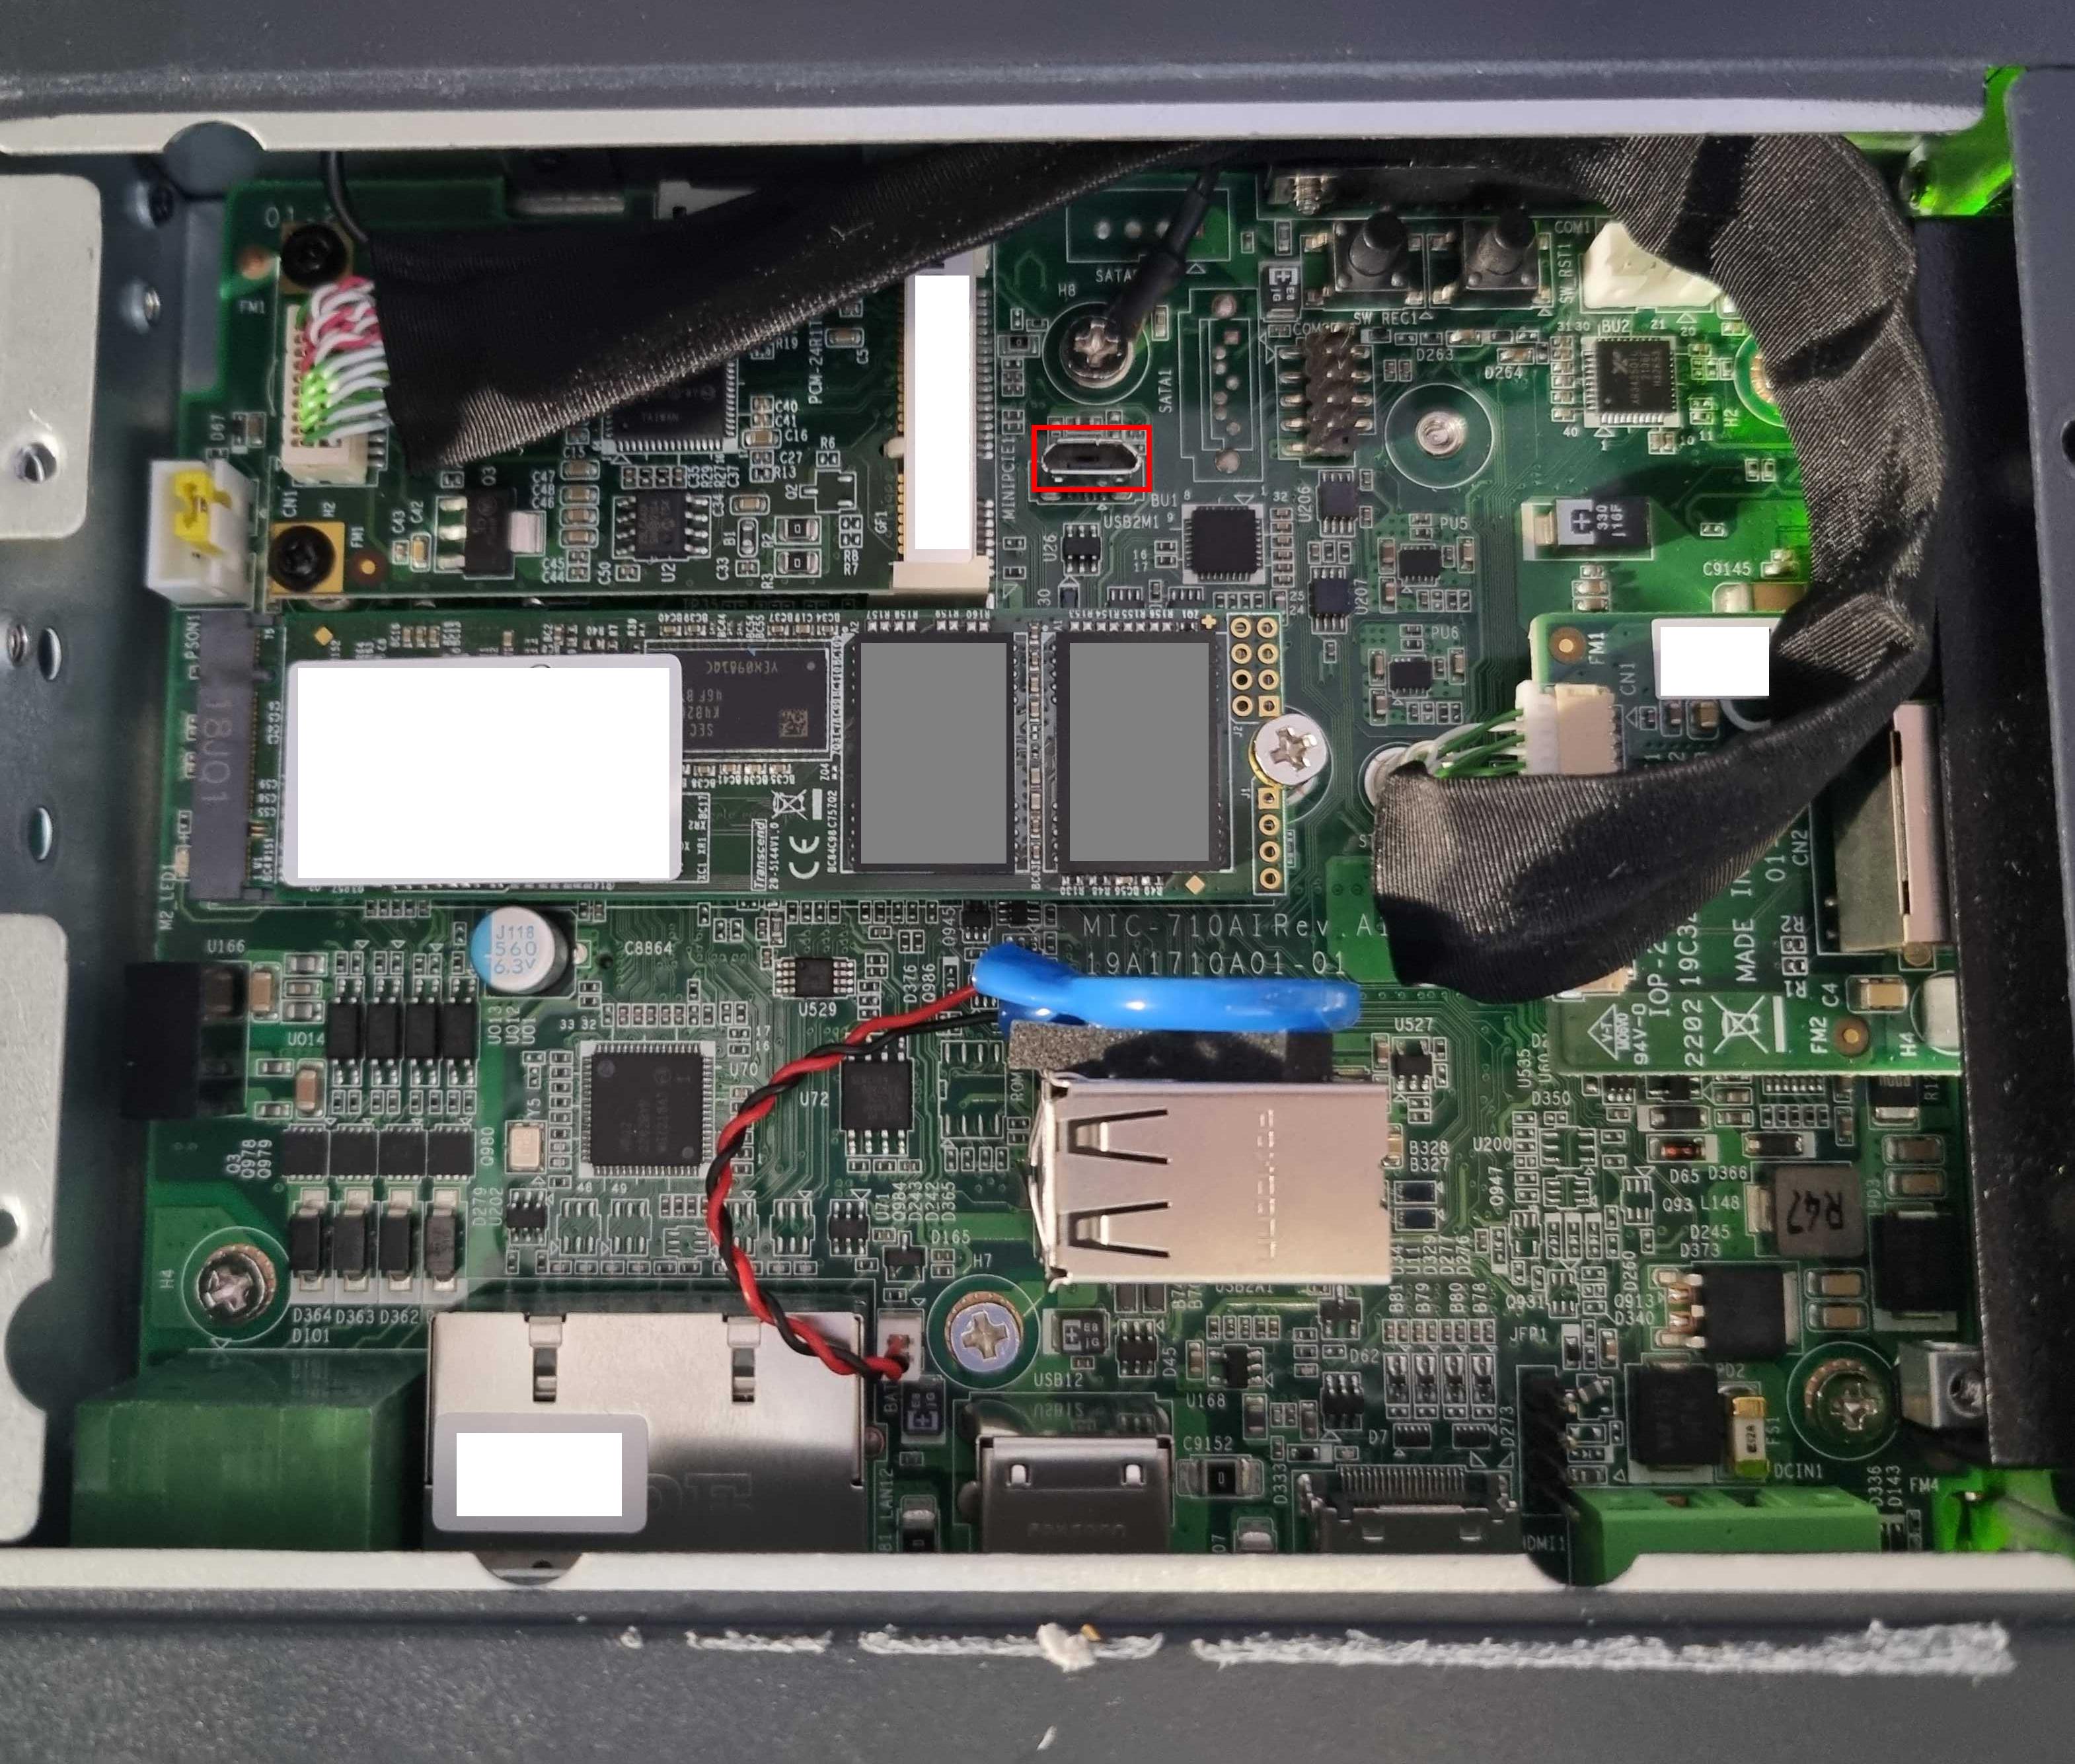
lsusb, and the list of devices connected to your computer will be displayed.Connect the computer or laptop to the LPU-B using the USB 5-pin cable.
- Please refer to the red box on the image for the location of the 5-pin USB Micro-B port of LPU-B.
In the terminal, Type
lsusbagain. If your LPU-B is properly connected, you will see a device namedNVidiaadded to the list.
Flash and install Ubuntu 20.04 in LPU-B
warning
Please make sure your computer or laptop is connected to the LPU-B with the USB 5-pin cable and plugged into a power socket.
Download the operating system installation file (download link) on your laptop or computer
Pre-install the following tools while downloading files.
sudo apt-get install -y liblz4-tool
sudo apt-get install libxml2-utils
Go to the folder where the file was downloaded, and open a terminal in that folder.
Enter the commands below in the order in the terminal to extract and install the file. This step can take about 4-5 minutes.
sudo tar xfj MIC-710AIX_NX_5.0.2_V0.1_SDK.tbz2
cd MIC-710AIX_NX_5.0.2_V0.1_SDK/
sudo ./flash.sh jetson-xavier-nx-devkit-emmc mmcblk0p1
- Once the operating system has been fully completed, the following message should appear on the terminal.
# skip
*** The target t186ref has been flashed successfully. ***
Reset the board to boot from internal eMMC.
danger
If the installation fails, to start over, you must remove the MIC-710AIX_NX_5.0.2_V0.1_SDK folder and start over from step 4.
- Connect the LPU-B to the monitor using an HDMI cable.
- The installation takes some time
- When the installation is successful, Ubuntu 20.04’s desktop will appear on the monitor, and the LPU-B will reboot automatically
Switch boot media
note
The LPU-B’s disk space is insufficient to download Nvidia Jetpack. Therefore the booting media must be changed for the installation.
caution
An Internet connection is required during installation. Proceed without an internet connection unless otherwise noted.
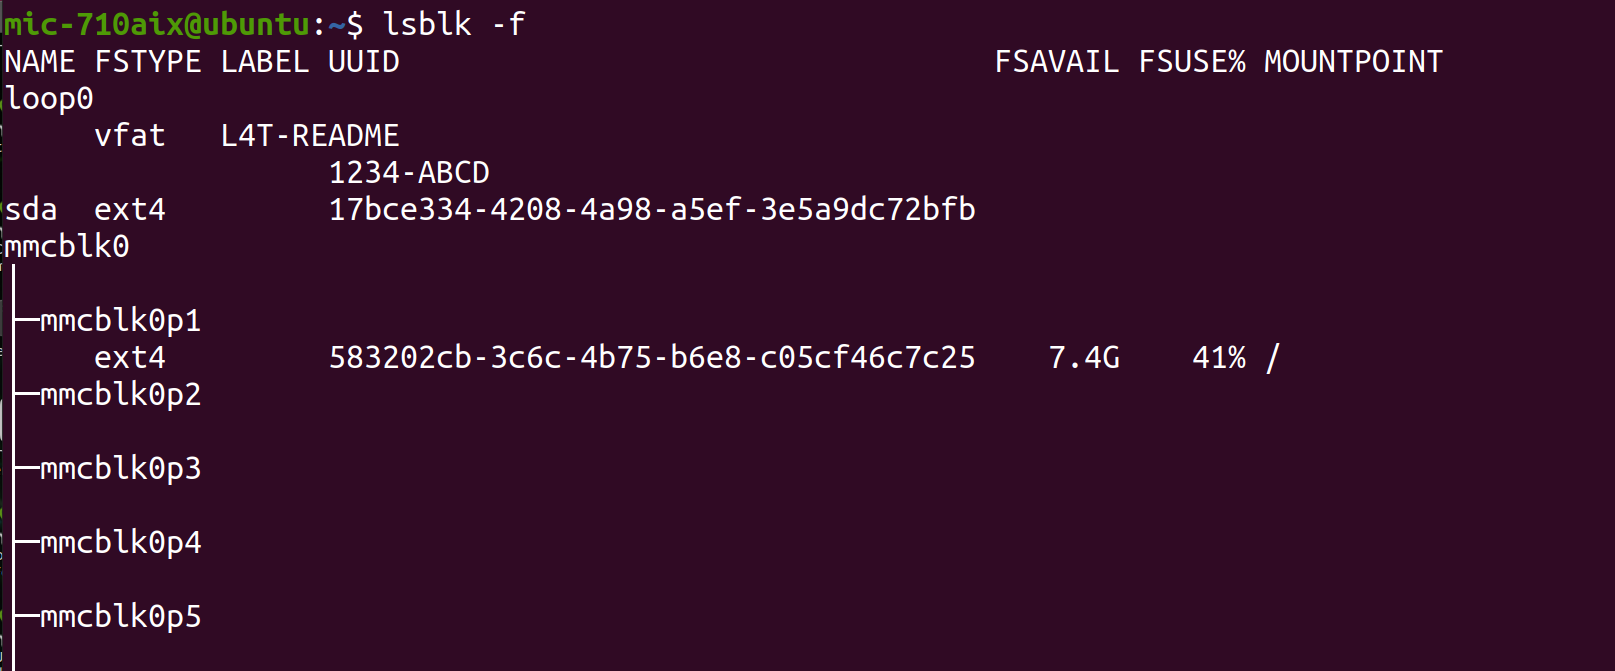
- Open a terminal on LPU-B, enter the command below, and ensure the OS is correctly installed, as illustrated below.
lsblk -f
Enter the command below to let the LPU-B boot on start up.
- When using the
sudocommand, the machine asks for a password. Please enter your password.
sudo mkfs -t ext4 /dev/sda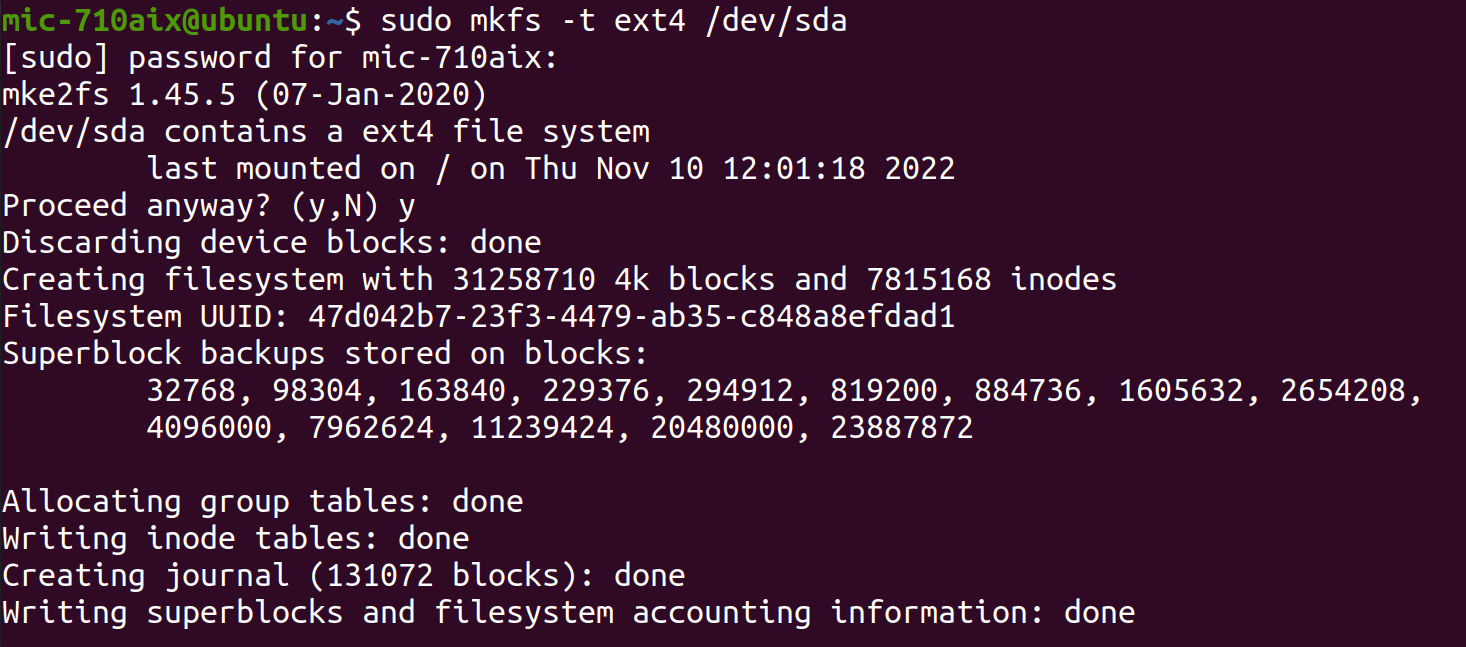
- If this doesn't work try
sudo umount /dev/sdacommand- If the LPU-B has already been through Jetpack installation before with the same SSD, unmount the current SSD first by executing the command below
- When using the
Enter the commands below to create an external media file and mount it
sudo mkdir /etc/tmp
sudo mount /dev/sda /etc/tmp
Enter the command below to copy the contents of the root folder to the external media file just created.
sudo cp -ax / /etc/tmp- This will take about 4-5 minutes.
Enter the commands below in order to ensure the copy was successful.
cd /etc/tmp
ll- If the copy is successful, the terminal should display the following:
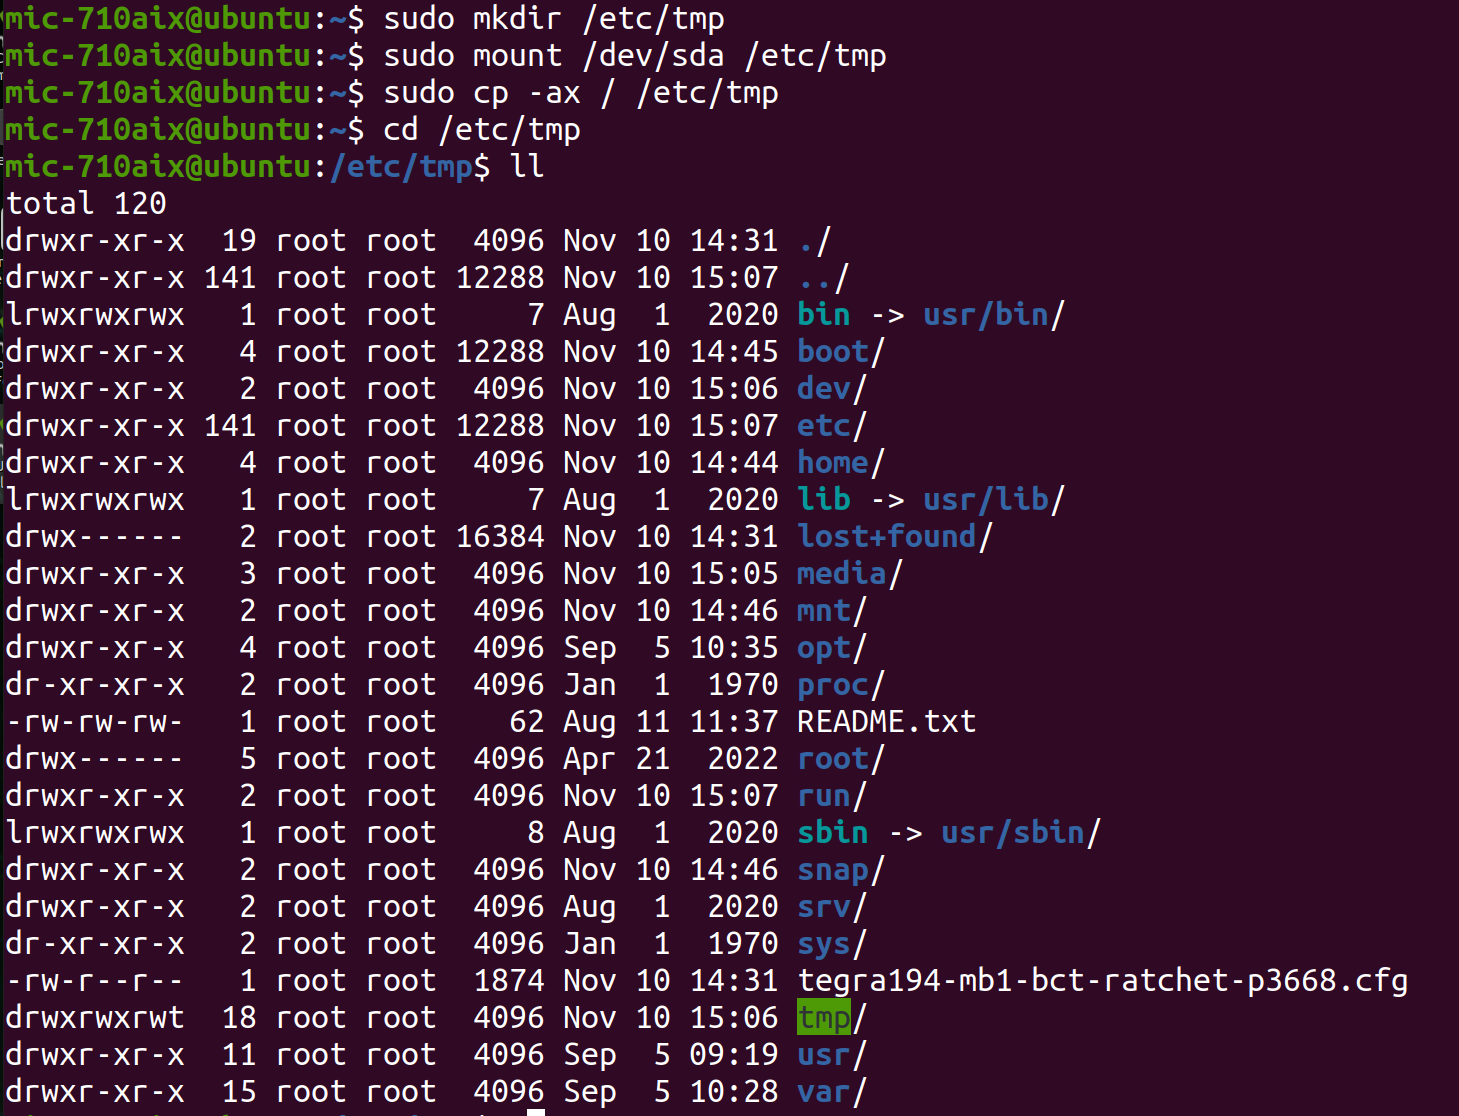
- If the copy is successful, the terminal should display the following:
Create a script file to change the boot process.
1) Open the terminal in your LPU-B home folder
2) Enter the command below to create
setssdroot.servicefile.sudo gedit setssdroot.service- When the text edit window appears, copy and paste the content below into the window.
[Unit]
Description=Change rootfs to SSD in M.2 key M slot (sda)
DefaultDependencies=no
Conflicts=shutdown.target
After=systemd-remount-fs.service
Before=local-fs-pre.target local-fs.target shutdown.target
Wants=local-fs-pre.target
ConditionPathExists=/dev/sda
ConditionVirtualization=!container
[Service]
Type=oneshot
RemainAfterExit=yes
ExecStart=/sbin/setssdroot.sh
[Install]
WantedBy=default.target
3) Save the content with ctrl+s, go to the terminal window, and type ctrl+c to close the text edit window or click the x button in text edit.
Enter the command below to create
setssdroot.shfile.1) Open the terminal in your LPU-B home folder
sudo gedit setssdroot.sh2) When the text edit window appears, copy and paste the content below into the window or click the x button in text edit.
#!/bin/bash
DEV_SDA=$(sudo smartctl -a /dev/sda | grep -e M.2 -e 'Solid State Device')
DEV_SDB=$(sudo smartctl -a /dev/sdb | grep -e M.2 -e 'Solid State Device')
DEV_SDC=$(sudo smartctl -a /dev/sdc | grep -e M.2 -e 'Solid State Device')
NVME_DRIVE="/dev/sda"
if [[ $DEV_SDB == *"M.2"* || $DEV_SDB == *"Solid State Device"* ]]; then {
NVME_DRIVE="/dev/sdb"
}
elif [[ $DEV_SDA == *"M.2"* || $DEV_SDA == *"Solid State Device"* ]]; then {
NVME_DRIVE="/dev/sda"
}
elif [[ $DEV_SDC == *"M.2"* || $DEV_SDC == *"Solid State Device"* ]]; then {
NVME_DRIVE="/dev/sdc"
}
fi
CHROOT_PATH="/nvmeroot"
INITBIN=/lib/systemd/systemd
EXT4_OPT="-o defaults -o errors=remount-ro -o discard"
modprobe ext4
#modprobe fuse
mkdir -p ${CHROOT_PATH}
mount -t ext4 ${EXT4_OPT} ${NVME_DRIVE} ${CHROOT_PATH}
cd ${CHROOT_PATH}
/bin/systemctl --no-block switch-root ${CHROOT_PATH}
3) Save the content with ctrl+s, go to the terminal window, and type ctrl+c to close the text edit window or click the x button in text edit.
Connect the LPU-B to the internet.
Open the terminal and enter the command below on LPU-B to install
systemctl.sudo apt-get update
sudo apt-get install smartmontools- The terminal may ask if you want to proceed with the installation. In this case, just select yes.
Enter the command below to check if systemctl is installed correctly
sudo smartctl –a /dev/sda- If successful, the terminal should display the message below:
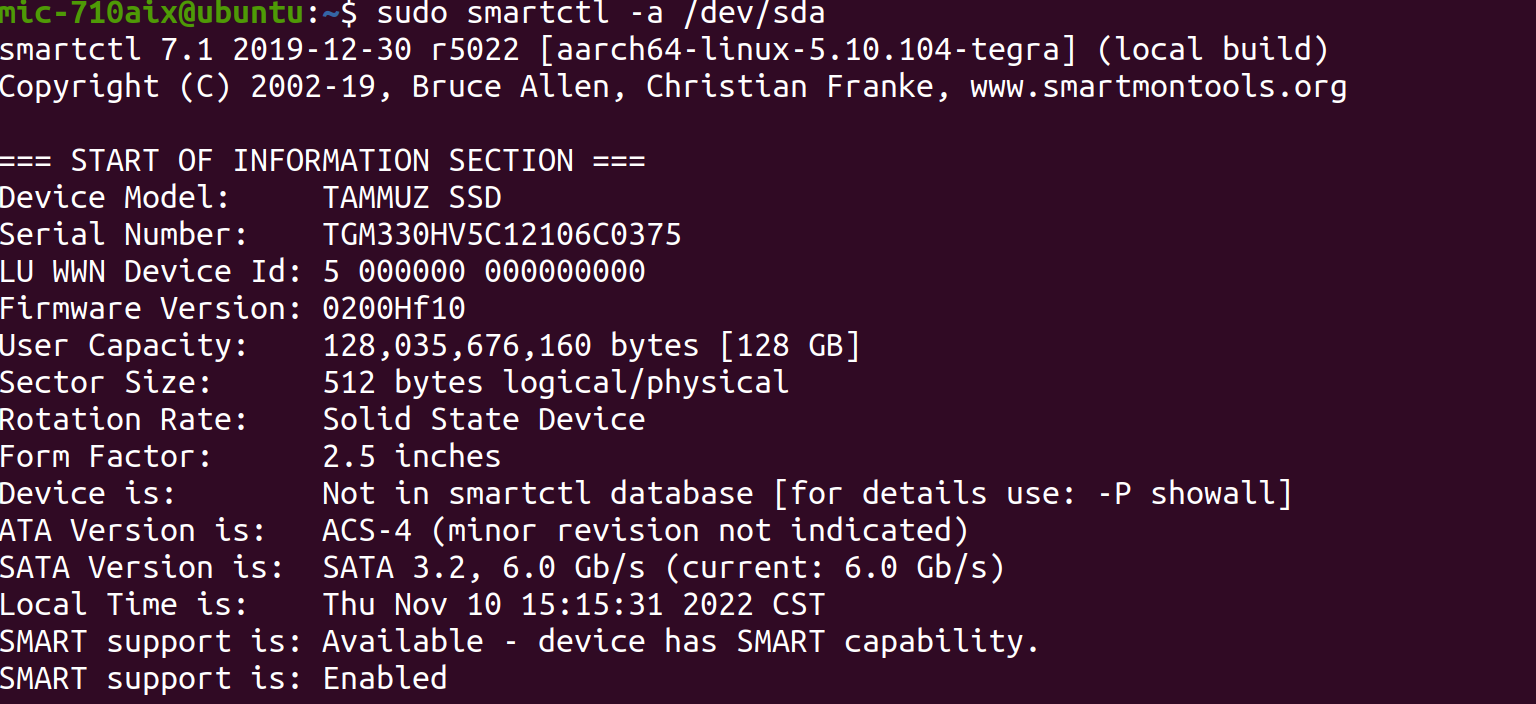
- If successful, the terminal should display the message below:
Enter the commands below.
sudo cp setssdroot.service /etc/systemd/system
sudo cp setssdroot.sh /sbin
sudo chmod 777 /sbin/setssdroot.sh
systemctl daemon-reload- When entering the
systemctl daemon-reloadcommand, the system asks for the LPU-B password. Enter the password for LPU-B. - After entering the password, enter the following command in the terminal.
sudo systemctl enable setssdroot.service- Make sure the last command is properly executed and type reboot in the terminal to restart the machine

- When entering the
Install Jetpack5.0
note
Connect your computer or laptop to the LPU-B with the cable prepared before proceeding with this step. Also, connect the internet to both machines.
Install the Nvidia Jetpack on your computer or laptop
- Nvidia SDK manager (download link)
- Sign up for Nvidia before downloading.
- Make sure to sign up for Nvidia Developer when you sign up.
- Click the download button labeled as
.deb
- Nvidia SDK manager (download link)
Open the downloaded file to install SDK manager.
After installation, type
SDKManagerin the menu window to find it. 1) Open menu window 2) Enter sdk and find SDKManager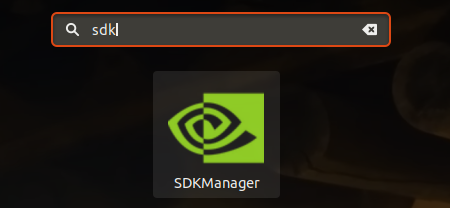
When opening the S g DK for the first time, you will need to log in. Click the login button inside the green box to log in.
If the laptop and LPU-B are properly connected, the following screen will appear.
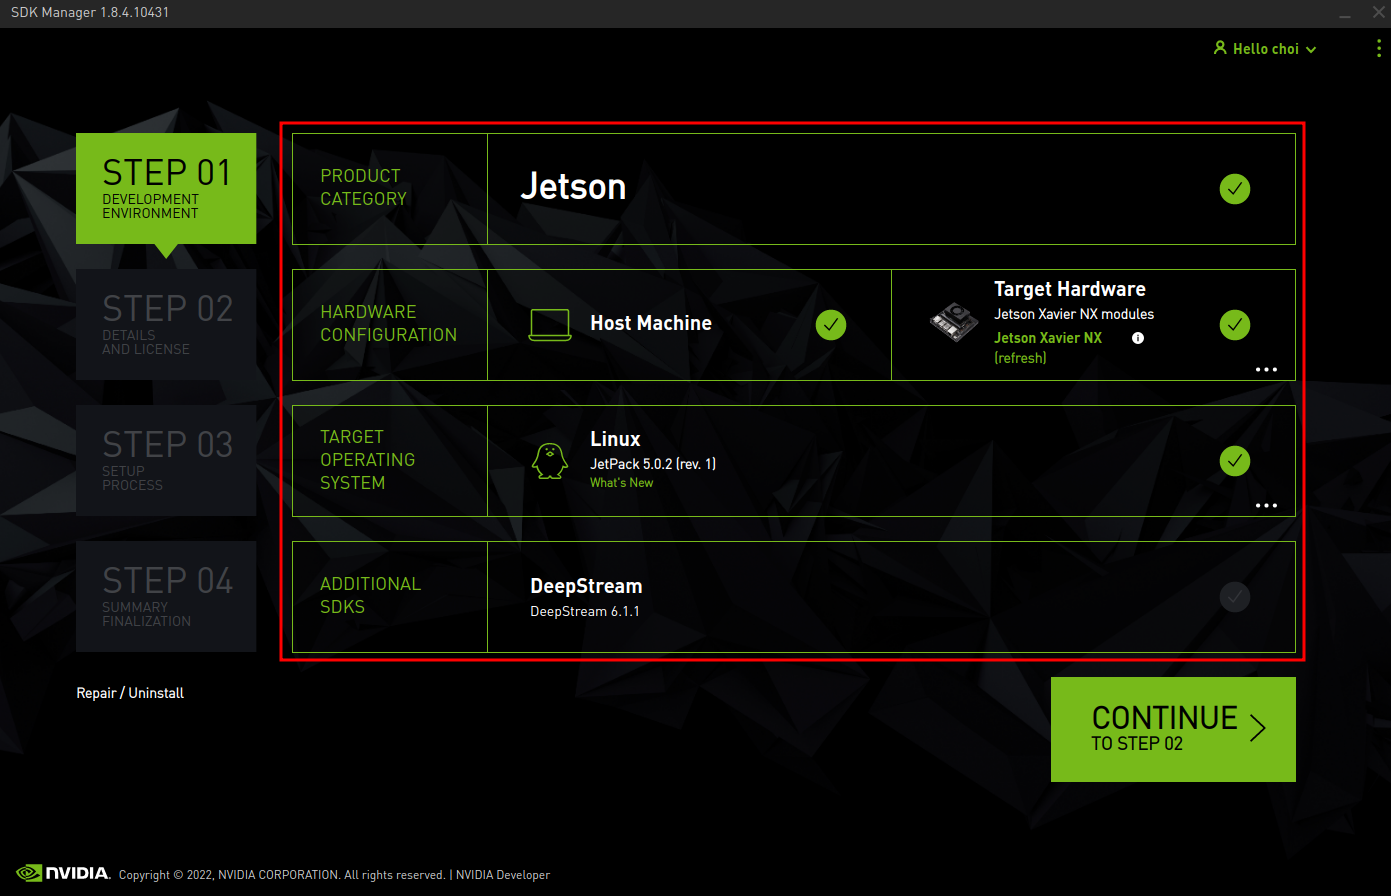
Press the continue button to proceed to the next step.
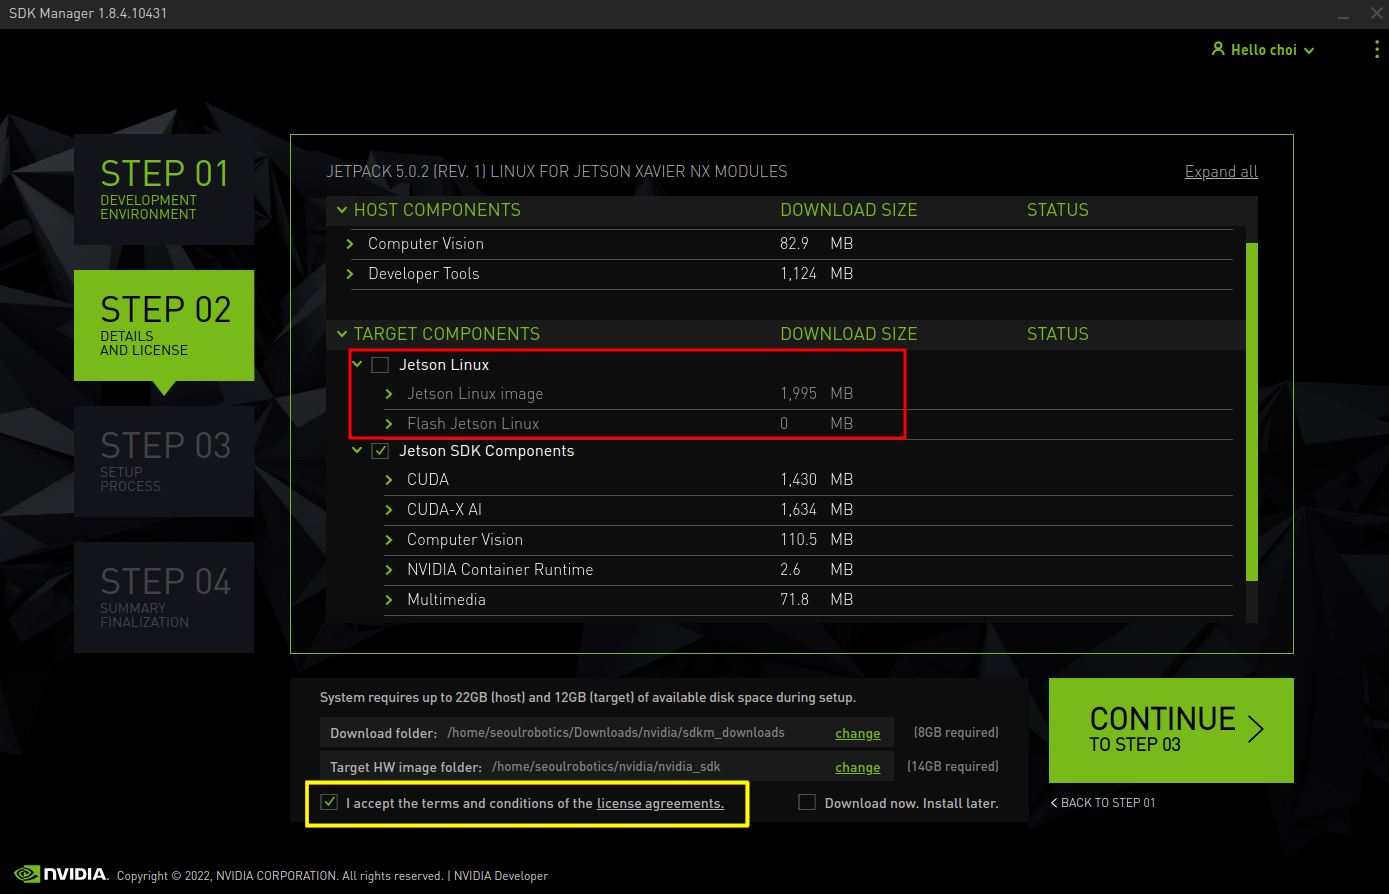
Untick the Install Jetson Linux checkbox, tick the agree checkbox below and click the continue button to proceed to the next step.
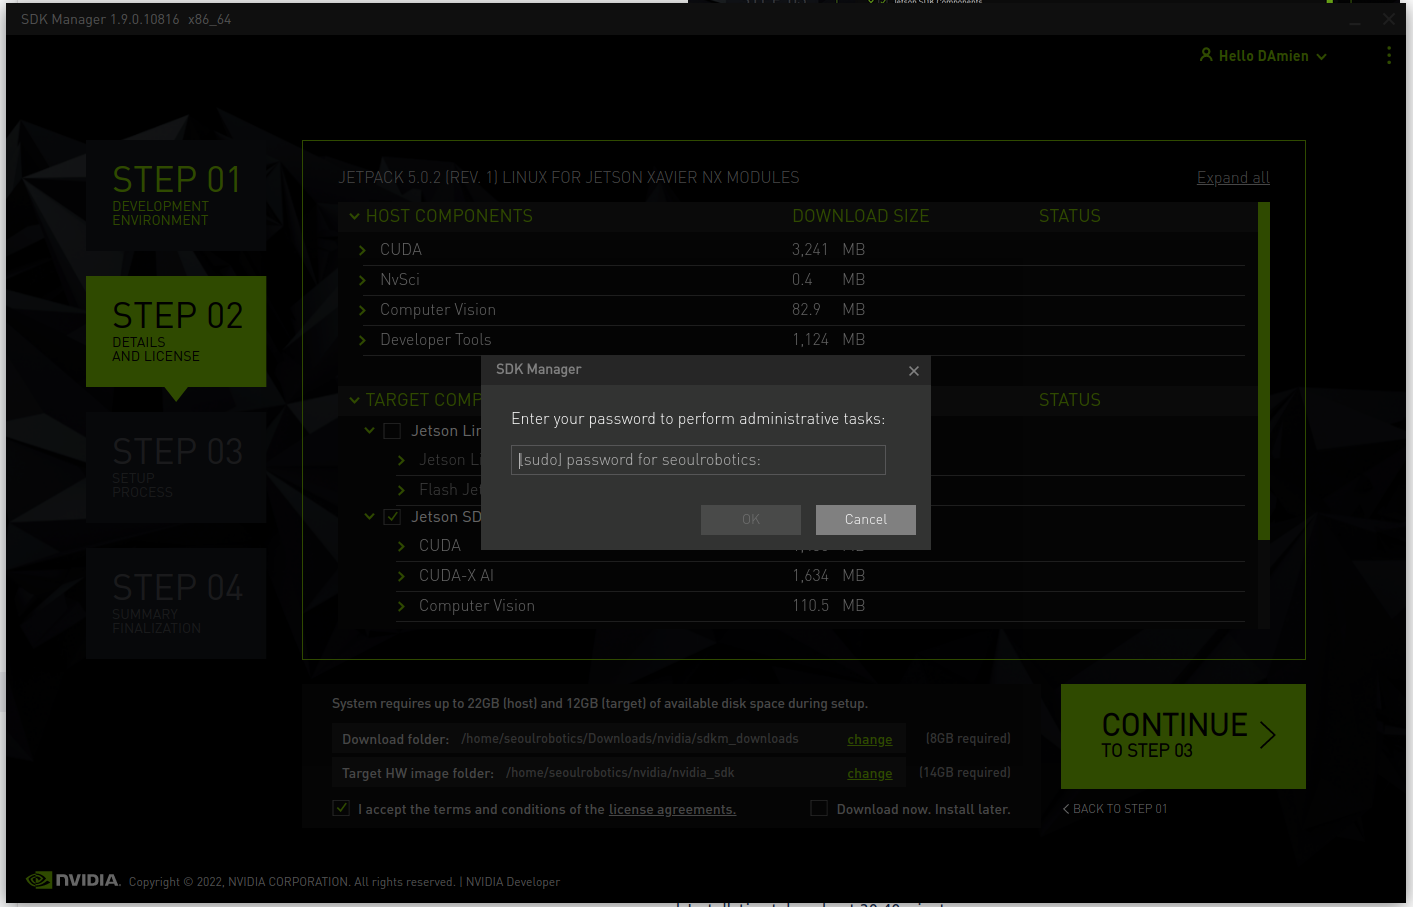
Before downloading the file, the SDK asks for a password. Please enter your computer password.
Enter the user name and password for LPU-B.
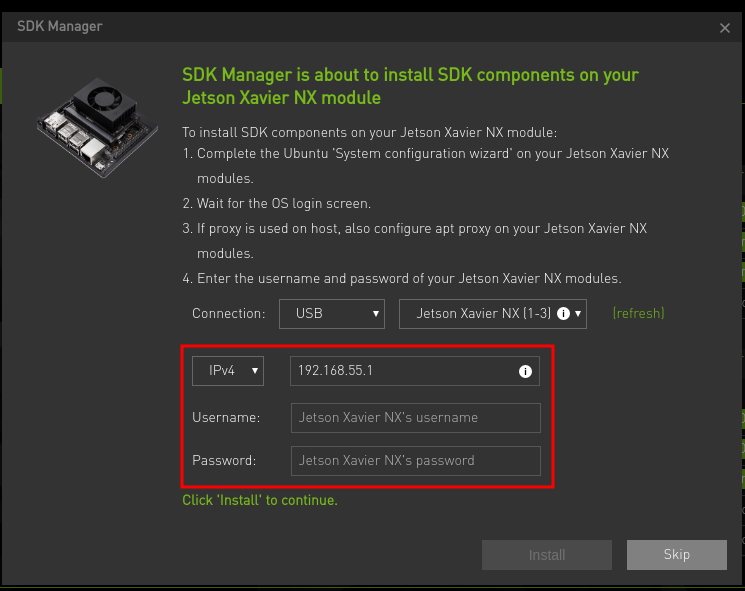
- Enter the user name and password to activate the install button, and then click the install button to proceed with the installation. -The installation takes about 30-40 minutes.
note
If the installation does not proceed after entering the correct user name and password, please check the network status. In Settings > Network, make sure that the network starting with Nivida is enabled and set to DHCP.
- After installation, reboot LPU-B, open a terminal and enter the following command to verify that jetpack is properly installed.
nvcc --version
- Once the installation is complete, please install SENSR and redeploy the backed-up files.
- To install SENSR, please follow the steps here