SENSR-I Installation
info
If you have Discovery kit (LPU with SENSR-I pre-installed), you may skip this procedure.
CLI installation and launch is also available. You can find the instruction here.
caution
Make sure you have an active internet connection during the installation process.
Pre-requisites
SENSR-I supports Ubuntu 20.04 LTS as a default OS. The following packages are required.
Master node machine
(The machine can be used as both the Master node and Algo node.)
Graphics drivers
mesa-utils(>= 8.4.0-1) | forAMD64architecture without GPUsudo apt update && sudo apt install mesa-utils -y && sudo rebootnvidia-driver-525| forAMD64architecture with GPUsudo apt update && sudo apt install nvidia-driver-525 -y && sudo prime-select nvidia && sudo reboot
# It is recommended to enter the following command to prevent the 'apt' operation from changing the driver version:
sudo apt-mark hold nvidia-driver-525 libnvidia-compute-525
Algo node machine
(You can skip this step if running the master and algo nodes on the same machine.)
Common
openssh-server(>= 1:8.2p1-4ubuntu0.5)sudo apt update && sudo apt install openssh-server -y
Graphics drivers
nvidia-driver-525| forAMD64architecture with GPUsudo apt update && sudo apt install nvidia-driver-525 -y && sudo reboot
# It is recommended to enter the following command to prevent the 'apt' operation from changing the driver version:
sudo apt-mark hold nvidia-driver-525 libnvidia-compute-525
Installation
Download
sr-launcher-[VERSION]-[ARCH].deb.Install the downloaded file with command below.
sudo apt install ./sr-launcher-[VERSION]-[ARCH].debExecute
SRLauncherin "Show Applications"
SR Launcher will check the pre-installation has already been done. If not, it will ask you for target version and architecture to pre-install. Once by downloading Kubernetes binary and Docker images of SENSR-I.
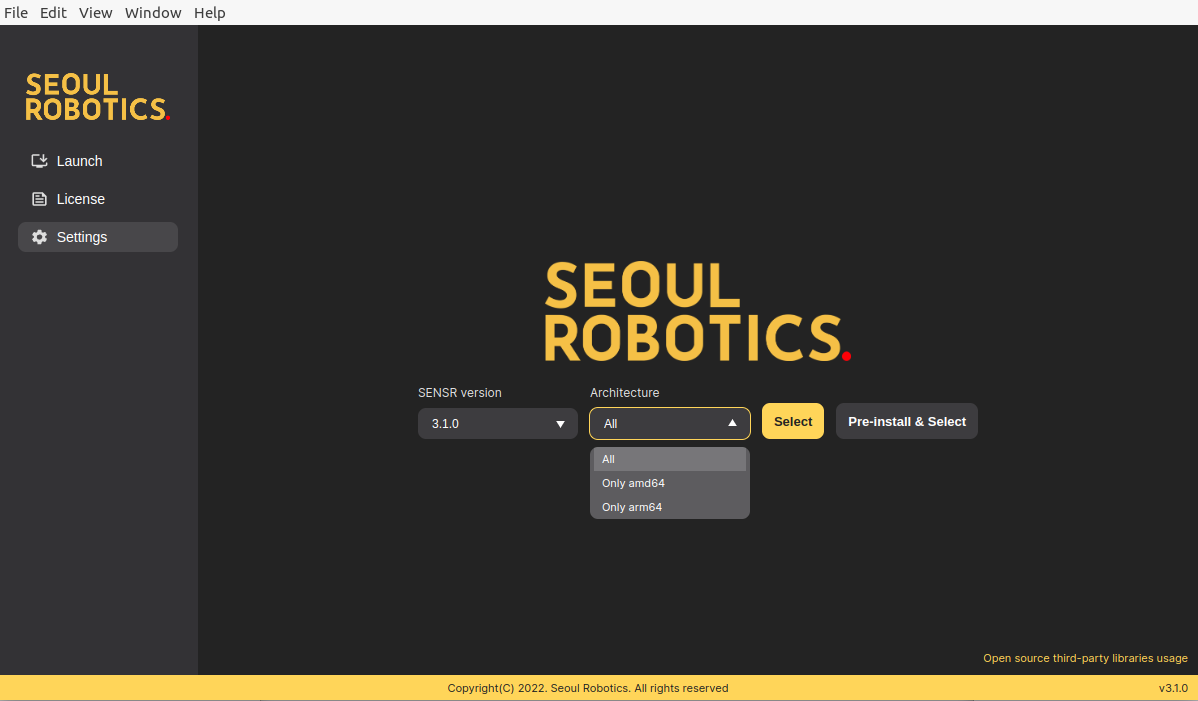
After pre-installation, it will show the "Launch" tab.

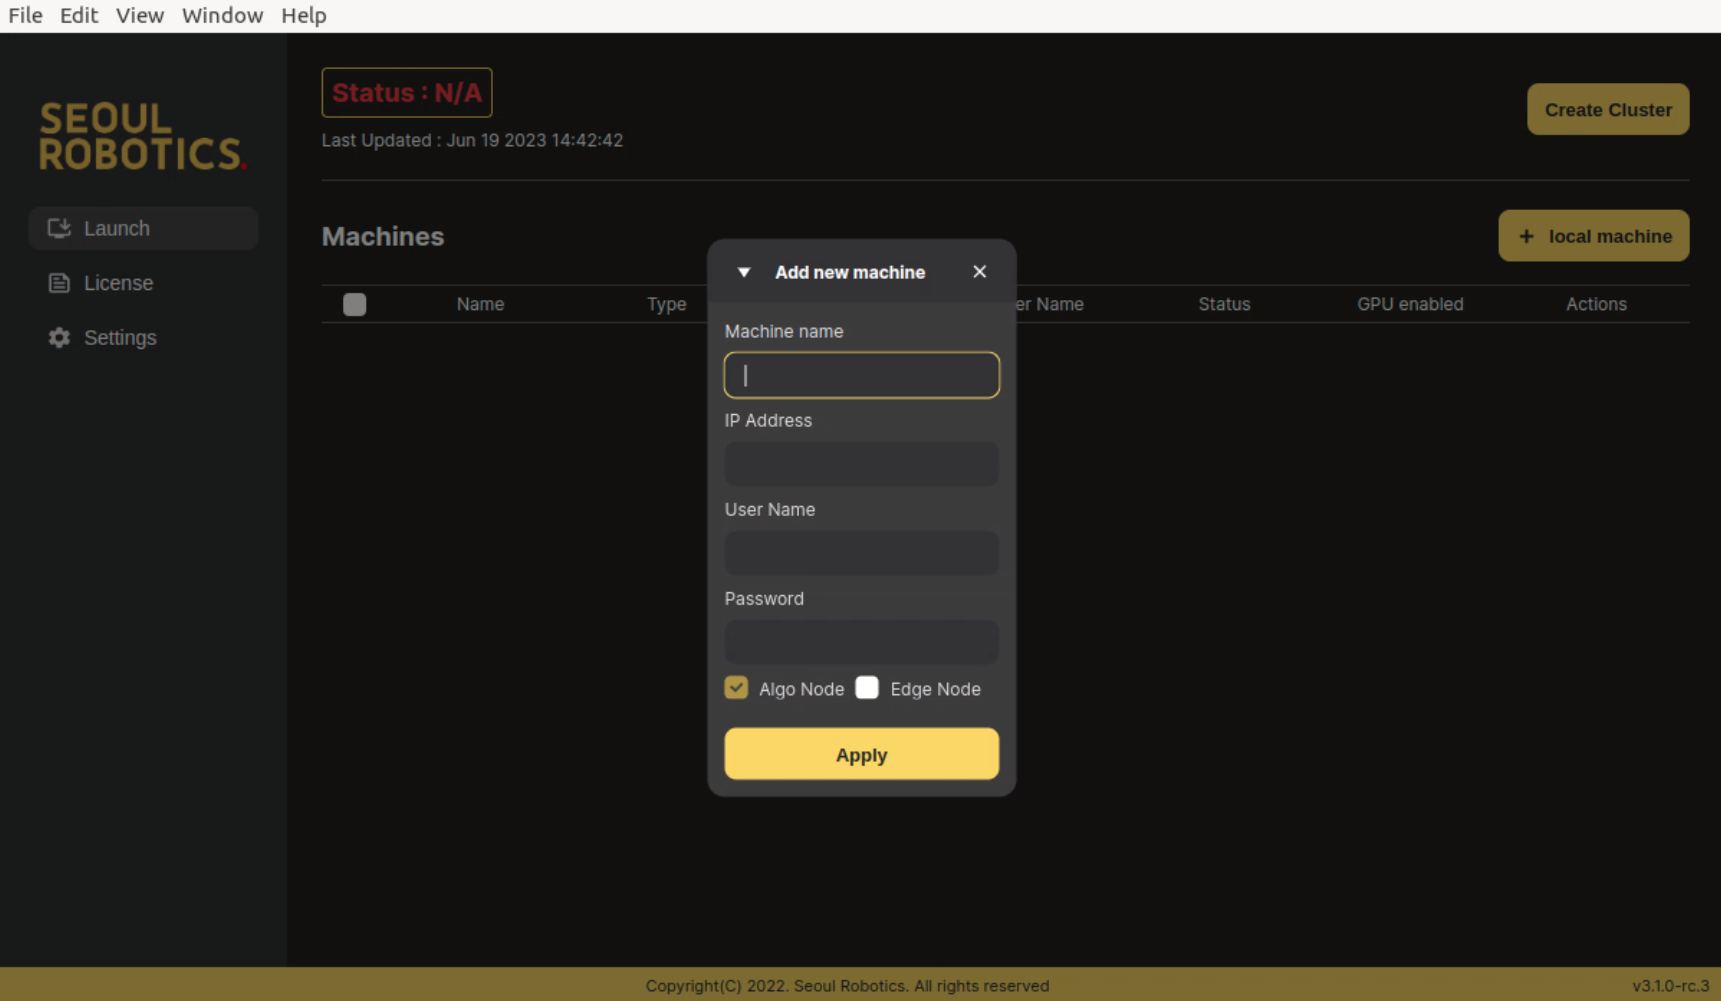
Click "+ local machine" to add the local machine as Master node machine. Fill the information of the machine and click "Apply" button. If you want to add more machines as Algo node machines, click "+ Algo" and do the same.
- Name : Name of the node, which will be used to identify the node in the cluster. Any name can be used.
- IP Address : IP address of the machine. It should be the static IP address which is in the same network with other Algo node machines, if you have. For more information, please refer to the Cluster section here.
- User Name : User name of the machine.
- Password : Password of the machine.
- Enable Algo Node : Whether this machine will support Algo node. It's default on for the Master node machine.
- Enable Edge Node : Whether this machine will support Edge node.
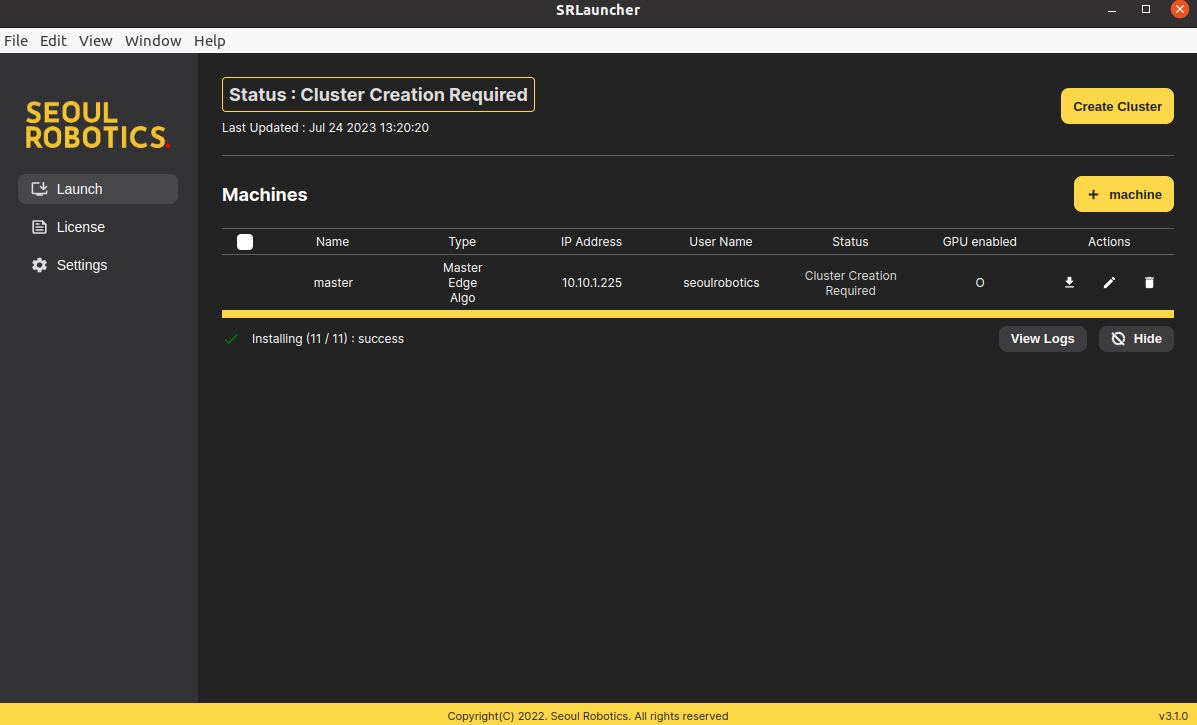
(optional) You can check the current status in top left corner of the window. It will be one of the following.
N/A: Status not refreshed.Installation Required: At least one machine in the list is not installed. Check the status tab of the node machine table and click theInstallbutton in the Action column on the the right side of uninstalled machines.Cluster Creation Required: All machines are installed, but the cluster is not created. ClickCreate Clusterbutton.Ready to Run SENSR: The cluster is created. You can clickRun SENSRbutton to launch SENSR-I.SENSR Running: SENSR-I is running. You can clickStop SENSRbutton to stop SENSR-I orRun Web FE Serverto allow users to access SENSR-I through web browser.
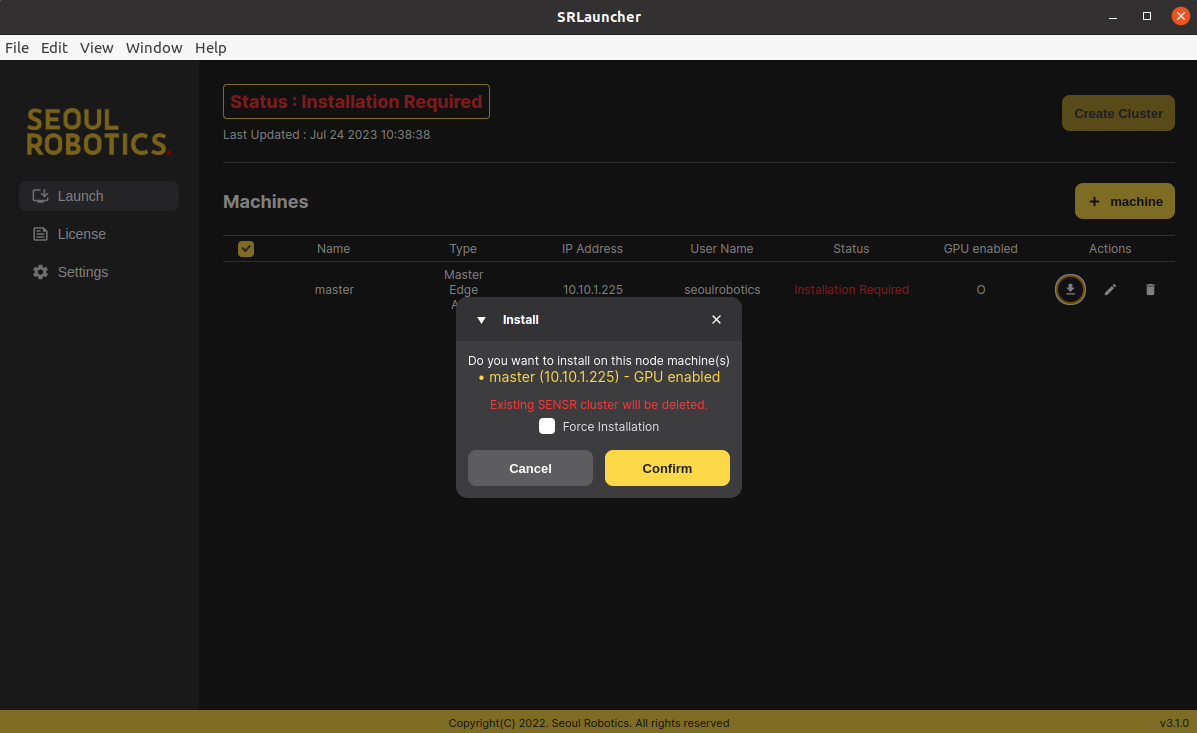
Click "Install" button in the Action column on the right side. It will start the installation process of the machine.
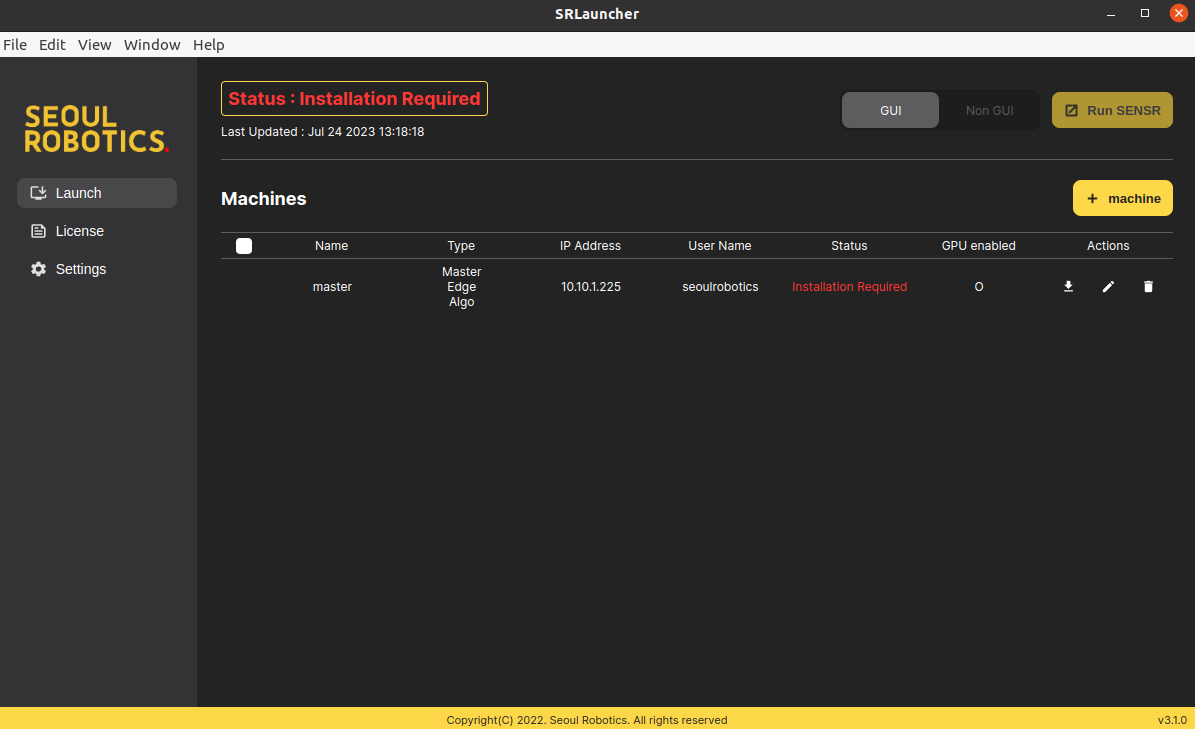
Force installation: It will overwriteDockerandNvidia Dockerdependencies if they are already installed. It should be ticked if you are using Jetpack 5.0, which comes with pre-installed Docker and Nvidia Docker that conflict with SENSR-I.
After installation, the green check icon will be displayed. Once all the machines are installed, you are ready to launch SENSR-I.
Update SENSR-I version
caution
If there is an update to SR Launcher, you must update to the latest version to ensure compatibility with SENSR. Please refer to this link for the update method.
If there are no changes, you can simply update SENSR as described below.
- Go to
Settingstab.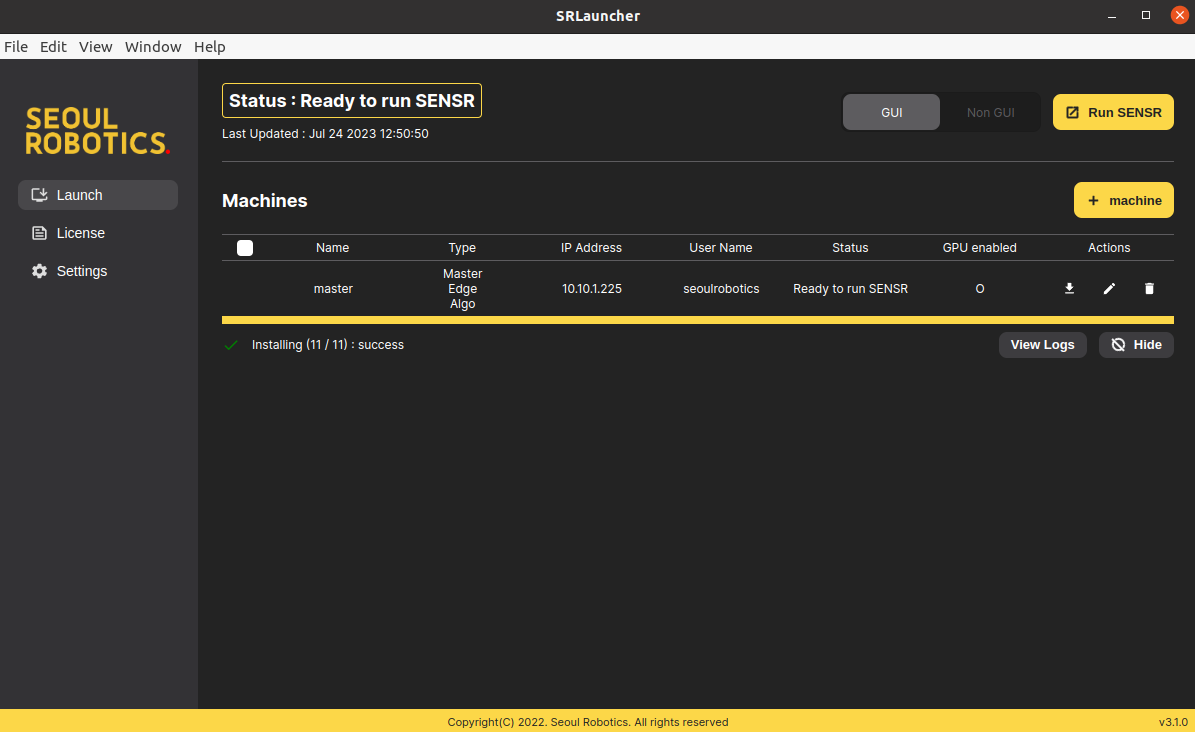
- Select the version you want to update to.
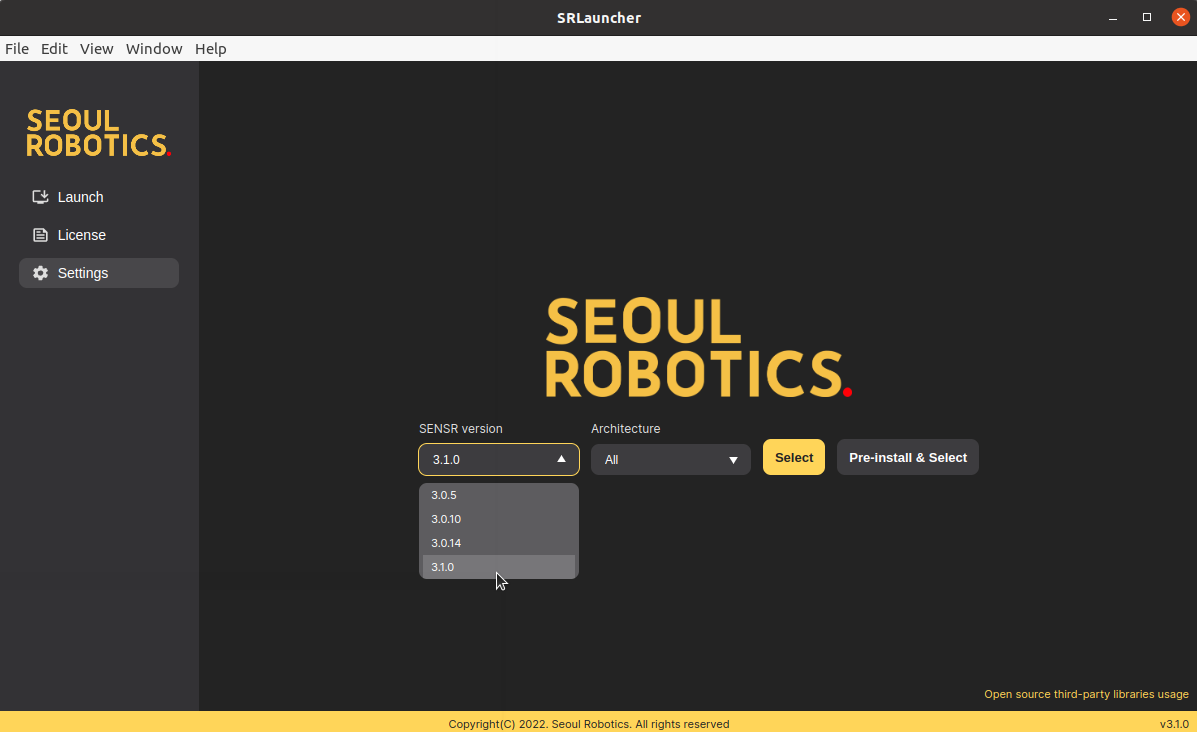
- Click
Pre-install & Selectbutton.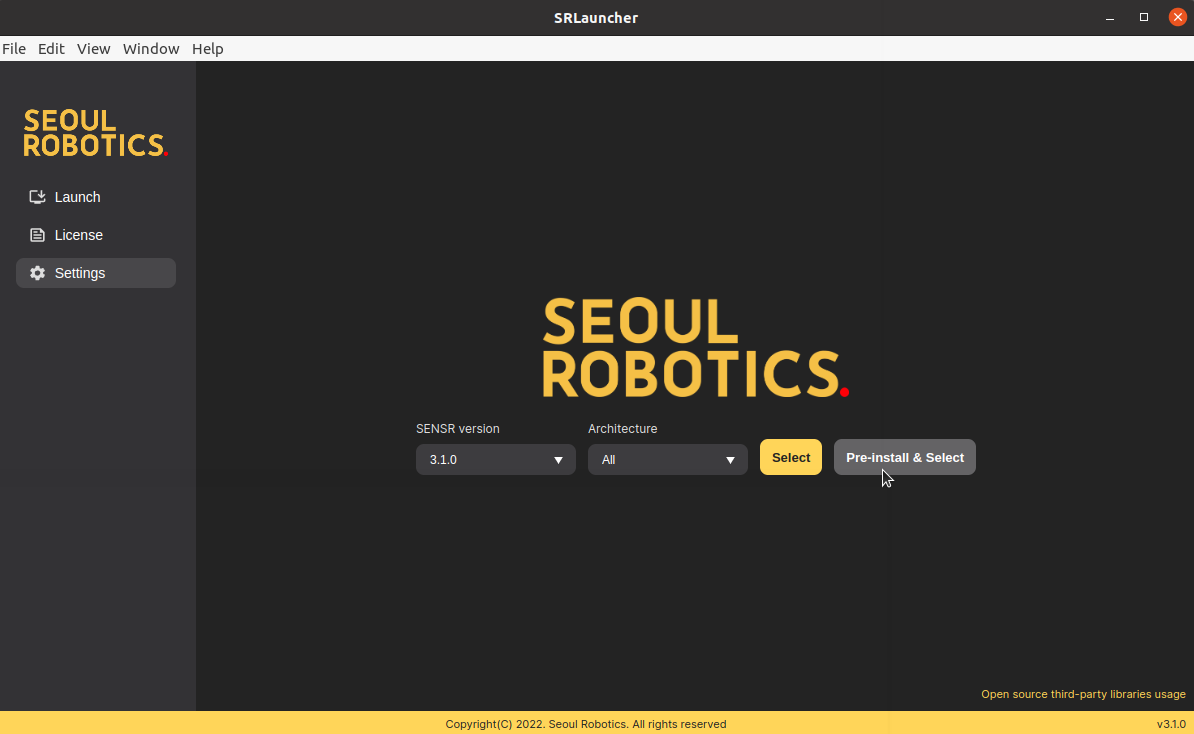
- Then SR Launcher will pre-install the selected version of SENSR-I. After pre-installation, follow the same step described in the Installation section to launch SENSR-I.
note
The SR Launcher downloads and retains new Docker images without discarding the previous ones to facilitate potential downgrades. If you're running low on storage space, you can remove old images from /opt/seoulrobotics/sr-launcher/resources/docker.
Docker images already loaded can be removed as follows:
- List all docker images present on the machine using
docker images - Dismount a given image by using
docker rmi <IMAGE_ID>.
Update SR Launcher
- Uninstall the existing SR Launcher.
sudo apt purge sr-launcher # if you installed GUI version
sudo apt purge sr-launcher-cli # if you installed CLI version - Once the existing SR Launcher is removed, the new one can be deployed following the instructions here.