Zone Setup
SENSR has built-in zone management. Zones can be used to trigger entry/exit, calculate occupancy or areas and to eliminate noise.
You can access the zone setup screen using the Mode > Zone Setup menu item. When you create a new zone
Zone types
There are four types of zones:
- Event Zones
An Event Zone is a special area that reacts to objects entering and exiting. The data output stream (see Output) will generate a message whenever an object enters or exits an event zone. Additional triggers are available (see Event Zones Additional Trigger Settings)
- Exclusion Zones
Exclusion zones are used to exclude an area from being processed. Any object that enters an exclusion zone is no longer tracked and will not be part of the output stream. This can be done for a variety of reasons.
Privacy
It is possible that in the total coverage area not all areas are allowed to be tracked, but the sensors have line of sight.
Noise
It is possible for certain seemingly static objects to create movement. Vegetation in particular can move in the wind and create false positives. If a coverage area has a known trouble spot, a manually created exclusion zone around this object can eliminate false positives in this area.
The solution to this is to create an exclusion zone on the other side of the window, so any objects will be ignored.
Performance
Another important reason to create exclusion zones is to reduce the amount of processing that is required. If your sensors have line-of-sight to an area, but you are not interested in tracking in that location, an exclusion zone will skip any processing that would otherwise take place inside the zone.
- Static Zones
Static zones are useful for preventing static object from becoming classified as part of the background. If SENSR is configured to continually update and learn the background, object that remain static (i.e. objects that do not move) for too long will eventually become part of the background. Creating a static zone around the object will prevent this from happening.
A good example use-case for static zones is a parking lot. Without static zones the parked cars initially detected by SENSR will eventually be classified as part of the background. Creating a static zone where the parked cars are will allow SENSR to continually detect the parked cars as objects.
- Reflection Zones
Reflection zones are a special type of zone to filter out errors cause by reflective surfaces.
For example, a sensor and a person are in the same room with a large window. The sensor has a direct line-of-sight to the person, creating an object. The sensor also has an indirect line-of-sight through a reflection off the window. The sensor is not able to differentiate a reflection from a direct line-of-sight and will provide the SENSR system with "ghost" points on the other side of the window.

caution
Reflection zones are vertical planes as opposed to polygonal like the other zone types. Draw two points (a single line) to set the reflection zone.
Zone List
When you enter Zone Setup, you will see a window with all existing zones listed.
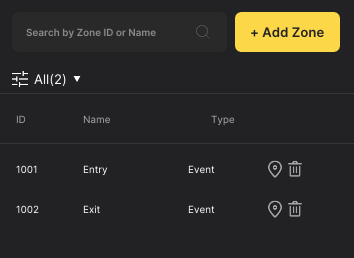
In the window, you can see a list of zones on the ‘Zone List’ widget. If you hover your mouse over a zone in Zone List, that zone is highlighted in the 3D view with a brighter color.
Add/Edit Zone
How to add zone?
Click Add Zone on the zone list on the left side of your screen to add a zone.
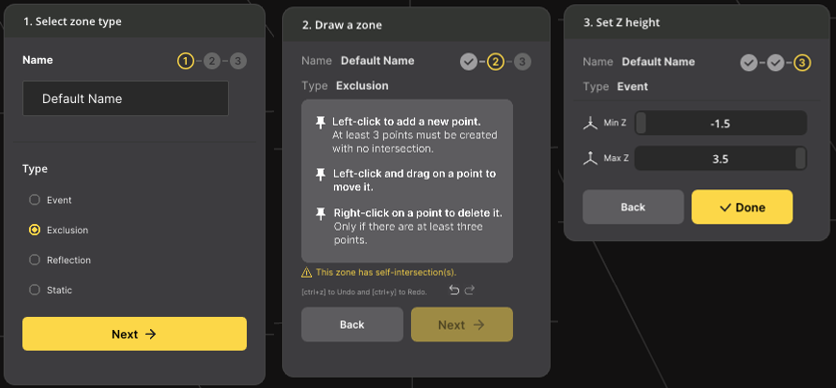
Select a zone type and input a zone name to distinguish it from others.
Name
The name is a label that you can create for your zone. This name is part of the output stream (see Output). A default name is created using the format ‘Zone-{zone_id}’. You can change it to your liking and it does not have to be a unique name.
Type
You can select the type of zone based on the Zone types.
Draw a zone following the instructions on the widget.
Set Z height, if needed.
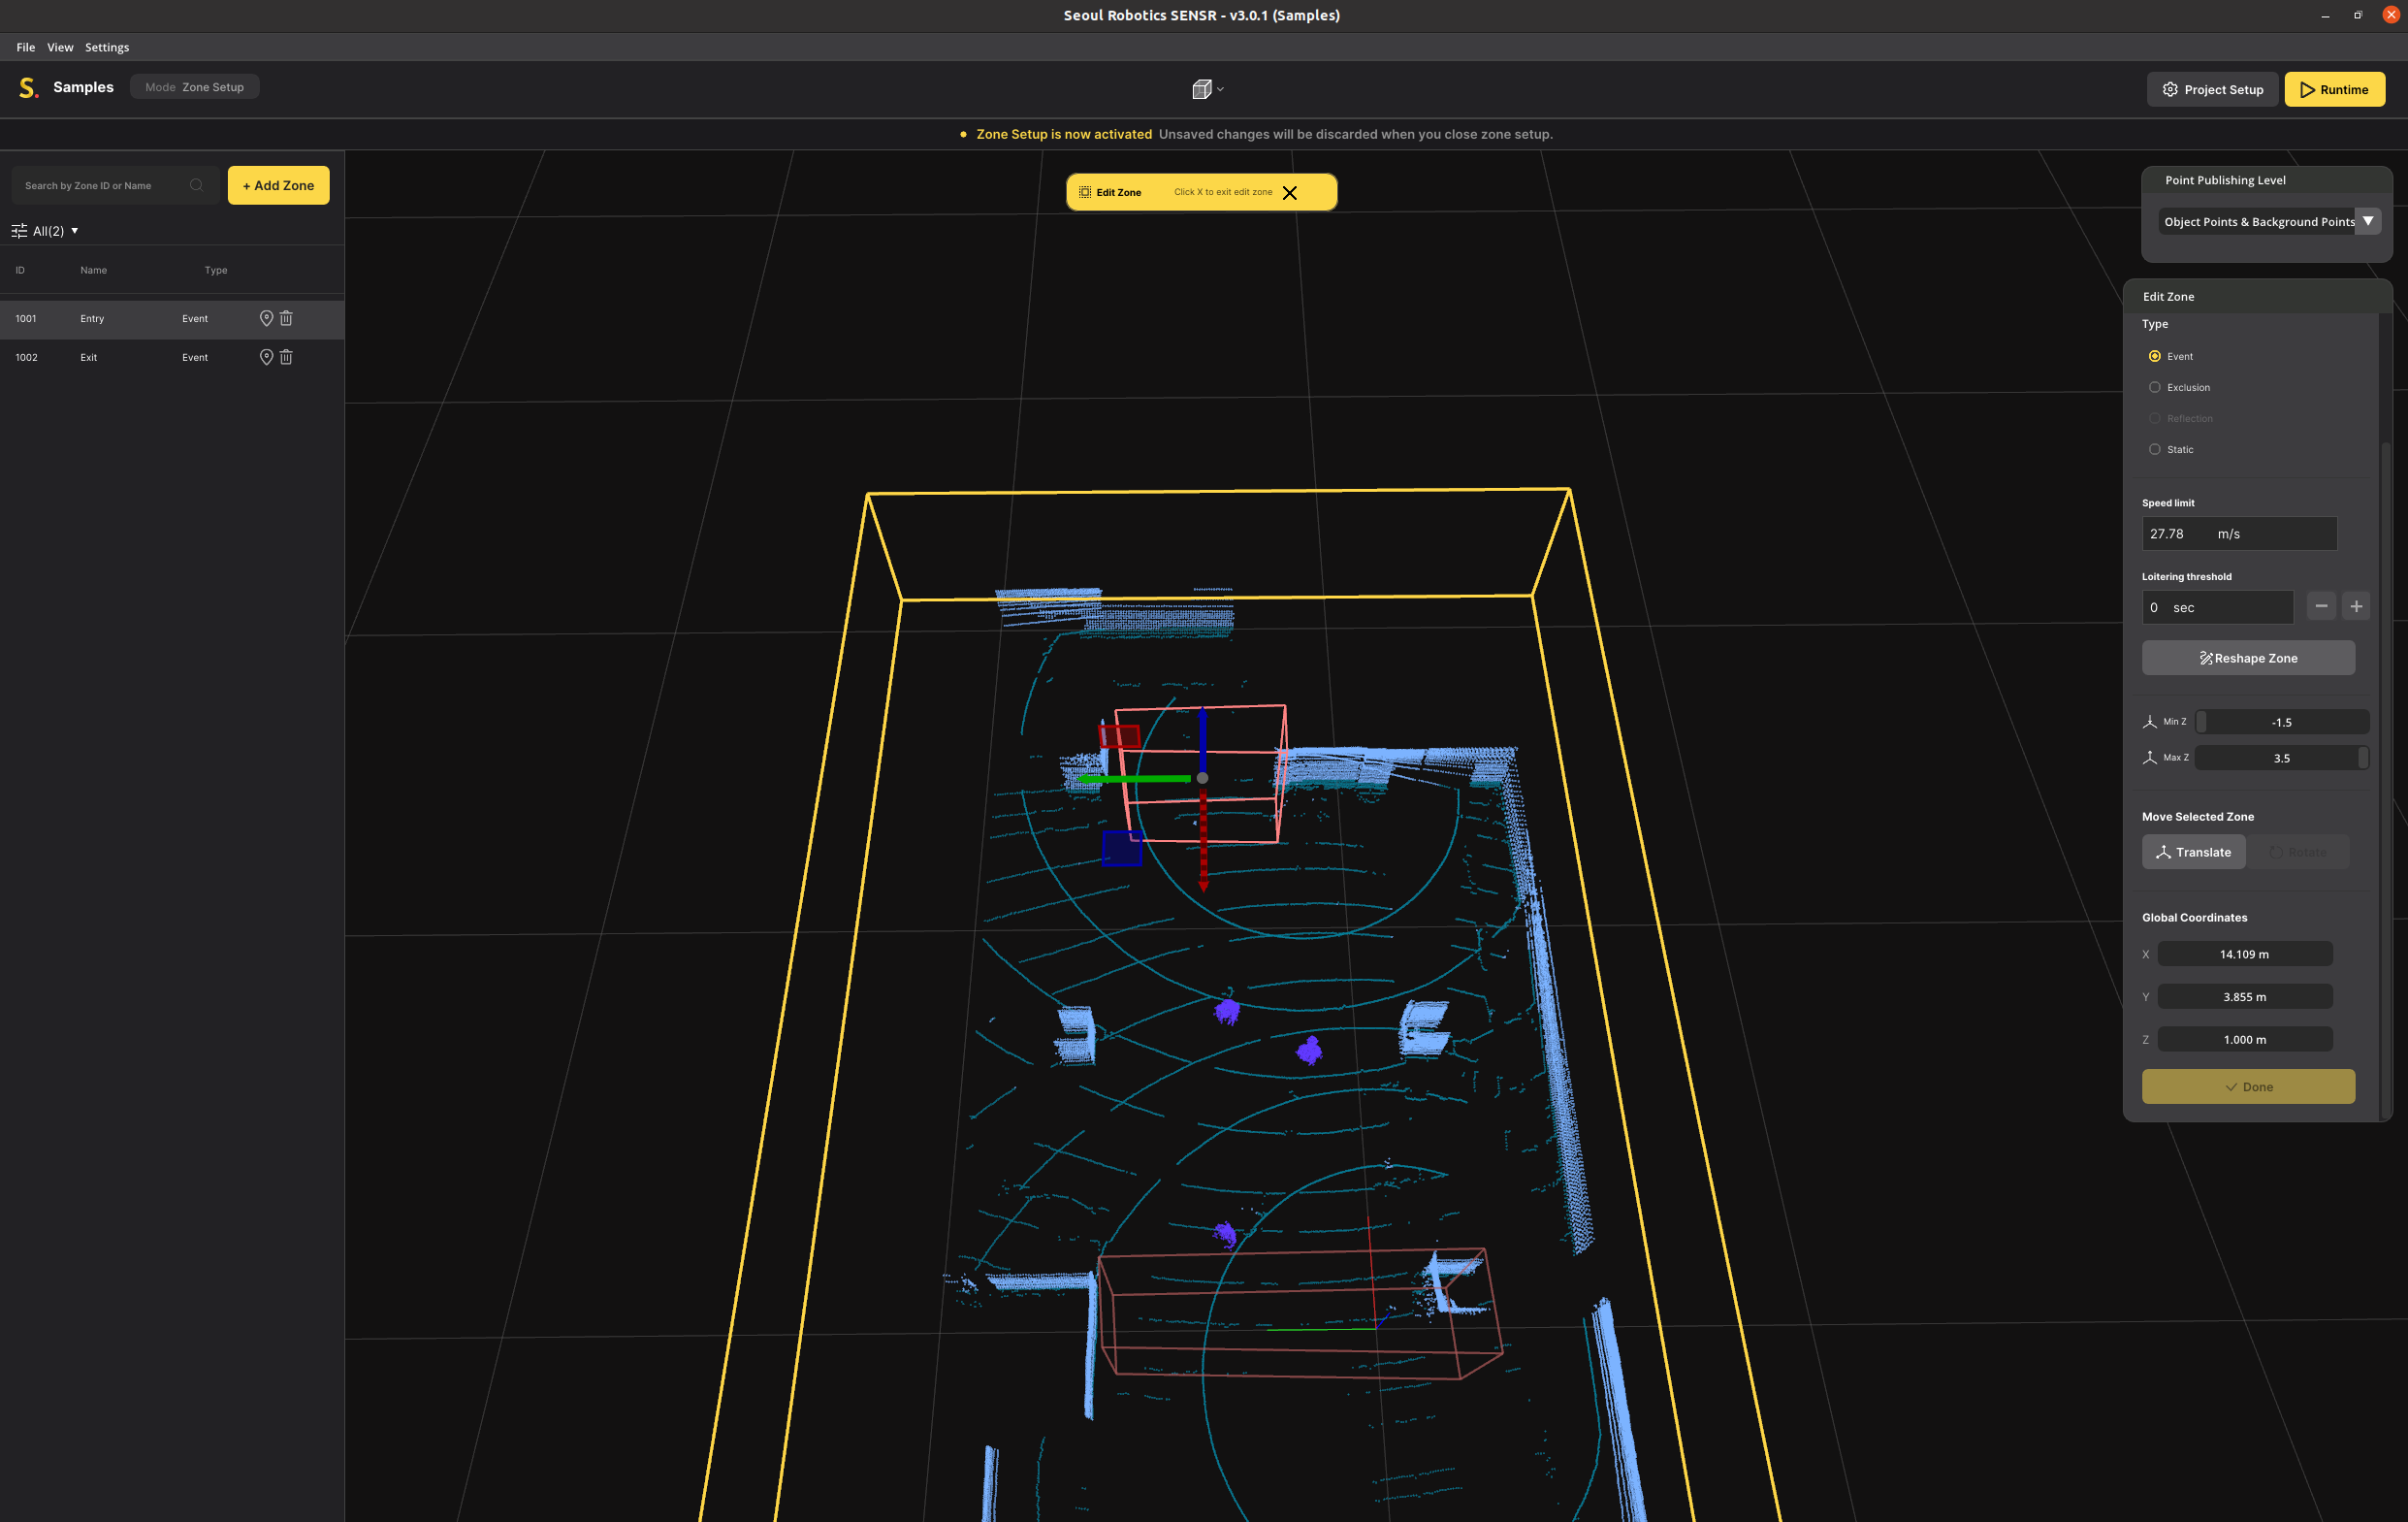
Min Z is the height in meters of the bottom of the zone as measured from the ground level. This allows a zone to be created above ground level.
Note: If you create a zone with a minimum height of non-zero, make sure to check the ‘Allow Floating Object’ option in the settings (see settings). If the zone has a MIN Z of greater than zero, the bottom of the object must be above the MIN Z value for the object to be considered in the zone.
Max Z is the height in meters of the top of the zone as measured from ground level.
How to edit a zone?
Click a zone on the zone list, then a widget will show up on the right. Modify zone on the widget.
Drawing a Zone
At the ‘Add Zone’ Step 2, the 3D viewport changes to a 2D top-down view.
To start creating the zone, left-click on the location to place a zone vertex (corner point). When no vertex is selected, you can left-click on a vertex to select and move it around. A right-click will automatically make a complete zone shape without self-intersection. Additionally, when no vertex is selected you can left-click on any point on the edge between two vertices to create a new vertex there. There are also Undo(ctrl+z) and Redo(ctrl+y) buttons.
To cancel the creation of a zone during the point selection process, click on Back.
There are two things that you have to keep in mind while drawing the zone.
- Polygonal zones (event, exclusion, static) should have at least three points and planar zones (reflection) should have exactly two points.
- A zone cannot have any self-intersection.
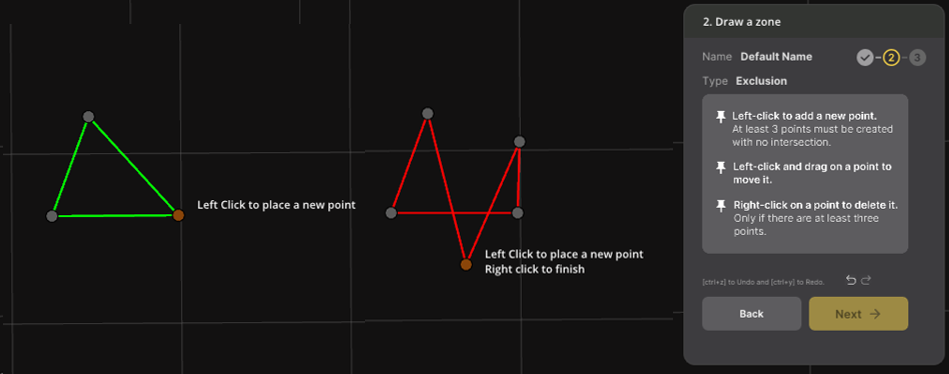
If the zone color turns red at any point during the creation process it means that it is invalid. This is usually because the zone has a self-intersection.
Once you are satisfied with the zone click Next to set z height of the zone.
Event Zones Additional Trigger Settings
SENSR Event Zones come with a number of more advanced triggers that can be configured.
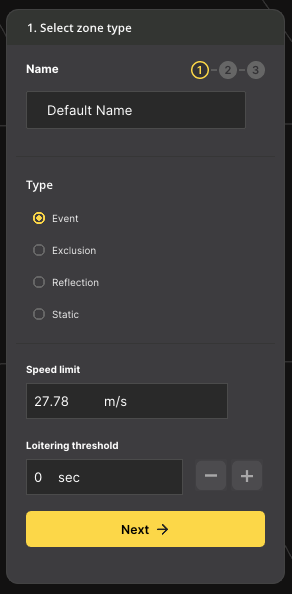
Speed Limit
This number, in meters per second, will trigger an ‘exceed speed’ event message in the output stream when an object that is inside the zone boundaries exceeds the speed threshold.
Loitering Threshold
Any object that is inside the zone boundaries will be tracked how long it has been within the boundaries. When the time exceeds the threshold a ‘loitering’ message will be generated. If the object exits and re-enters the zone, the elapsed time will be reset on exit.
note
For an object to be considered in a zone, the following criteria must be met
- Both X and Y at the center of the bounding box at ground level must be inside the zone
- The entire height Z of an object must be inside the zone (both top and bottom of the bounding box)