Zones
SENSR has a built-in zone management logic. Zones can be used to trigger entry/exit, calculate occupancy or areas, and eliminate noise.
Zones are set in Zone Setup mode. The Zone Setup mode can be accessed from SENSR's user interface by clicking on the Zone Setup button on the top right corner of the screen or by selecting Mode > Zone Setup in the top menu bar.

Zone Types and Associated Logic
Information on the available zone types and their associated logic can be found in the concepts section.
Zone Setup Mode
The Zone Setup Mode allows drawing all types of zones within a site. The menus are organized as follows:
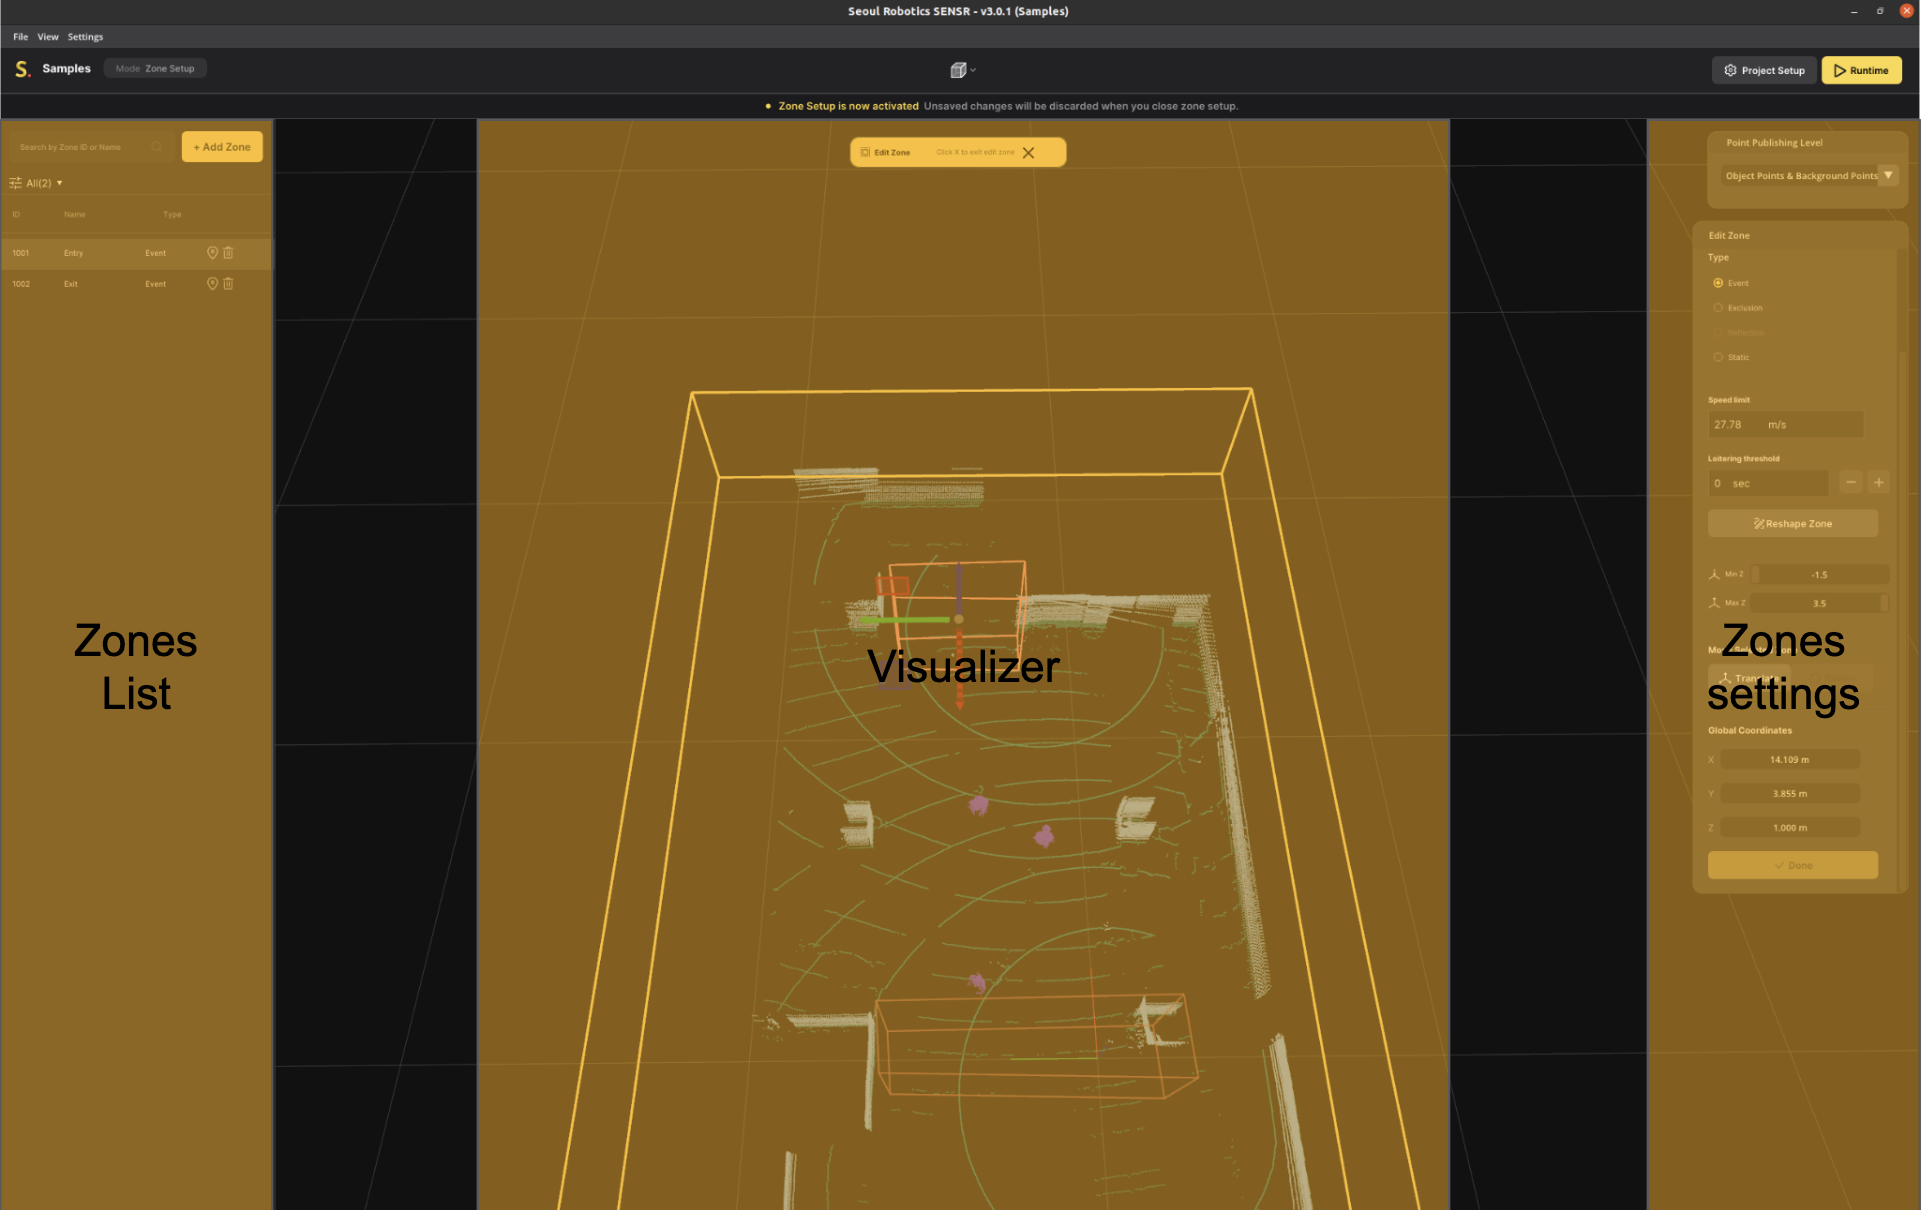
Visualizer
In Zone Setup mode, the site's entire pointcloud can be visualized. In this mode, SENSR runs its perception engine to classify the points in real time and provide as much information and context as possible. For better visibility, objects are not wrapped in a bounding box, and points are colored as follows:
- Ground points: Green
- Background points: Light blue
- Object points: Purple
The different colors of the points can be used to draw zones more accurately. For instance, exclusion zones' location and geometry can be difficult to define accurately. By looking at Purple points (objects), the definition of these zones can be greatly improved.
Zone List
On the left side panel, all zones drawn on the site are listed and their type specified.
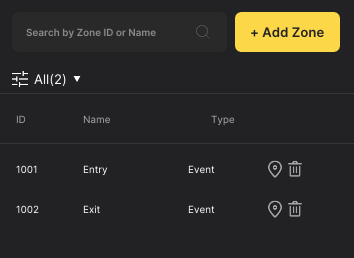
When hovering over a given zone in the Zone List menu, SENSR will highlight that zone in the visualizer with a brighter color.
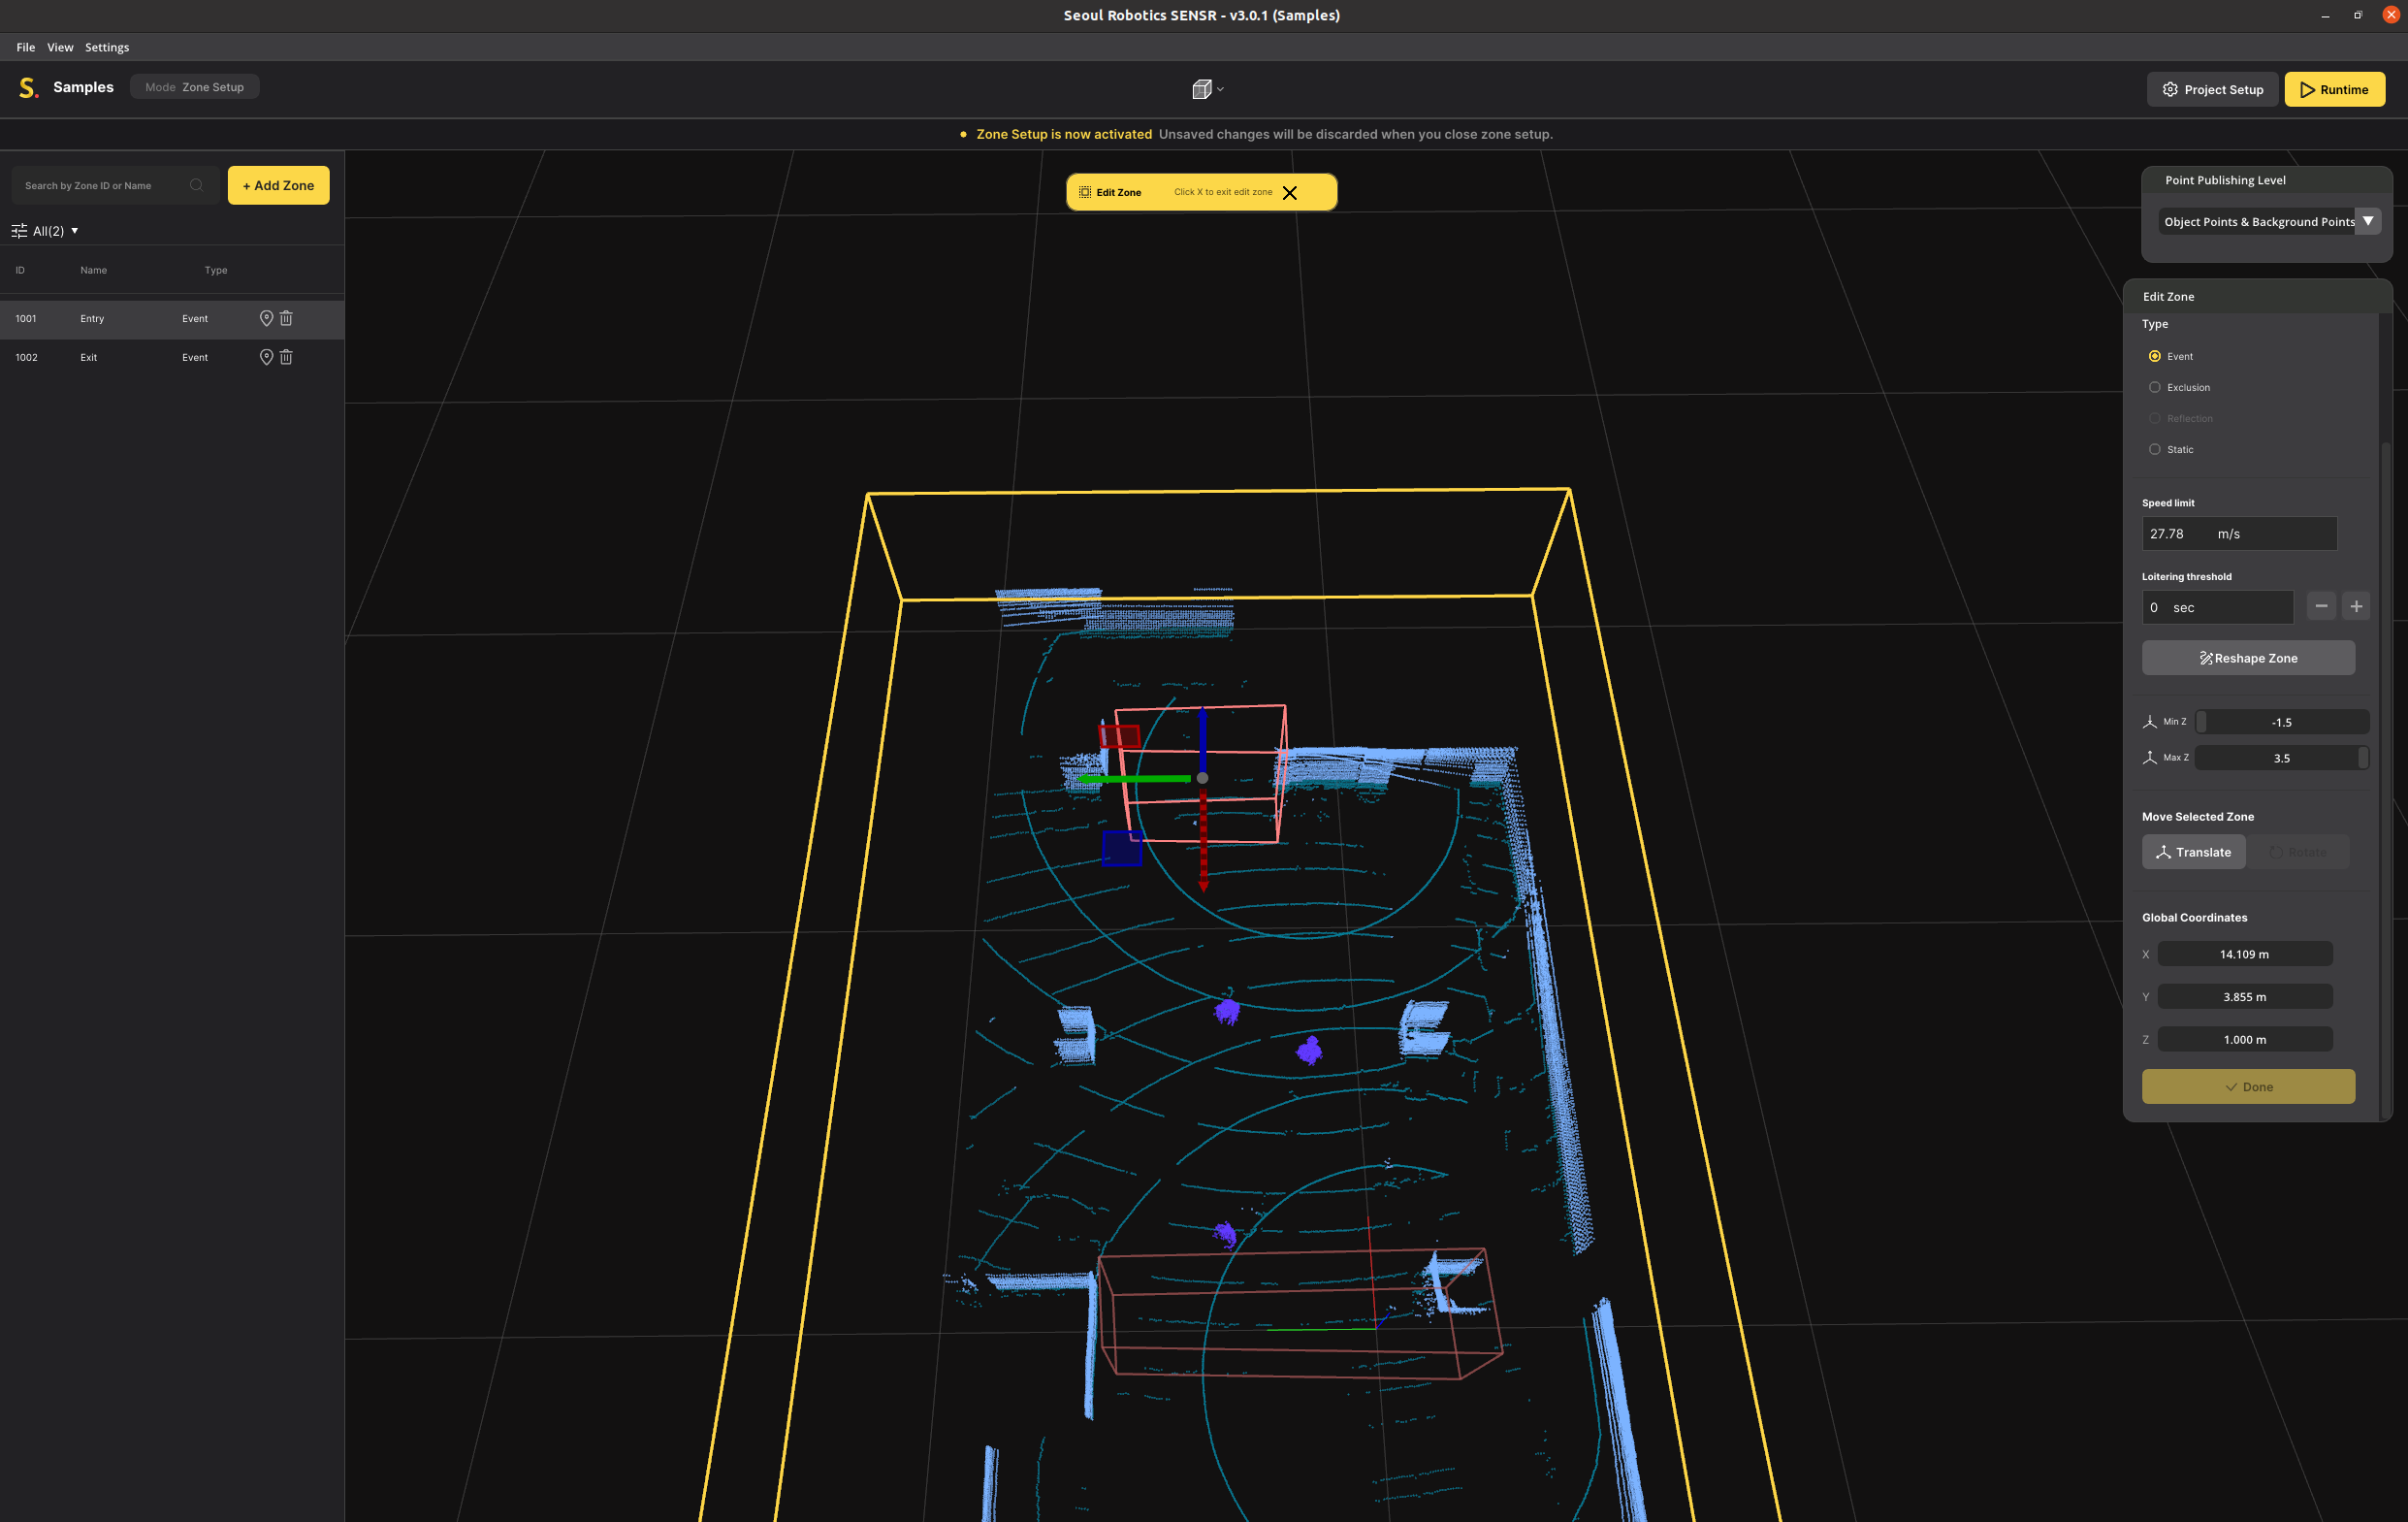
Zone Settings
On the right side panel, when clicking on a given zone or creating a new zone, SENSR will display settings for that zone.
Add/Edit Zone
Adding a zone
To add a zone, click Add Zone on the zone list on the left side of the screen.
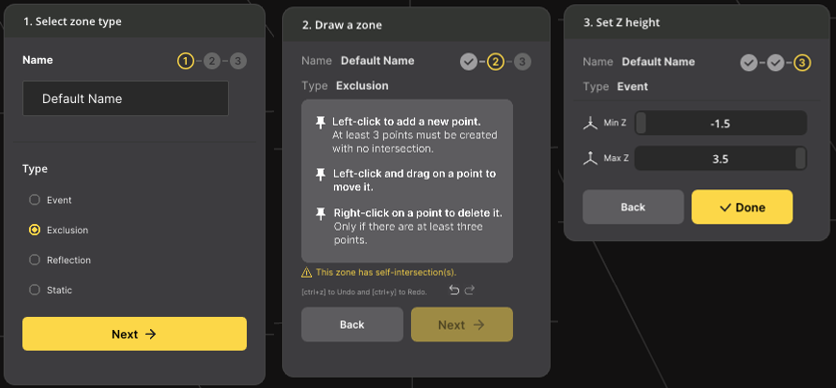
Select a zone type and input a zone name to distinguish it from others.
Name
The name is a label created for the zone. This name is part of the output stream (see Output). A default name is created using the format ‘Zone-{zone_id}’. This can be changed to any preferred name, and it does not have to be unique.
Type
The type of zone can be selected based on the Zone types.
Draw the zone following the instructions on the widget.
Set the Z height, if needed.
Min Z is the height in meters of the bottom of the zone as measured from ground level. This allows a zone to be created above ground level.
Note: If a zone is created with a minimum height greater than zero, make sure to check the ‘Allow Floating Object’ option in the settings (see settings). If the zone has a Min Z greater than zero, the bottom of the object must be above the Min Z value for the object to be considered in the zone.
Max Z is the height in meters of the top of the zone as measured from ground level.
Edit a zone
To edit a zone, click on a zone in the zone list. A widget will appear on the right. Modify the zone using the widget.
Drawing a Zone
At the ‘Add Zone’ Step 2, the 3D viewport changes to a 2D top-down view.
To start creating the zone, left-click on the location to place a zone vertex (corner point). When no vertex is selected, left-click on a vertex to select and move it around. A right-click will automatically complete the zone shape without self-intersection. Additionally, when no vertex is selected, left-click on any point on the edge between two vertices to create a new vertex there. There are also Undo (ctrl+z) and Redo (ctrl+y) buttons.
To cancel the creation of a zone during the point selection process, click on Back.
Keep in mind the following while drawing the zone:
- Polygonal zones (event, exclusion, static) should have at least three points, and planar zones (reflection) should have exactly two points.
- A zone cannot have any self-intersection.
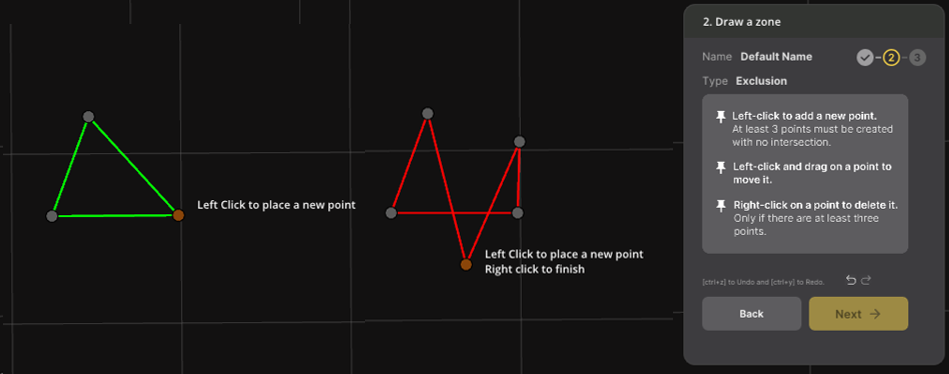
If the zone color turns red at any point during the creation process, it means that it is invalid. This is usually because the zone has a self-intersection.
Once the zone is satisfactorily created, click Next to set the Z height of the zone.
Event Zones Additional Trigger Settings
SENSR Event Zones come with a number of advanced triggers that can be configured.
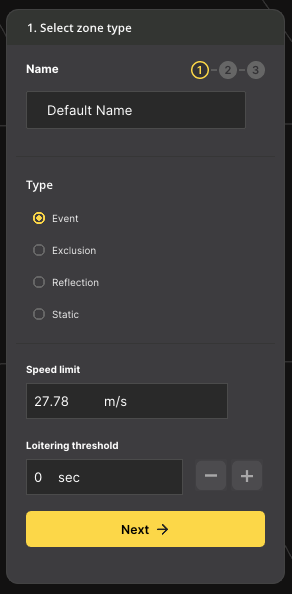
Speed Limit
This number, in meters per second, will trigger an ‘exceed speed’ event message in the output stream when an object inside the zone boundaries exceeds the speed threshold.
Loitering Threshold
Any object inside the zone boundaries will be tracked for how long it has been within the boundaries. When the time exceeds the threshold, a ‘loitering’ message will be generated. If the object exits and re-enters the zone, the elapsed time will be reset on exit.
note
For an object to be considered in a zone, the following criteria must be met:
- Both X and Y at the center of the bounding box at ground level must be inside the zone.
- The entire height Z of an object must be inside the zone (both top and bottom of the bounding box).