Preparing for production
Overview
After going through the process of installing LiDARs, calibrating them, tuning the parameters, SENSR is ready for production. This section provides a few recommendations to maximize the usage of SENSR in production.
Set the environment
Allow traffic on your network
SENSR sends its traffic through a certain number or ports. Those ports used by SENSR are listed here. The table below provides the minimum ports to open in case the network traffic goes through a Firewall.
As a bare minimum, we recommend the following ports to be open between Master node and your system:
- Output message
- Web Front-End
- API
Note: Those are a minimum, additional ports to allow traffic such as SSH, SFTP, VNC, Point Cloud... can be enabled to ease the system usage.
Network settings
To ensure smooth operation, update your network settings as follows:
- Set your computer IP to a static one, you can find some instructions here
- Build a script to assign the network interface connected to the internet with the highest priority in case it is disconnected. We usually use
ifmetric <network_interface> 10.
Automatic Login
In case your computer restarts in operation, it is preferable to set auto-login in Ubuntu, it can be done as follows.
- In Ubuntu Settings select
Usersin the left panel - Toggle
Automatic Loginto ON - Enter your password
Ubuntu will now automatically login at start.
Run SENSR in non-GUI mode
While running with its User interface, SENSR consumes a significant amount of computing power. In production, the User interface is generally not used. It is therefore recommended to run SENSR in non-GUI mode and enable the Web Front-End. It can be done two ways:
- With the SR Launcher,
- With the SR Launcher CLI.
SR Launcher
If you are using the SR Launcher, you can follow the steps below:
- If SENSR is running, click Stop SENSR,
- Once SENSR stops, toggle the GUI / Non GUI button to Non GUI,
- Select Run SENSR again,
- At the bottom, click on Run Web FE server.
To access SENSR's User interface again, Stop SENSR then toggle the button in GUI position and run SENSR.
SR Launcher CLI
If you are using the SR Launcher CLI, you can follow the steps below:
- If SENSR is running, in a terminal, enter
sr-launcher-cli stop sensr, - Once SENSR stops, run SENSR in headless mode using
sr-launcher-cli run sensr -n, - Enable the Web Front end using
sr-launcher-cli run web-fe-server.
To access SENSR's User interface again, Stop SENSR then run sr-launcher-cli run sensr.
Monitor the perception system's status.
You can build a script to monitor the system's status using SENSR's health message API. SENSR provides status for:
- Master node: null, OK, Low memory
- Algo node: null, OK
- LiDAR: SENSOR_DEAD, SENSOR_ALIVE, SENSOR_ERRONEOUS (obstructed), SENSOR_TILTED
For instance you can:
- trigger alerts when the Master node is low on memory to indicate the user to free some space
- trigger alerts when the sensor is dead, obstructed or tilted to inform an operator that some verifications are needed
SENSR's API Commands can be found here. For this specific case, the following commands can be used:
# Install jquery
sudo apt install jq


# Perform the API Health query and store the JSON response
response=$(curl -X GET 'http://localhost:9080/results/health' 2>/dev/null)

# Extract the master node, algo node and lidar fields from the JSON response and store them in variables
# Please note that for algo and master node, the queries should be adapted to your setup

master_result=$(echo "$response" | jq -r '.master')
algo_status_result=$(echo "$response" | jq -r '.nodes.algo_0000.status')
lidar_health_result=$(echo "$response" | jq -r '.nodes.algo_0000.sensors."/lidar_0000/4sightm_1/foursightm/points"')

# Print the results (optional)
echo "Master Result: $master_result"
echo "Algo Status Result: $algo_status_result"
echo "LiDAR Health Result: $lidar_health_result"
Enable remote access
To work more easily on your edge device, enabling remote access is recommended. The following options are available:
- Use a viewer, such as Teamviewer, DW service...,
- Use a VNC server such as TightVNC,
- Use SSH and SFTP to communicate with the machine.
Lock SENSR
Overview
To avoid unwanted tamper with SENSR while in production, you can use the Lock feature. When SENSR is locked, users can still visualize objects and navigate on their site but all other options are disabled. In addition SENSR cannot be closed.
The password used to lock SENSR is reset when unlocking. If you lock SENSR a second time for instance, you will have to enter a password one more time.
The lock feature can be used for SENSR and/or the Web Front End.
Lock SENSR
The feature can be activated following the steps below:
- In the top menu bar, select
Lock - Click on
Lock SENSRorLock Web Front Enddepending on your needs - Enter a password containing at least 4 characters to lock SENSR
- Click on
Lock
Unlock SENSR
The feature can be deactivated as follows:
- Enter your password in the field
- Click
Unlock
Maintenance instructions
Further maintenance instructions can be found at our Support section here.
Appendix
Set a static IP with Ubuntu
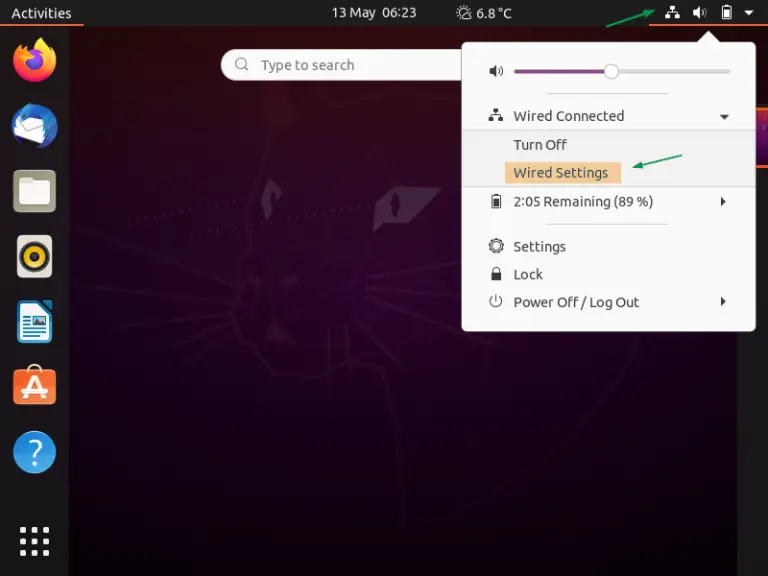
Login to your desktop environment and click on the network icon and then choose wired settings.
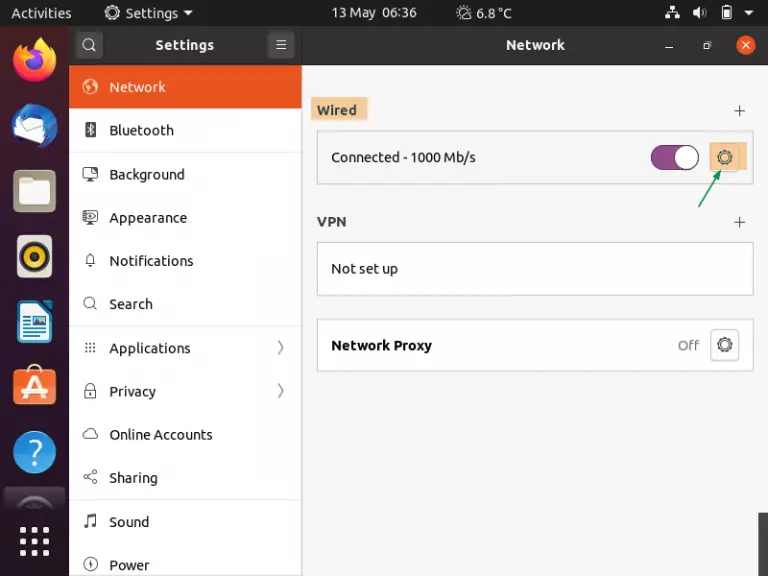
In the next window, Click on ‘gear box’ icon under the wired option.
In the next window, Choose IPV4 Tab and then select Manual and specify the IP details like IP address, netmask, gateway and (optionally) DNS Server IP.
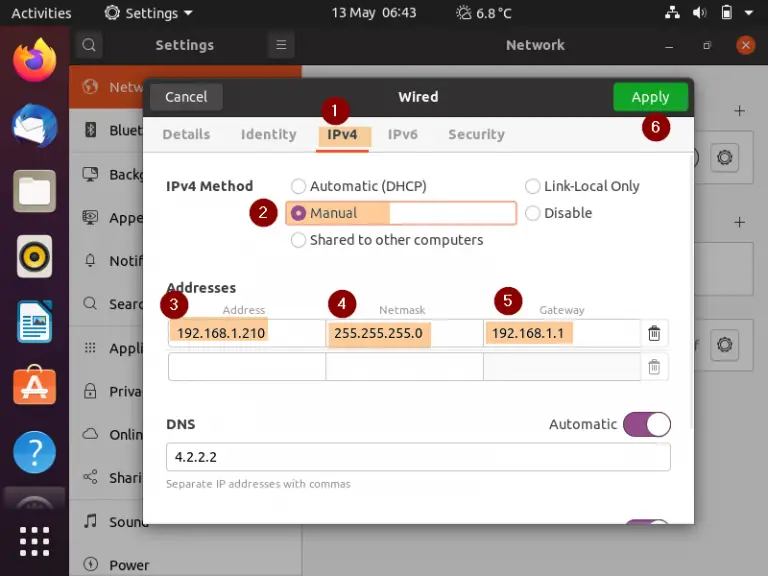
Click on Apply to save these changes and we must disable and enable interface once to assign the ip address to interface.