Web Frontend
Overview
Web Frontend is a web viewer that allows the user to remotely interact with SENSR. With Web Frontend, users can remotely check the status of SENSR-I and change some parameters if needed. Please note that not all the features of SENSR are available in Web Frontend
The functions offered by the Web Front-end are limited compared to SENSR's native interface, the table below summarises the main differences:
| Mode | Feature | Native SENSR | Web FE |
|---|---|---|---|
| General | Activate/deactivate Z Clip | Y | N |
| Lock SENSR screen | Y | N | |
| Project Setup | Import Algo Node | Y | N |
| Receive latency information | Y | N | |
| Landmark Calibration | Y | N | |
| Ground Level Profiling | Y | N | |
| Auto-Fine Tuning | Y | N | |
| Remote Installation | Y | N | |
| Play/Pause Data Stream | Y | N | |
| Change time synchronization parameters | Y | N | |
| License Expiration Alert | Y | N | |
| Load and calibrate background map | Y | N | |
| Export parameter change report | Y | N | |
| Runtime | Advanced recording | Y | Y |
| Full Screen | N | Y | |
| Advanced features settings (Except Retro-reflective tracking) | Y | N | |
| Zone Setup | Filter zones list by type | Y | Y |
Operation for SENSR Generic
Installation
The Web Frontend is automatically deployed as a docker image while installing SENSR.
Its presence on the machine can be checked using the command docker images. If the web frontend is deployed, an image such as the following should be shown:
sensr_frontend 3.3.0-beta.1 8c80ed91678a 13 days ago 134MB
Running the web Frontend
Pre-requisite
To properly run the Web FE on a machine with a graphics drivers(GPU), the graphics acceleration option should be emabled in the Chrome browser to ensure a smooth operation:
- Type "chrome://settings/system" in Chrome browser.
- Enable the "Use graphics acceleration when available" option.
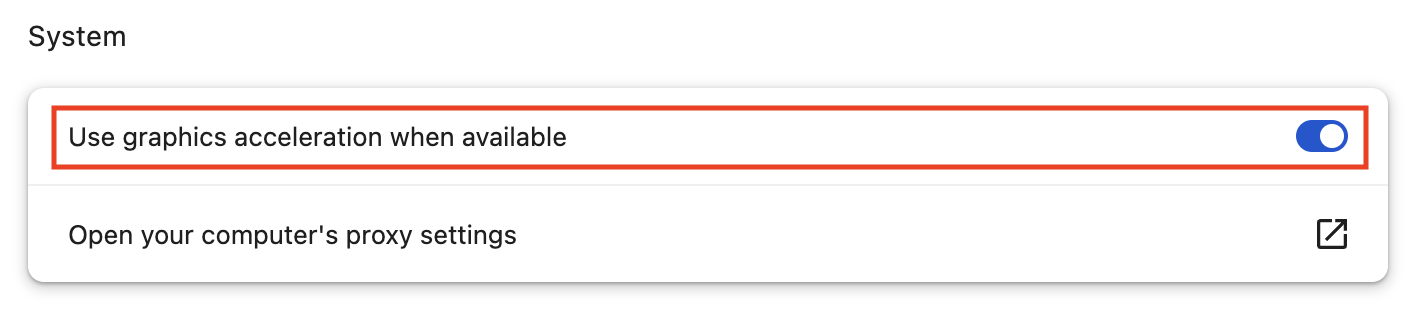
- Restart the Chrome browser
Default
To run the web Frontend, run the following command: sr-launcher-cli run web-fe-server
The web frontend will be published on the ip address specified for the cluster in the file cluster.json and published on port 5000.
To access the Web Frontend, in Chrome Browser, enter:
- On the host:
http://localhost:5000 - From a distant machine located on the same network as the cluster IP:
http://<cluster_ip>:5000
Custom ip and ports
The Web Frontend's ip and port to use can be specified at start. To specify a port and/or IP address, run the following command when launching the Web Frontend sr-launcher-cli run web-fe-server -p <Port_to_use> -s <IP_to_use>.
If a given flag is left empty, the value used will be the default one:
- Port : 5000,
- ip: cluster ip.
To access the Web Frontend, in Chrome Browser, enter:
- On the host:
http://localhost:<port> - From a distant machine located on the same network:
http://<IP_to_use>:<port>
Stop the web Frontend
To stop publishing the web Frontend, either:
- In SR Launcher CLI, run the command
sr-launcher-cli stop web-fe-server
Connect to use SSL
Overview
SSL plays an important role in securely transmitting and protecting sensitive data used for communication between clients and servers. SENSR provides SSL security features for secure communication between clients and servers. This ensures the safety and security of data transmitted between SENSR and its web frontend.
Setup
Enable SSL mode
1) Move to
/opt/seoulrobotics/app_configfoldercd /opt/seoulrobotics/app_config2) Change "enable_ssl" value to
trueinapp_settings.toml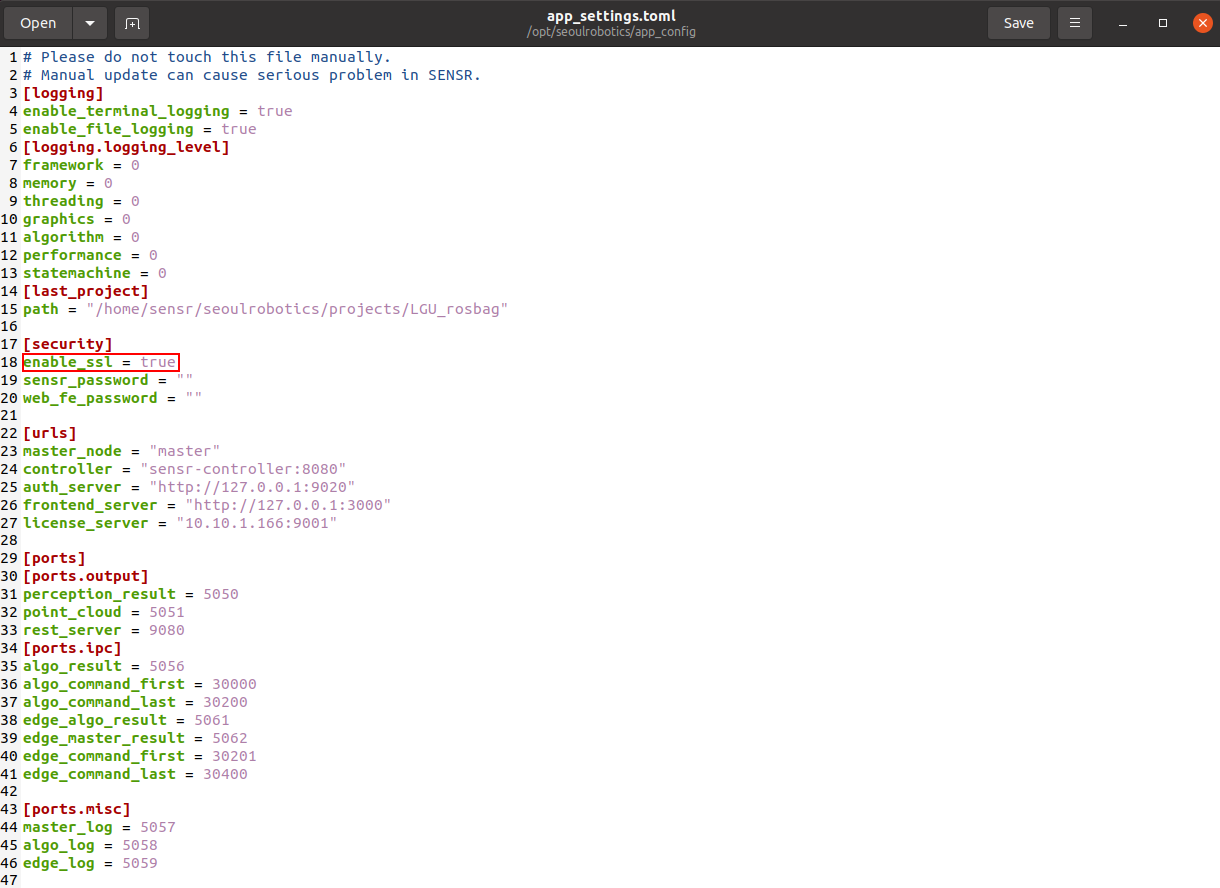
Create Certificates
1) Move
/opt/seoulrobotics/utilsfoldercd /opt/seoulrobotics/app_config2) Create certificate files using
generate_certificate.shscript./generate_certificate.sh {IP address}Enter the IP address to open the web frontend.
Run the web Frontend
Manually open the web frontend through the terminal using the command below:
docker container run --rm -v /opt/seoulrobotics/keys/sensr-ca.key:/workspace/certs/ca.key -v /opt/seoulrobotics/keys/sensr-ca.crt:/workspace/certs/ca.crt -e ENABLE_SSL=1 -p 5000:8080 sensr_frontend:{SESNR verison}Access the web frontend using a browser. 1) Open browser and enter
https://IP address:5000example
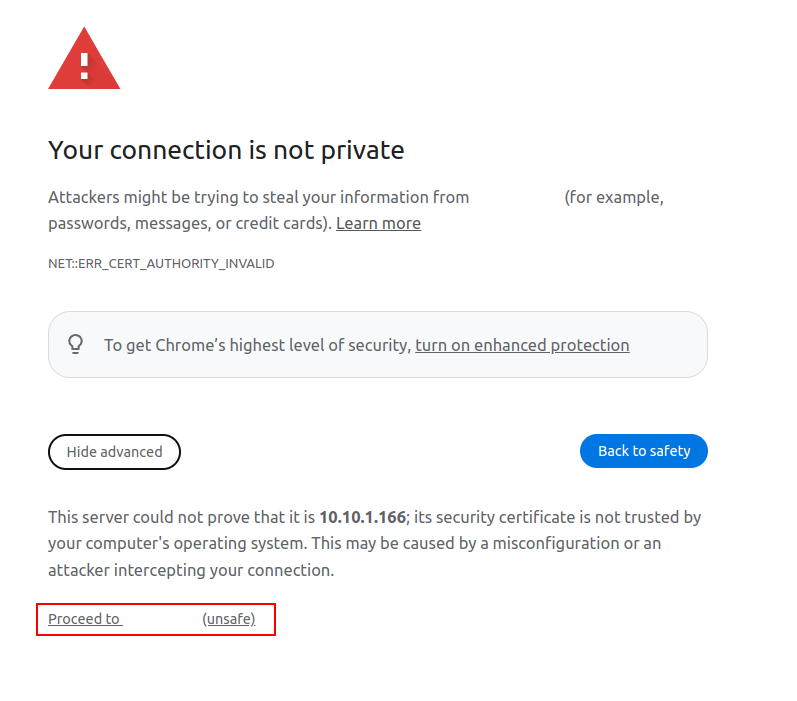
https://192.168.1.30:50002) A warning will appear on the browser when trying to access. Click
AdvancedandProceed toto access the Web Frontend.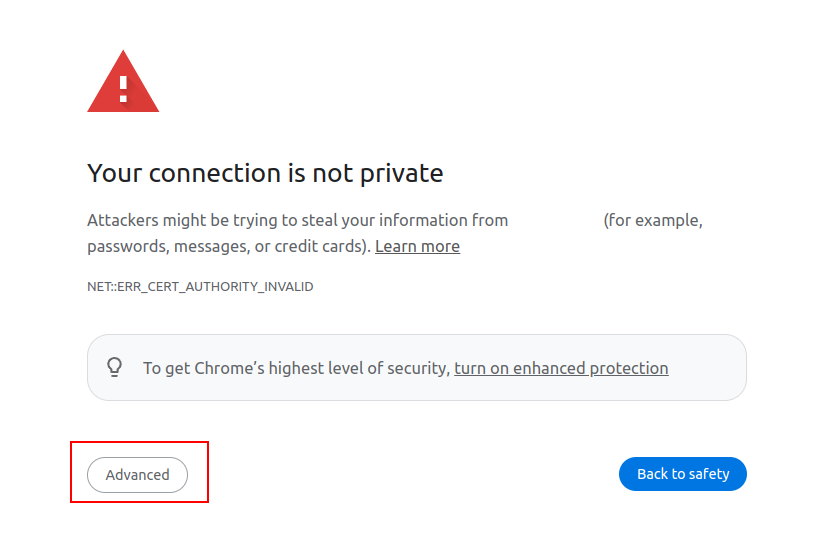
3) The Web Frontend will be displayed.
Stop the Web Frontend
Find the name of the Docker container for the web frontend.
docker ps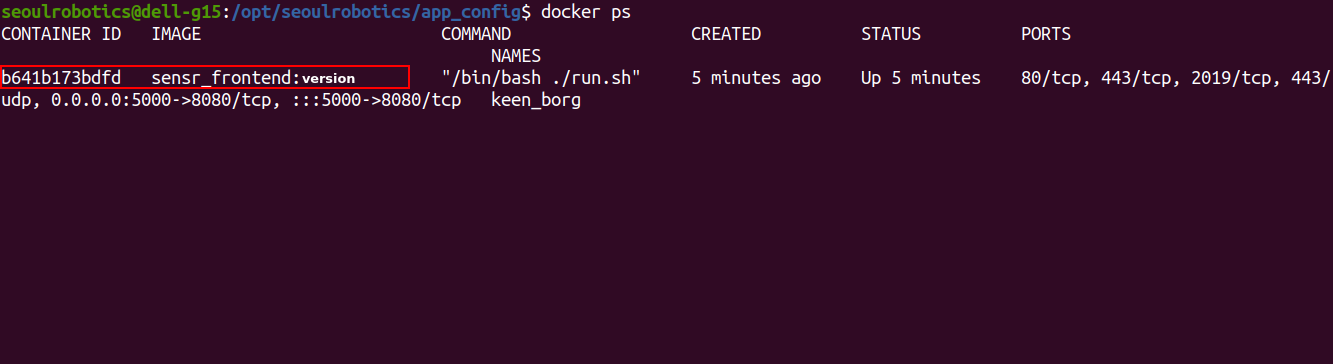
Stop the web frontend docker container.
docker stop {the web frontend docker name}