Appendix - Distributed System
Overview
SENSR is built with a highly modular architecture. It allows distributing the data processing across multiple machines called Algo Node machines.
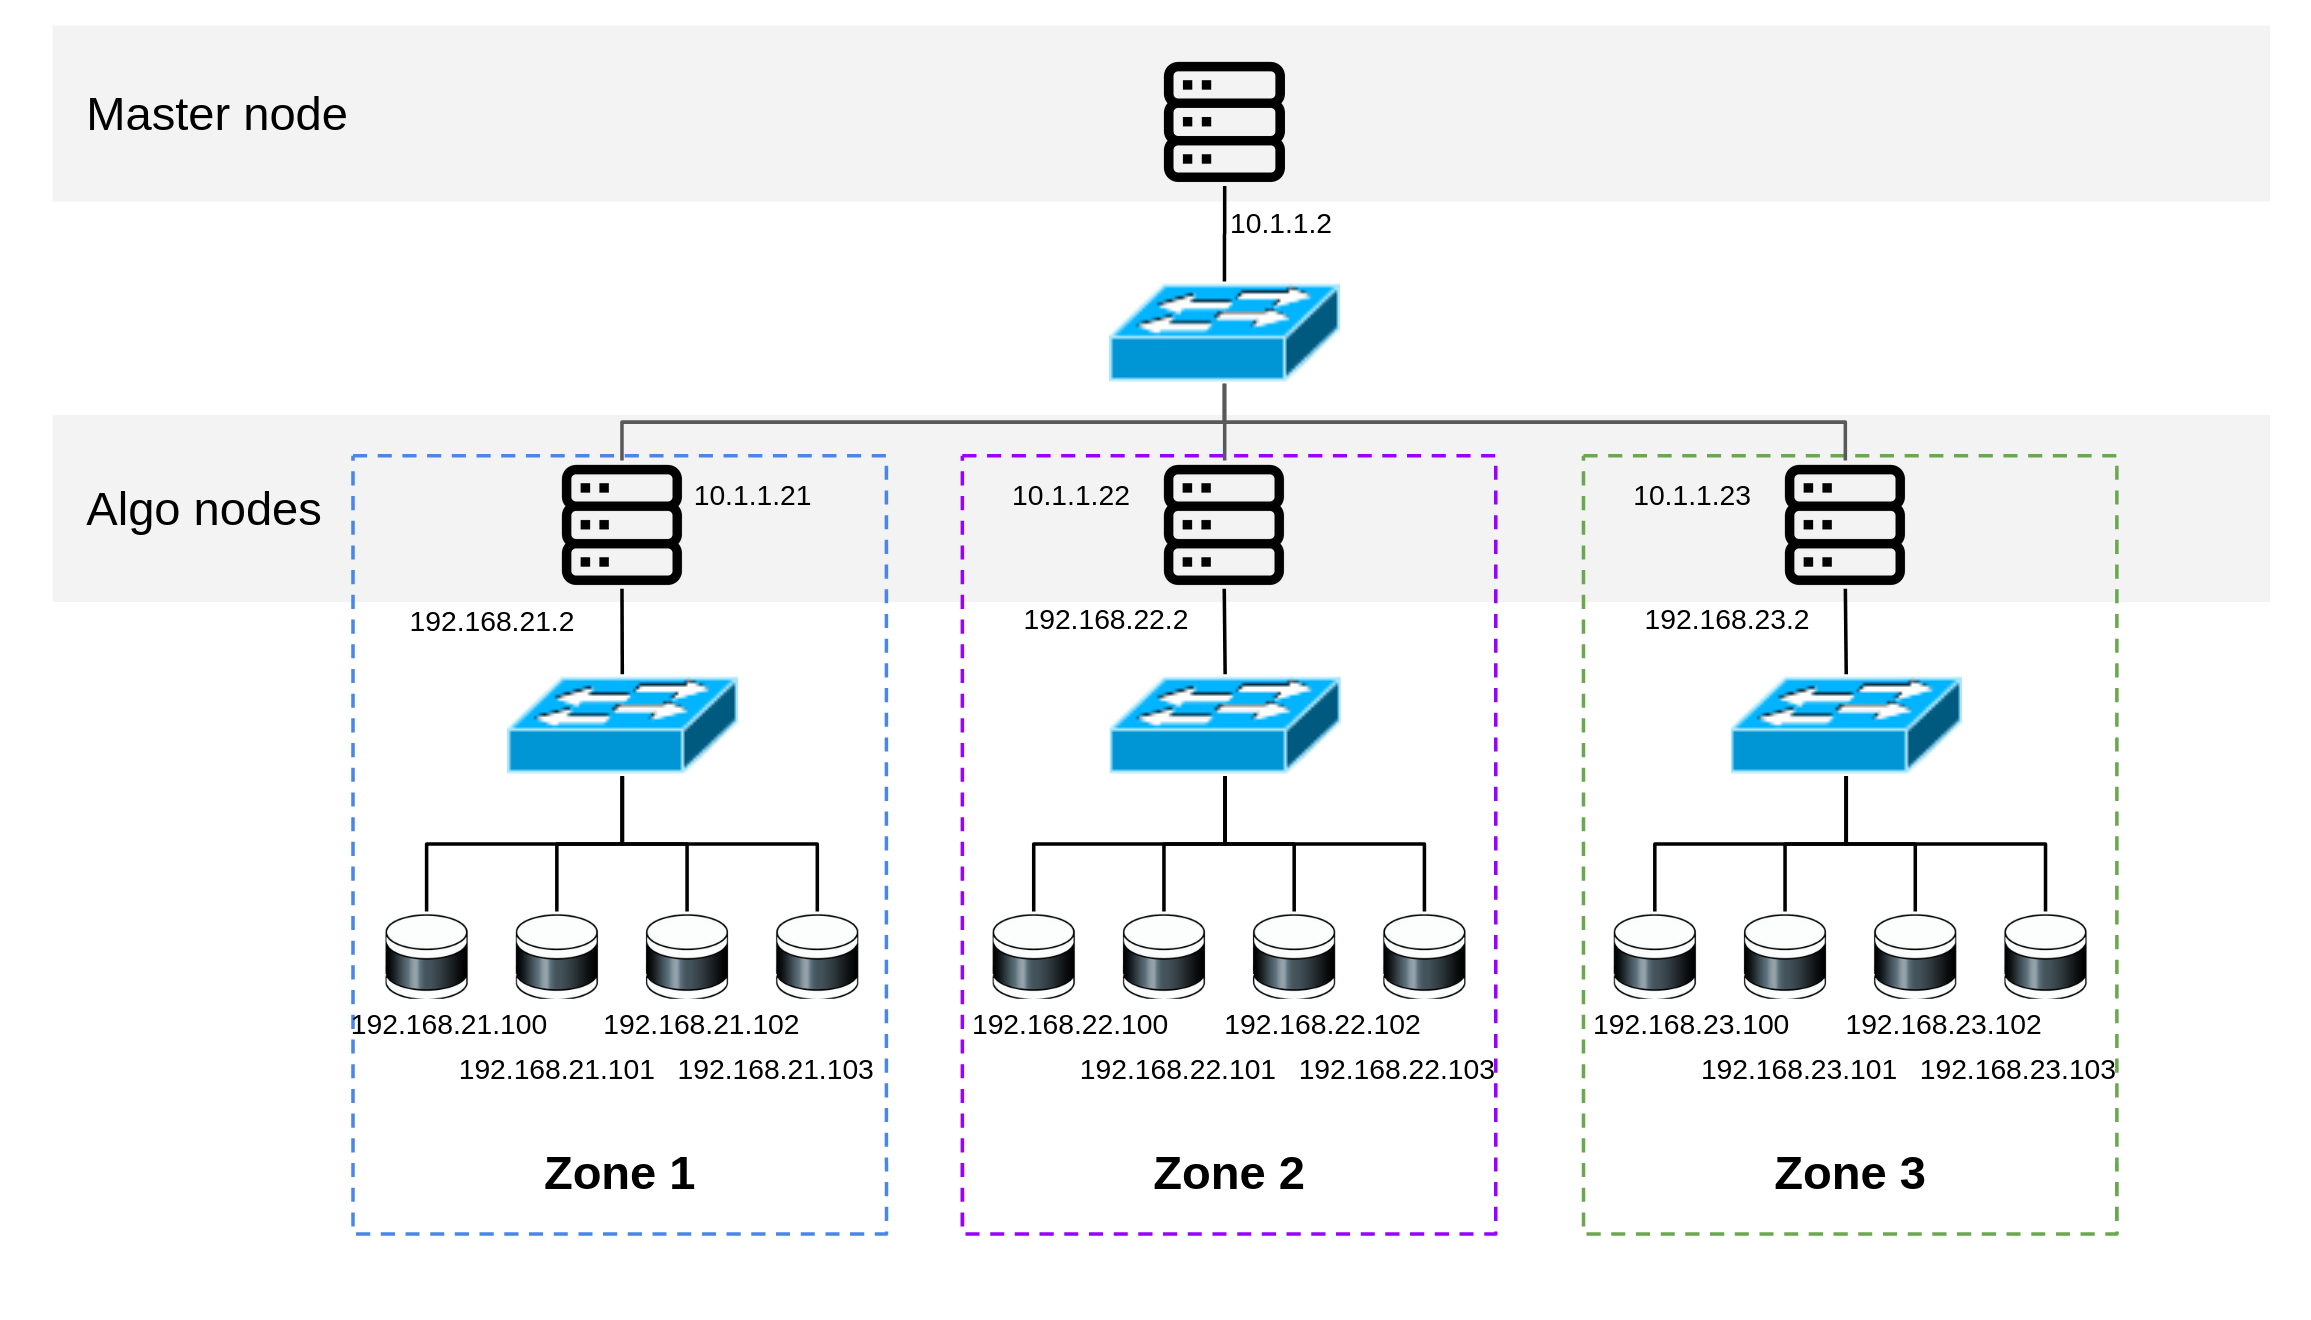
This page will explain how to set up a distributed system across multiple machines.
Setting up a distributed system
Before starting, ensure that the required dependencies are already installed on the Algo node machine you intend to use. Additionally, ensure that the Master Node machine has access to the Algo node machines.
On the host to be used as a Master node, define the cluster file as defined in the manual here. The cluster file shall contain all the ip addresses and root user/password for all the hosts to be used as Algo nodes. The list can be appended with as many machines as needed.
```json cluster.json
{
    "nodes": [
        {
            "ip": "master_node_computer_ip_address",
            "user_name": "master_node_computer_user_name",
            "password": "master_node_computer_password",
            "is_master": true,
            "supported_worker_apps": ["algo"],
            "name": "master"
        },
        {
            "ip": "node2_computer_ip_address",
            "user_name": "node2_computer_user_name",
            "password": "node2_computer_password",
            "is_master": false,
            "supported_worker_apps": ["algo"],
            "name": "algo_1"
        },
        ...
    ]
}
```
Once all machines have been listed in the cluster file, deploy SENSR on all machines using the following single command:
sr-launcher-cli run install -f cluster.json --force.Deploy the License Server on the Master node:
sr-launcher-cli run install license-server. and deploy your license file as indicated here.Create the cluster to link all machines of the distributed system together:
sr-launcher-cli create cluster -f cluster.json c1 -oin the Master node's host.After creation of cluster, machines will be all bound together and ready to operate together. To run SENSR, enter
sr-launcher-cli run sensrin the Master node's host.SENSR will open in project setup mode.
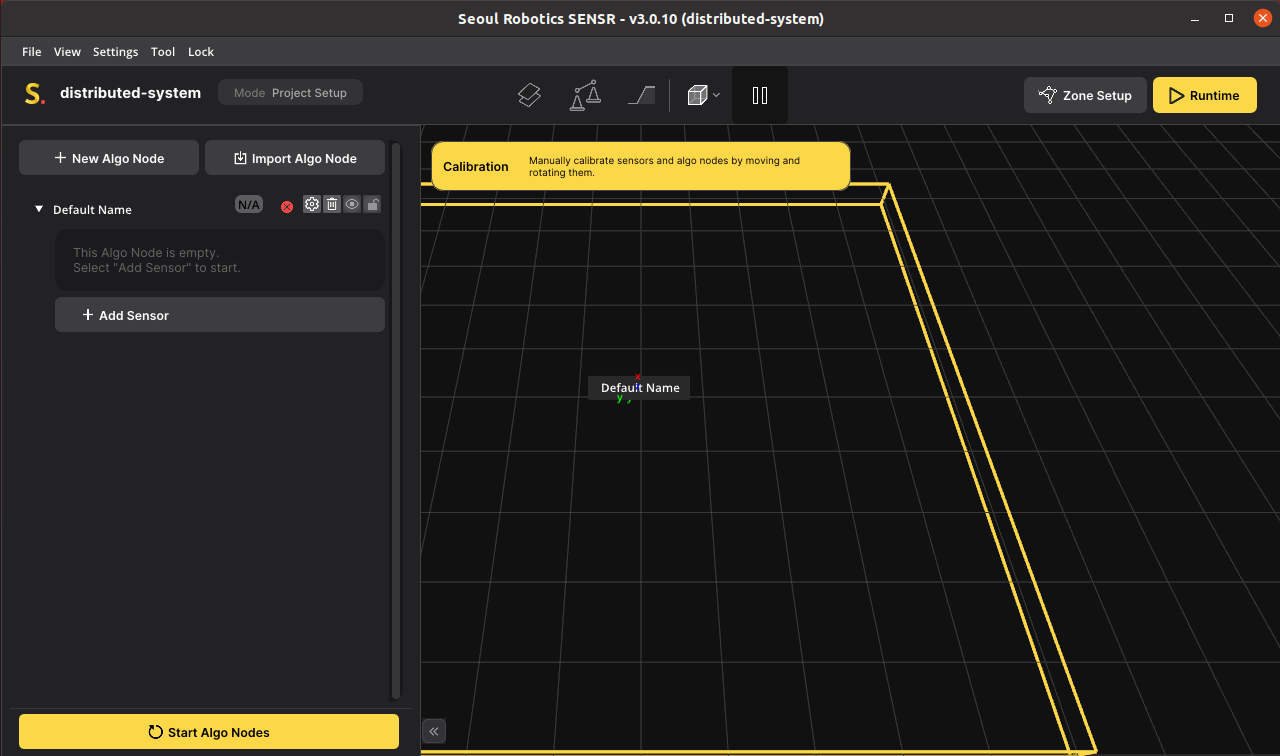
Click on
New Algo Nodeto add the Algo node machine. Click on the Algo Node icon (next to the Algo Node's name) and select the IP address of your Algo node machine. Note that you can select different presets for each algo node. For instance, one algo node can run an indoor preset while the other ones run the outdoor_gpu preset. Each Algo node can use a completely different set of parameters
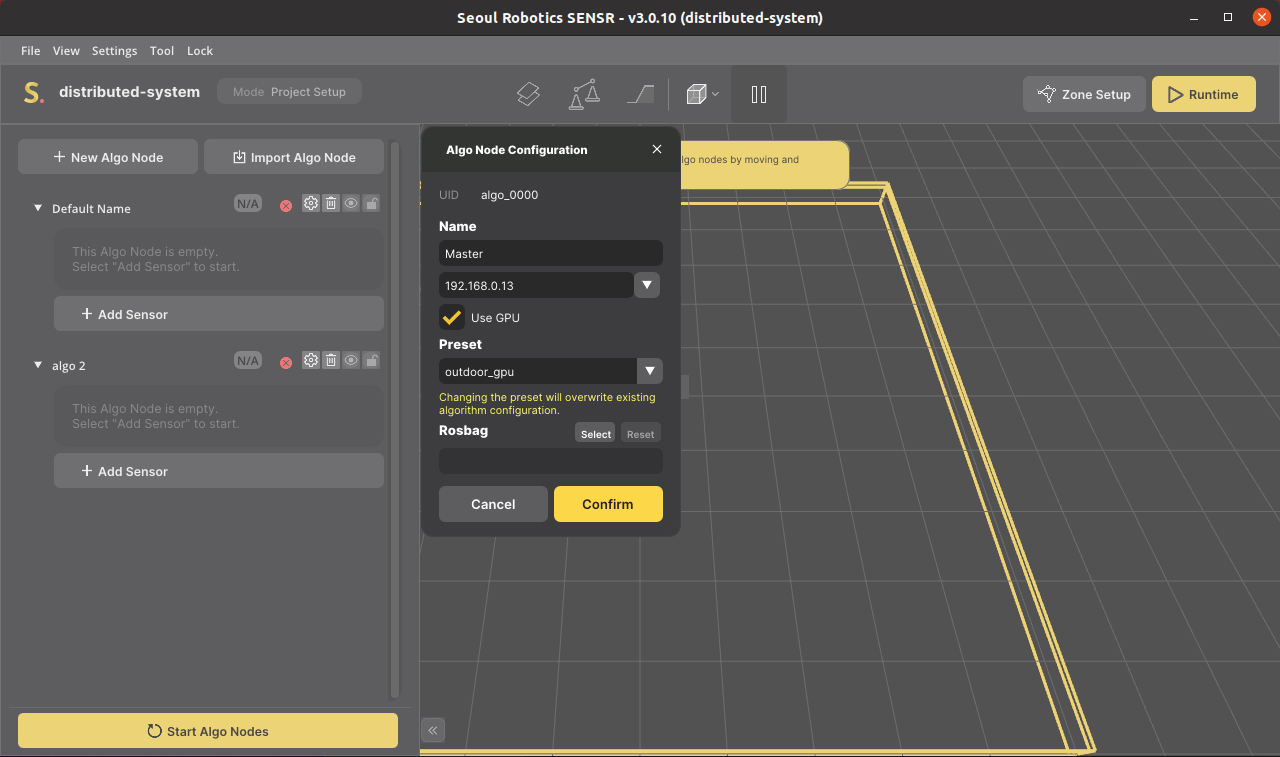
Click on the Algo node’s name to translate, rotate or resize it.
Add lidars to your Algo nodes. Please note that an algo node can only process data coming from the lidars that are connected to it, it cannot process other lidar data under different Algo nodes.
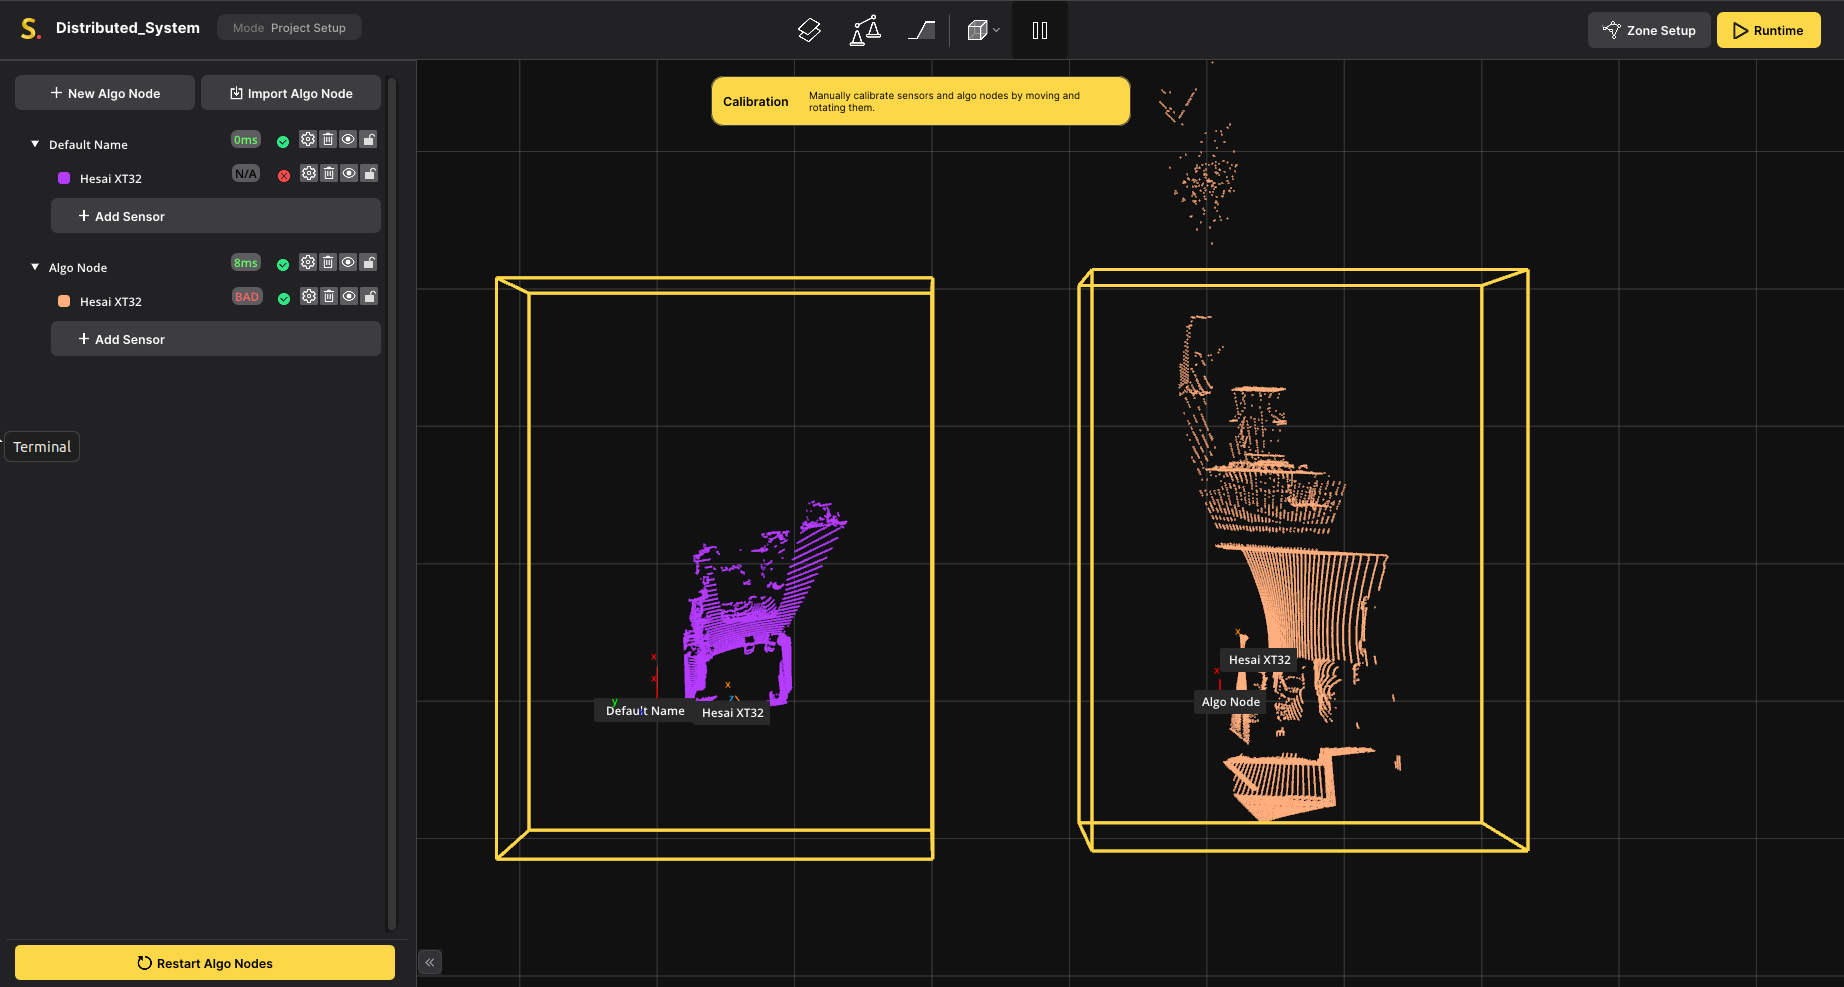
Calibrate your site
- Start with the LiDARs within an Algo Node
- Finish by adjusting the Algo Nodes together
To ensure that all data is properly time-synchronized between all hosts, all machines' Operating systems must be time synchronized using either the PTP to NTP protocols. The instructions below detail how to synchronize two Ubuntu hosts using the NTP protocol:
Synchronizing Two Ubuntu Machines Using NTP
To synchronize two Ubuntu machines using the Network Time Protocol (NTP), follow these steps:
Step 1: Install NTP on Both Machines
Ensure NTP is installed on both machines by running these commands:
sudo apt update
sudo apt install ntp
Step 2: Configure the NTP Server
Choose one machine as the NTP server and configure it:
Edit the NTP configuration file:
sudo nano /etc/ntp.confConfigure the server:
Comment out or remove the default pool servers.
Allow your local network to access the NTP server:
restrict 192.168.1.0 mask 255.255.255.0 nomodify notrap(Optional) Add the local clock as a fallback:
server 127.127.1.0 # local clock
fudge 127.127.1.0 stratum 10- Restart the NTP service:
sudo systemctl restart ntp
Step 3: Configure the NTP Client
On the second machine, configure it to use the first machine as its time source:
Edit the NTP configuration file:
sudo nano /etc/ntp.confAdd the NTP server's IP address:
Remove or comment out the default pool servers.
Add the server's IP:
server <NTP_SERVER_IP> iburstReplace <NTP_SERVER_IP> with the actual IP address.
Restart the NTP service:
sudo systemctl restart ntp
Step 4: Verify Synchronization
On the client machine, check the synchronization status:
ntpq -p
You should see the NTP server's IP address and synchronization status. An asterisk (*) next to the server IP indicates successful synchronization.
Troubleshooting:
- Ensure the firewall on both machines allows NTP traffic (UDP port 123).
- Verify network connectivity between the machines.
- Check the NTP service status:
sudo systemctl status ntp.
By following these steps, you should successfully synchronize the time between two Ubuntu machines using NTP.