Start with a Project
Overview
At first launch, SENSR opens on the landing page letting the user select between New Project and Open Project.

After that phase, SENSR will by default open the latest project used.
This section describes:
- How to create a project
- How to open a project
- How to configure a project
For more information on the definition and contents and of a project can be found in the concept section.
Creating a Project
Select either New Project from the landing page or File > New Project in the menu bar.
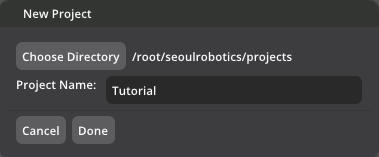
You have the option to define where the project file will be stored. By default, each Project is stored in the /opt/seoulrobotics/projects folder.
Software upgrades or removal will not affect that directory.
Loading a Project
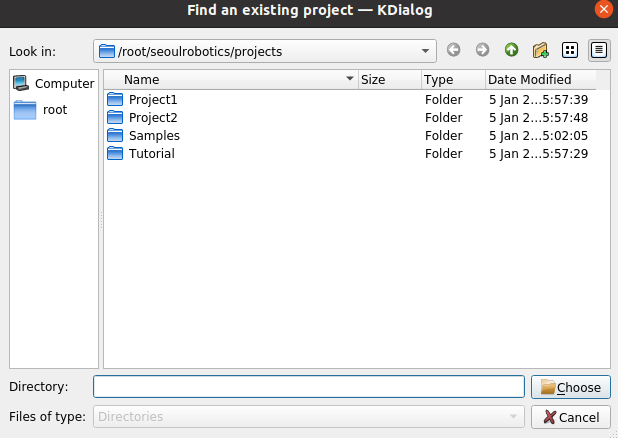
Select either Open Project from the landing page or File > Open Project in the menu bar. To select a project, select the folder containing all the project files, the folder that contains the config folder.
In the example below, the projects folder contains four projects. Select the desired project (i.e. highlight the folder by left-clicking on it once) and then click OK.
Configuring a Project
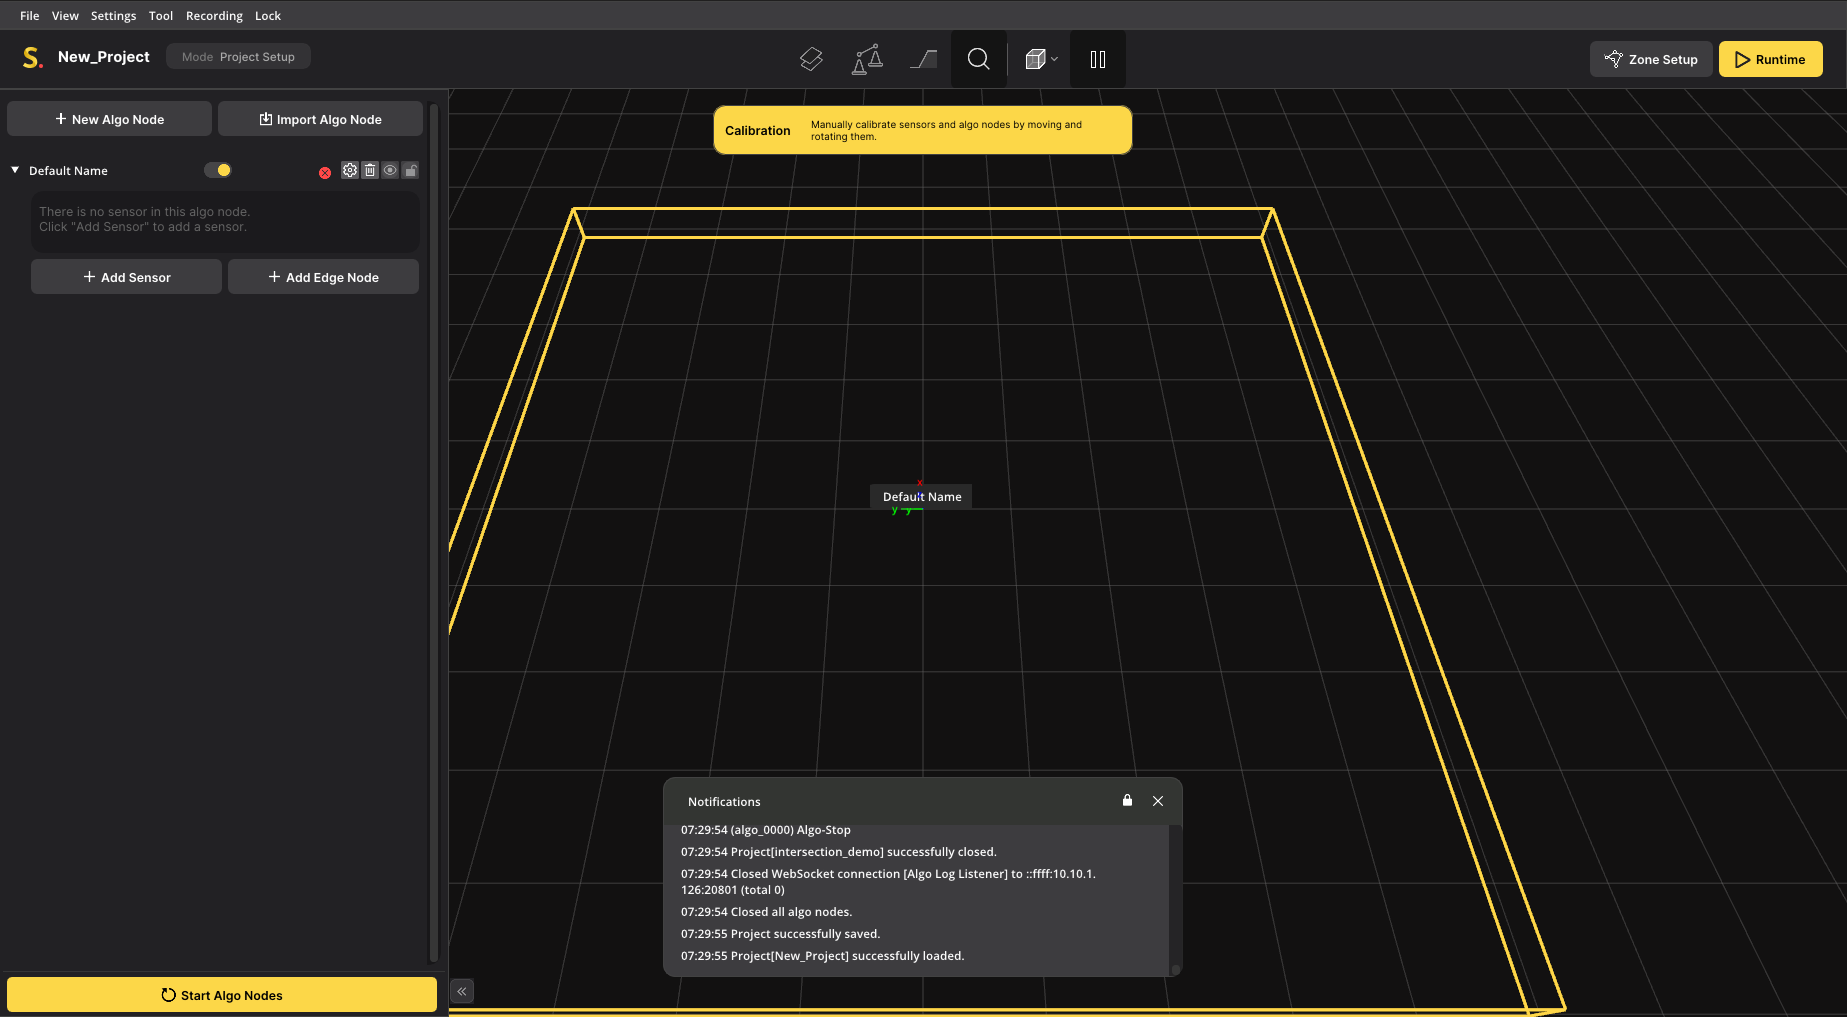
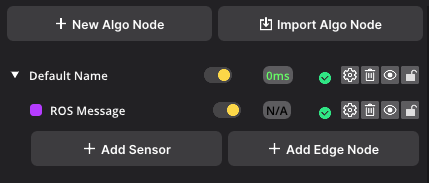
Once you open a new project, you will meet an empty Algo Node/Sensor List on the left pannel. In that pannel, the user can add/remove/edit Sensors, Edge nodes and Algo nodes.
Configuring Algo nodes
Click on the Gear Icon next to "Default Name", to open the Algo Node Configuration Window.
That window allows the user configuring
- Algo Node Name,
- Algo node IP address,
- Usage of GPU or not,
- Preset type,
- Use a rosbag (pointcloud record) file as an input.
GPU usage SENSR can use the hosts' GPU to run its vehicle detection Deep Learning algorithms. Without using a GPU, the charge on the CPU is significant and therefore the detection range cannot be very large. Using a GPU reduces the stress on the machine's CPU, allowing for a much larger detection range.
Presets There are several default presets pre-loaded in SENSR. They can be used as follows:
- GPU-enabled presets:
- outdoor_gpu: preset for detecting vehicles, cycles and pedestrians alike (Default and recommanded preset),
- long_range: preset for detecting road users using machines with relatively limited computing power,
- lv5_control_tower: preset used for Autonomy Through Infrastructure projects.
- Non GPU presets:
- indoor: preset for cases where only pedestrians should be detected, specific tracking algorithms are used for greater accuracy,
- indoor_light: preset for cases where only pedestrians should be detected and the host has limited computing power (lower data quality),
- outdoor: preset for detecting vehicles, cycles and pedestrians alike without using a GPU (limited detection range),
- outdoor_light: preset for detecting vehicles, cycles and pedestrians alike without using a GPU (lower data quality).
Adding sensors
To add a Sensor:
- Click
Add Sensor, - Select your LiDAR model among the list,
- Input your sensor configuration*.
*All lidars have a slightly different configuration, generally to configure your sensor, you need to input its ip address and port.
Once all your lidars are added, we need to calibrate them.
If you don't have any live sensor yet, you can download our Sample data and practice with it.
Elements description
The green check marks in front of each item indicate that the Algo Node and Sensors are running and processing data correctly. Each sensor will generate a point cloud in its own color. When adding a new sensor, it is by default added with the corrdinates (0,0,0)
Each node in the list has some buttons next to it. The functionality of each button is as follows:
- (Gear icon) Open up the settings window for the node.
- (Trash icon) Delete the node from your project.
- (Eye icon) Toggle the visibility of the node. If visibility is disabled the node cannot be interacted with
- (Lock icon) Lock the node in place and make it non-interactable. Locking an algo node also automatically locks the child sensor nodes of that algo node.
In the 3D viewport, you can use the mouse to move the camera position and angle relative to the 3D world.
- To move, hold the middle mouse button and move the mouse. The WASD keys can also be used to move.
- To rotate, hold the right mouse button and move the mouse around.
- To select, click the left mouse button when hovered over a point cloud.
You can also select specific sensors by clicking on their name in the list.
Tip
You can enable and disable a sensor or even an Algo node using the toggle button in front of its name.
 .
.