Runtime
When the calibration is ready, click Runtime to enter runtime mode. Object tracking is only active in runtime mode.
When clicking runtime for the first time, parts of the point cloud may temporarily disappear as the SENSR software enters the Environment Learning phase.
Environment Learning
SENSR runs the initial environment learning before starting object detection. The Environment Learning phase will detect the ground and static points within the scene. The duration of this phase depends on the parameter Algo Node Parameters > Background Detector > Time to Initialize Background [s].
The longer the background learning time, the more the system can be immune to noise induced by the LiDARs. Recommended values 5~15 seconds.

Runtime
Once the learning phase completes, SENSR will switch into Runtime mode. In this mode objects present at the scene will be tracked.
You can choose Point Publishing Level with the widget on the right. We have set Object Points as a default, to reduce computer resources with visualizer.
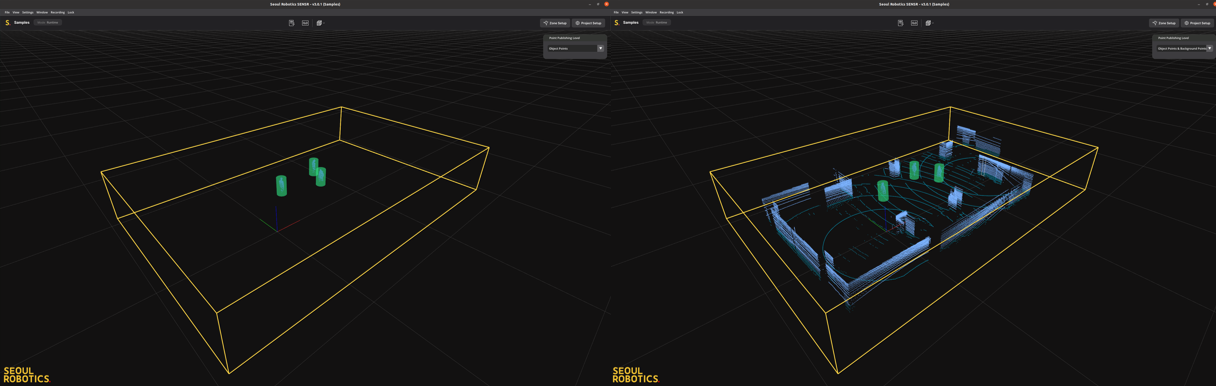
The above image shows the native GUI with points and objects in the default colors. The walls, ground and static objects are considered background and are both shown in light blue. Any movement that is detected is considered foreground and processed to detect and track objects. Here shown in green since the objects are pedestrians.
The difference between left and right images is Point Publishing Level. Left: Object Points ONLY, Right: Object Points and Background Points.
caution
The foreground and background update at different rates in the visualizer. This is done by SENSR to preserve network and processing bandwidth. You will notice that tracked objects move smoothly through the world while the shadows they generate update at a slower rate. This is normal. The default update rate for foreground objects is 100ms (10 fps) and the default update rate for background is 1s (1 fps).
This can be changed in the settings
It is possible to change the colors of various points and objects in the 3D viewport. To do so, in the View menu, select Preferences. You can also use the F11 keyboard shortcut.
A pop-up window will appear, select Color on the left-side panel. Every item's color can be changed with either the color selector by clicking on the color preview or using RGB values. The transparency level can be adjusted with the last column with 0 being fully transparent and 255 being fully opaque.
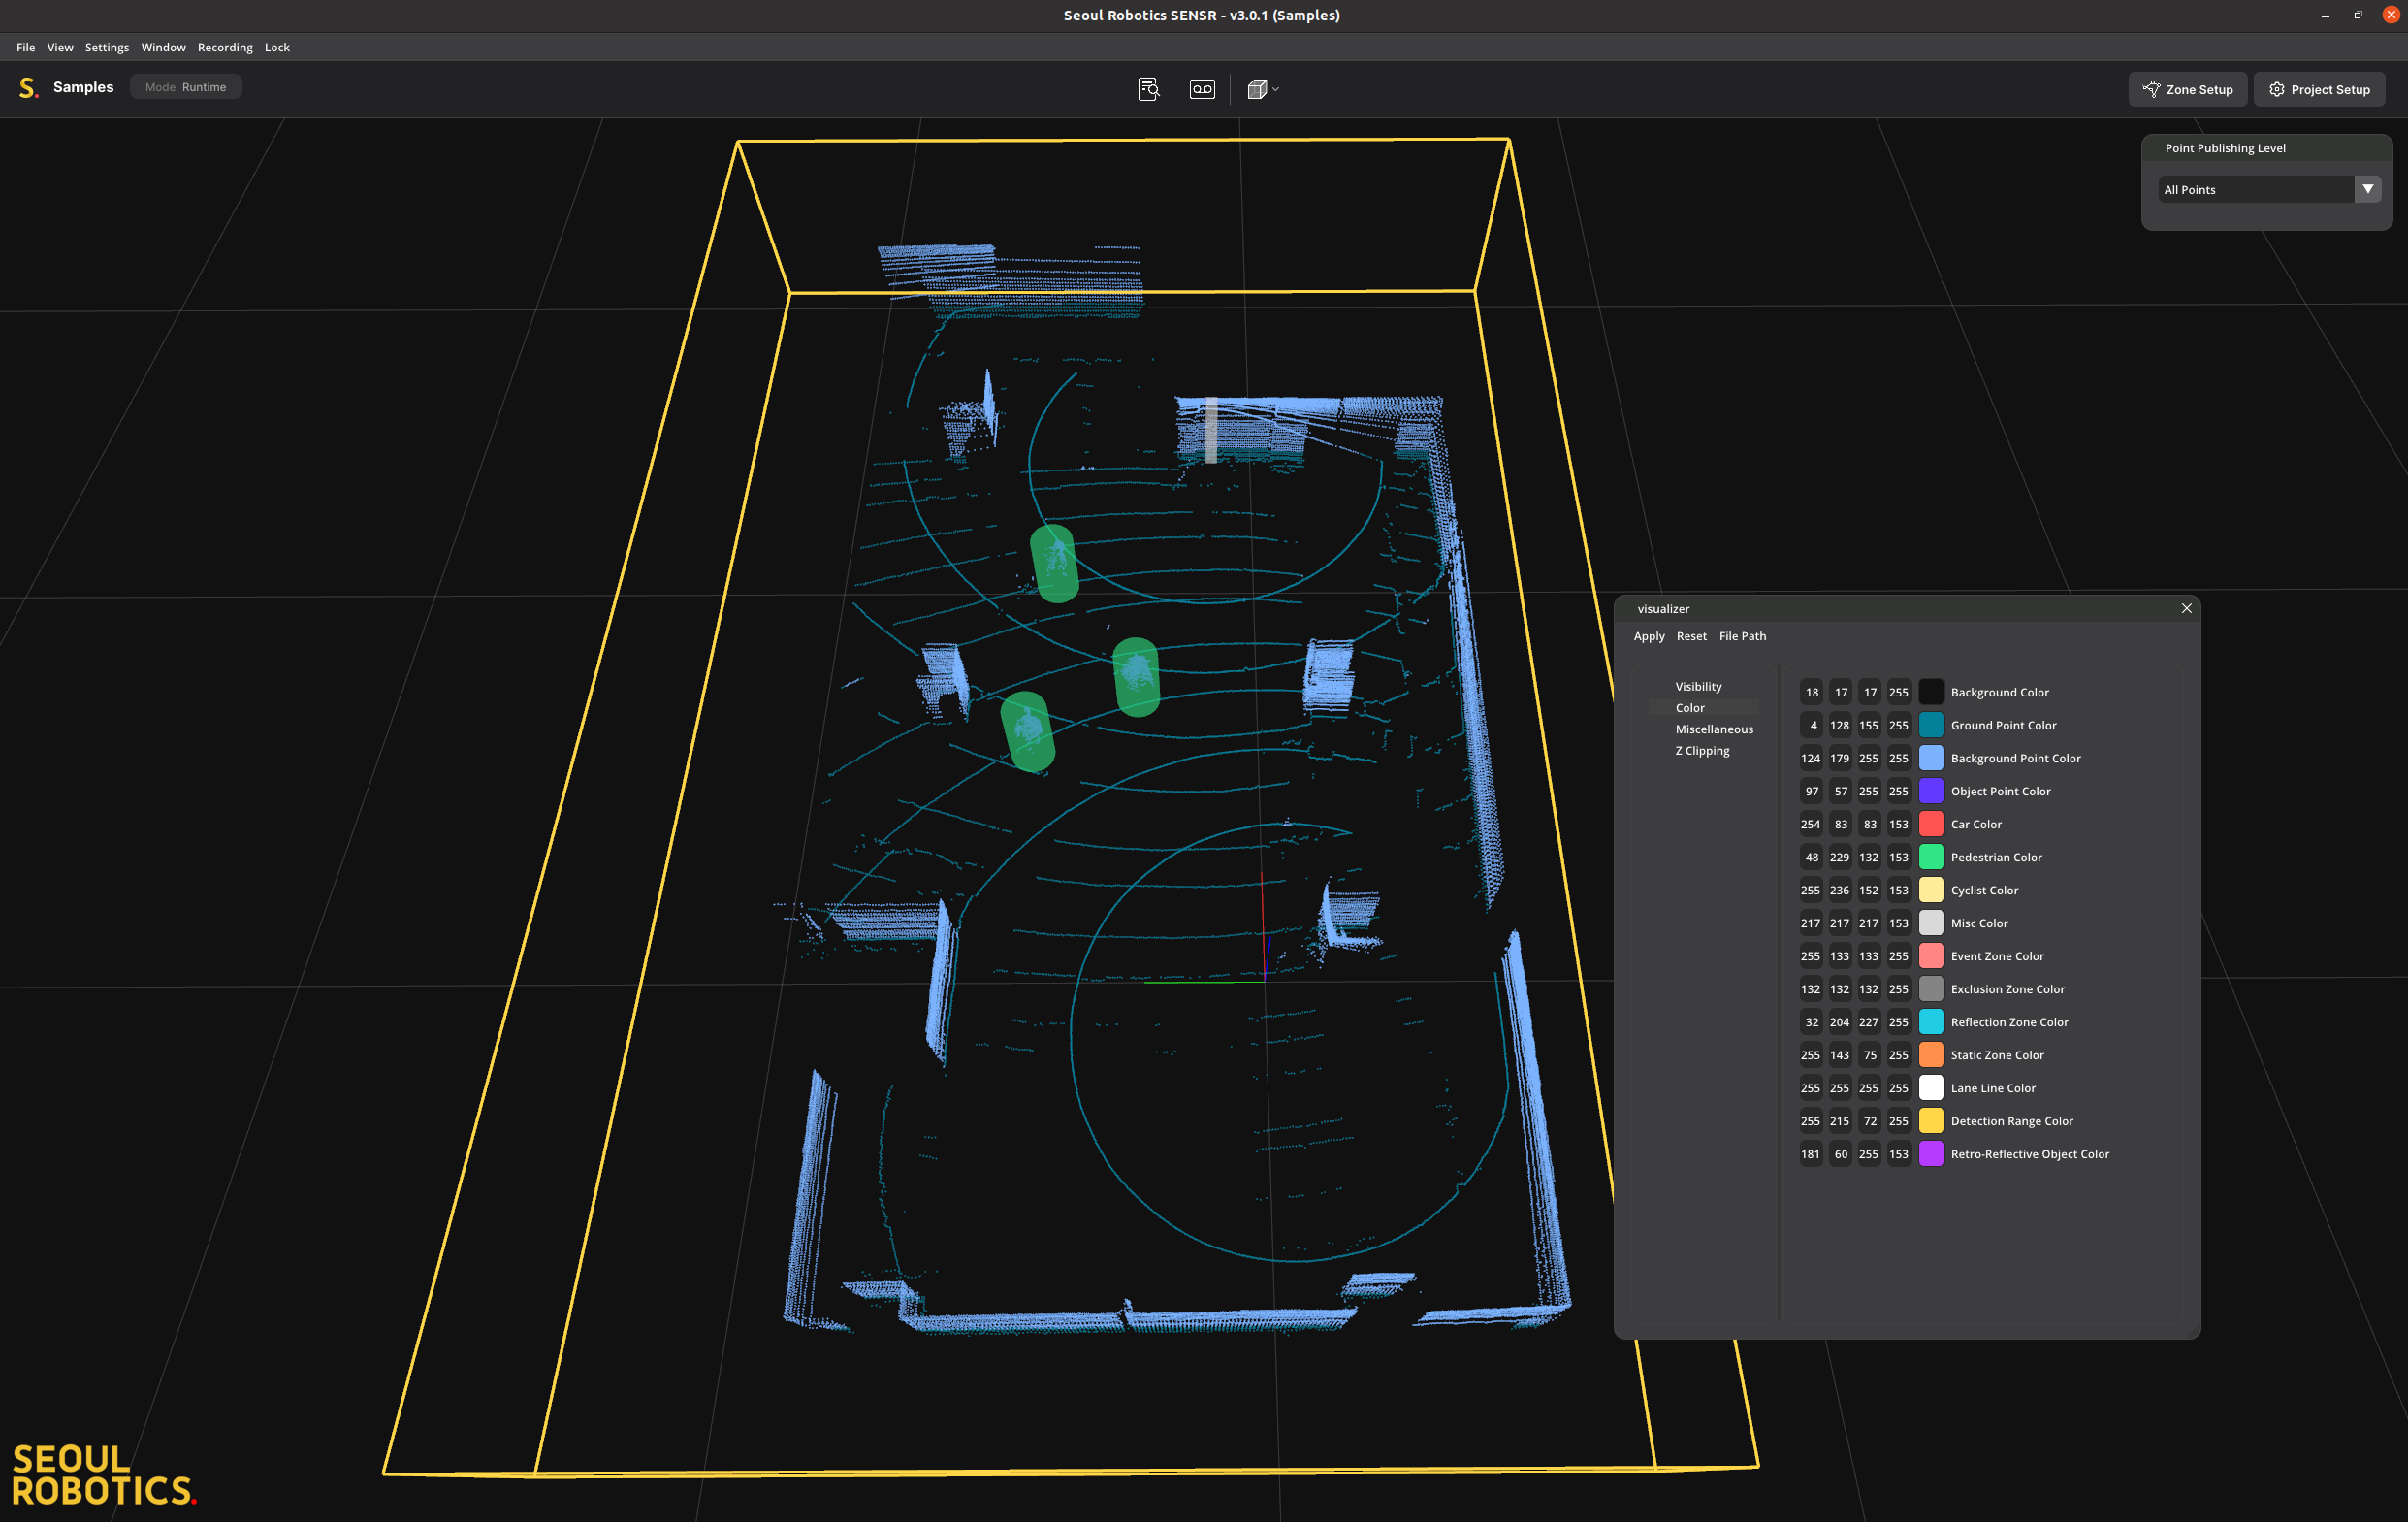
Changing colors can help understand tracking performance problems such as making sure that moving objects are correctly seen as foreground and that the ground level is set correctly.
Object Tracking
When an object is detected and tracked, it will be wrapped in either a cylinder or rectangular bounding box, depending on its class. The color of the box or cylinder indicates the object class.
The default colors are:
- Grey: Unknown/Miscellaneous
- Green: Pedestrian
- Yellow: Bicycle/Motorcycle
- Red: Car or larger vehicle
Each tracked object gets a unique ID number that stays with the object until tracking is lost. If the object reappears within (default) 1 second (see Drifting Period in setting) in the expected location based on previous direction and velocity, the detected object will regain its previously assigned ID. If an object is lost for longer it will permanently lose its ID. This means that, for projects that require advanced tracking through a large space while maintaining the Object ID throughout the entire journey, SENSR requires continuous coverage, taking into account obstacles that could break the LiDARs line of sight.
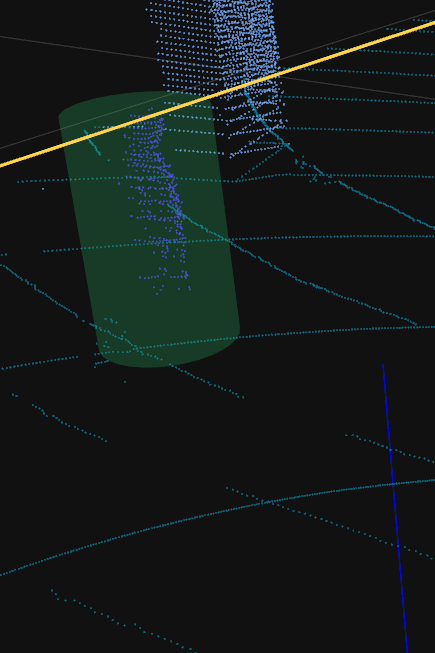
In the example below, a person is detected and tracked as indicated by the green cylinder around the object. It is important to note that the majority of noise that is generated by sensors and/or the result of reflections in the scene will be classified as miscellaneous objects. You can choose to ignore these objects by making them invisible.
To do this go to:
View→Preferences→Visibility and disable the Draw Misc-Objects option
It is recommended, for the best tracking performance, to surround the targets with sensors. This will help the SENSR system detect and maintain the size and shape of objects as they pass through the field of view.
In the below example, two sensors are placed on diagonally opposite sides of an intersection, allowing a small vehicle to be tracked and classified next to a large vehicle.

Runtime menus
The following menu items are available in Runtime Mode.
File
- Export Parameter Change Report: If you would like to report your parameter changes to Seoulrobotics support team, please export this report and send it to support@seoulrobotics.org.
View
Reset Viewpoint: Reset the camera viewpoint to the default for the selected view mode.
View Mode: This menu lists the various view modes that are available
- Perspective - the default view mode with 3D perspective enabled. You have full viewpoint freedom in this mode
- Top View (Ortho) - a top-down view mode with perspective disabled, creating a 2D view. Perfect for using as a top-down floor plan
- Side View (Ortho) - a side view mode with perspective disabled, a good mode to check if the ground is level to the grid and to correct any height errors during calibration
- Isometric - a three-quarters view with camera controls locked so only rotation and zoom are available
Preferences: Change objects' or points' visibility, color, view-range
Settings
These are the settings that are available during runtime mode. For details about each setting, see Settings.
- General Parameters
- Master Node Parameters
- Algo Node Parameters
- Advanced Features
Window
Two additional types of windows are available.
- Object Information: This window gives additional information about objects in the scene. You can click on an object in the 3D viewport or in the list to display this information
- Connection Monitor: This window gives sensor and algo node connection status
- System Monitor: This window gives indication on each node's processing performance
Recording
This option allows you to record data streamed into or from SENSR. For more information on replaying recorded data, see Replay.
- Rosbag Recording
- Advanced Recording
- Anomaly Recording
Lock
This options allows setting a one time password to lock SENSR and/or the Web Frontend to prevent users from inadvertently tempering with SENSR.
- Lock SENSR
- Lock Web Front-End
Mode
This will allow you to switch to different modes and add, modify or delete sensors and zones.
- Project Setup: This will take you back to the sensor settings and calibration screen. (see Project Setup).
- Zone Setup: This will take you to Zone Setup mode (see Zone Setup)
caution
When you enter Sensor or Zone setup mode, you leave Runtime mode. Object tracking will be disabled until you re-enter Runtime mode.