Installation
info
If you have Discovery kit (LPU with SENSR-I pre-installed), you may skip this procedure.
caution
Make sure you have an active internet connection during the installation process. The software automatically downloads the latest sets of supporting software and tools during the installation.
You can use the user-friendly GUI-based SR Launcher to install and launch SENSR-I.
Install SR Launcher
- Get
sr-launcher_X.Y.Z_[arch].debfile from Seoul Robotics' Support engineer and save it into a folder on the target computer. e.g. ‘Downloads’ folder - Double click the
.debfile, then software installation window will show up. - Click ‘Install’
- If you successfully installed the sr-launcher, you can see the directory path when you type
which sr-launcher. Otherwise, nothing will be shown as a result.
user@customer-lpu:~$ which sr-launcher
/usr/local/bin/sr-launcher
Install SENSR-I using SR Launcher
- Open SR Launcher by clicking in the Application menu or typing
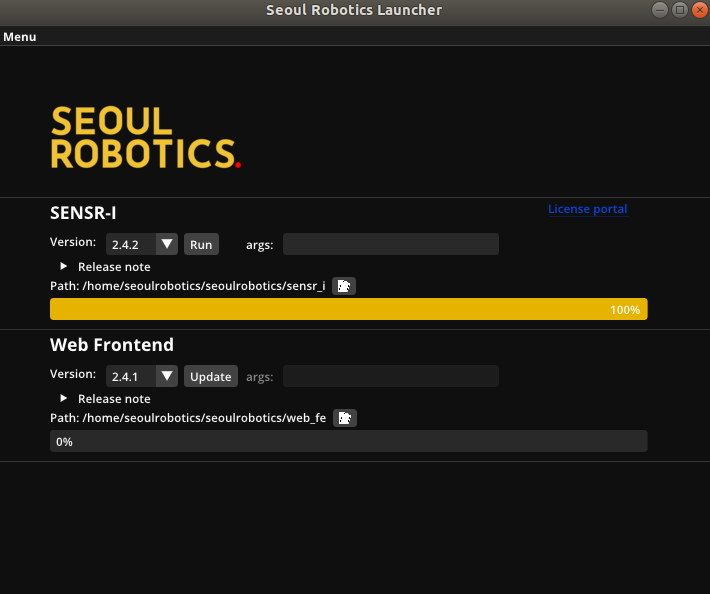
sr-launcherin the terminal - Select a version what you want to install under SENSR-I category and click ‘Update’
- You can optionally select install path via Path icon
- SR Launcher automatically downloads the version and asks you to type your password to install SENSR-I.
- After the successful installation, you will see the below screen.
- The final recommended step is to reboot your computer and continue to License related steps.
Install SENSR-I manually
Although not recommended, SENSR-I also supports installation without SR Launcher. (In the case you want to install dockerized SENSR-I, manual installation is the only one way to do it. )
- Get
sensr_i_X.Y.Z_[arch].debfile from Seoul Robotics' Support engineer and save it into a folder on the target computer. - Unzip the file. Then you can find the folder named
sensr. - Open terminal in the folder 'sensr'.
- Type command
./install.sh- Don't use
sudocommand.
- Don't use
- (If you're using dockerized SENSR-I) Be sure to reboot the machine right after installation.
Upgrade the version of SENSR-I using SR Launcher
- If you already have SENSR installed on your computer and you are willing to update SENSR to the new version, please follow below instructions:
- It is strongly recommended to make a backup of your existing version by moving or renaming the main installation folder. For example, rename ‘sensr’ to ‘sensr_backup’. Or simply select another installation path in SR Launcher for the new version of SENSR.
- Follow steps 1 to 4 of SENSR-I Installation process above.
Verify the installation
The installation script will create a folder called ‘seoulrobotics’ in the home directory.
There should be three folders like below.
├── projects
└── sensr_ws
Projects
This is where all project settings and project data replays are stored. If you want to copy an existing project configuration to a new computer, you can copy the contents of this folder to do so.
Sensr_ws
This folder contains the SENSR shared workspace and sensor drivers. Please do not modify or delete anything in this folder as its contents are critical to the system.