Record and Replay
SENSR includes a replay system that allows users to record the output of SENSR and replay it at a later time. The replay system is split into two modes:
- Record: Record the output data from SENSR and save to a replay file.
- Replay: Play a replay file and show the output in the visualizer.
To select either of these modes, you must first be in runtime mode. From the top menu bar, select Replay and then either Record or Load Replay.
Replay button activated only with the live streaming data.

Recording
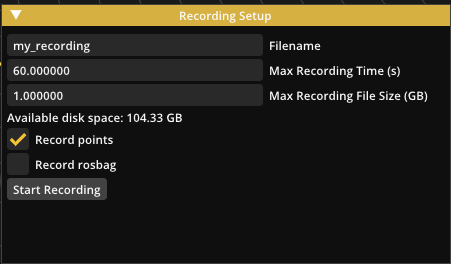
After clicking Record in the Replay drop-down menu the recording set-up window opens up. Before launching the recording mode the necessary settings need to be configured. These are
- Filename: The name of the file the recording is saved to. If the name does not have an extension (e.g.
my_recordinginstead ofmy_recording.tar.gz), the extension tar.gz will automatically be added to the filename. - Max Recording Time: This number specifies the maximum allowable recording time. Once SENSR has been recording for this amount of time, it automatically stops the recording and saves it to file. The recording can be manually stopped at any point before that, but this parameter is intended to limit the recording time in case there is limited space on the hard drive or if the user wants to record for a specific amount of time.
- Max Recording File Size: This number specifies the maximum allowable file size of the recording in gigabytes. Once the recording file size has reached this limit, the recording is automatically stopped and saved to file.
Additionally, the recording set-up includes a few options that can be toggled on/off. Leaving all of these options turned off records only the merged output of SENSR. The additional options include:
- Record points: Enabling this saves the point cloud to the replay file so it can be visualized during replay. Note that this drastically increases the recording file size so it is recommended that this option is turned off in the case of limited hard disk space or if you plan on recording for a long time. Recording the point cloud can be useful in case of tracking performance issues to share with the Seoul Robotics team.
- Record rosbag: Enabling this records a raw rosbag file of each algo node inside of the project. All ros topics of type sensor_msgs/PointCloud2 belonging to the algo node will be subscribed to. The rosbag file can be played with “Ros Interface'' in input mode. Note that rosbags get very big very quickly!
In the current version of SENSR, the rosbag stays under
[PROJECT]/replays/sensr_i/[REPLAY_FILENAME]_rosbagsfolder.
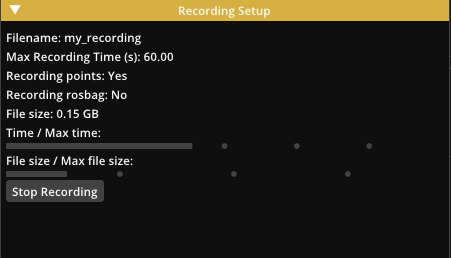
When all the settings have been properly configured, the Start Recording button can be clicked to launch the recording mode. The recording window now shows information about the recording and progress bars for the Max Recording Time and Max Recording File Size. Pressing the Stop Recording button at any time will stop the recording and save to file. The replay system also keeps track of the available disk space and automatically turns off the recording if there is not enough space remaining. On finishing the recording, the replay file is saved in the replay subfolder of the project folder. The replay files there can be deleted to free up space if they are not needed anymore.
Replaying
Once a replay file has been recorded it can be replayed at any time by pressing the Load Replay button in the Replay drop-down menu and launching the replay mode.
This opens up a window to choose the replay file from a list. The list is generated from the replay files saved in your project folder ( inside [project_folder]/replays/ ).
Choose a file from the list and press the Continue button.
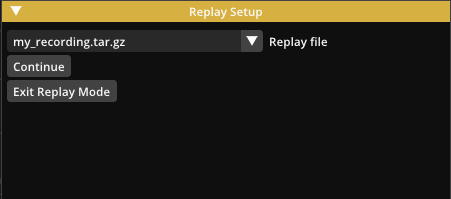
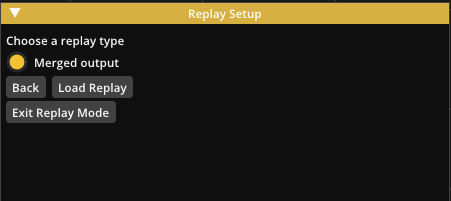
The next step is to choose a replay type. The file is verified to check which replay types are available and any type that is not present is greyed out. Note that in this release there is only one available replay type called - Merged output.
- Merged output: The output from SENSR is replayed from file without running any additional algorithm. This visualized result should be nearly identical to the result displayed during recording. This mode is what users will most frequently want.
Once the type is selected the Load Replay button can be pressed. This loads the replay, verifies that the replay file is not corrupted, and ensures the version of the replay file is compatible with the current application version. Once the loading is complete, the Start Replay button can be pressed.
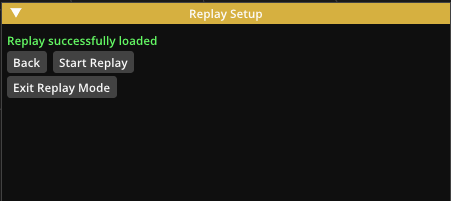
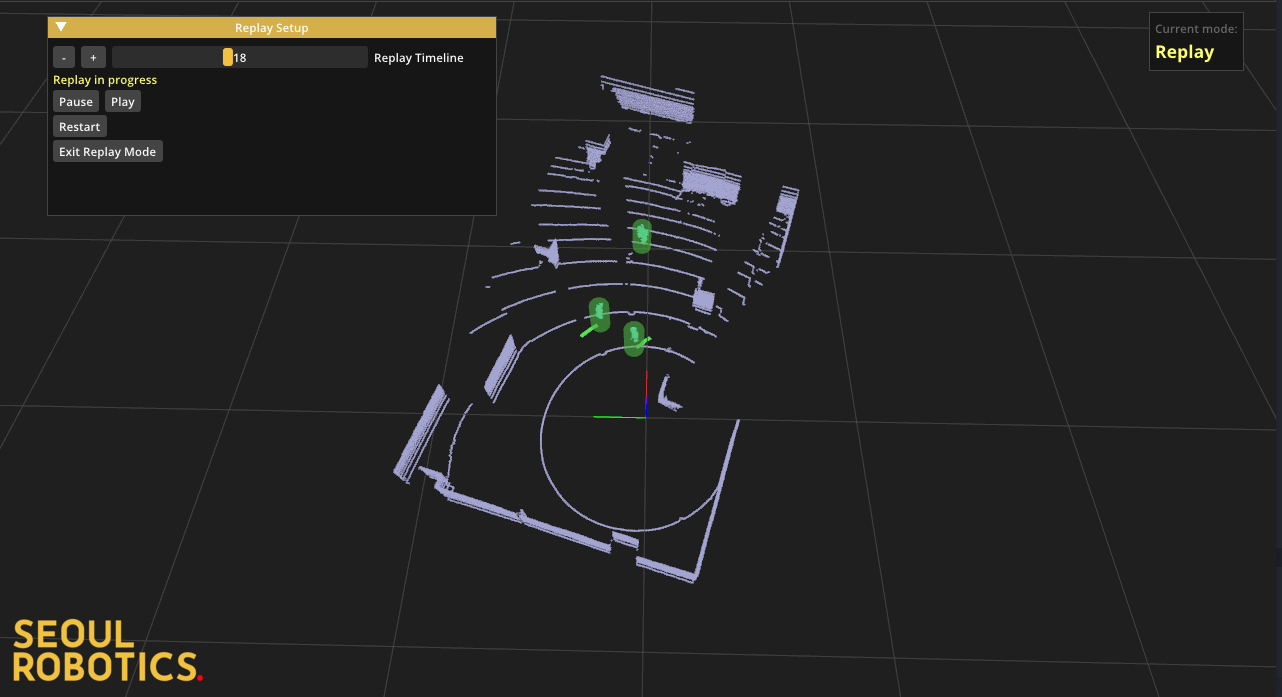
The replay will start playing and can be paused and restarted from the beginning. The timeline can be interacted with to move forward or backward in the replay. At any point, the replay mode can be excited by pressing the Exit Replay Mode button.