Time Sync Configuration
SENSR includes a user friendly interface for configuring time synchronization for compute nodes and lidars.
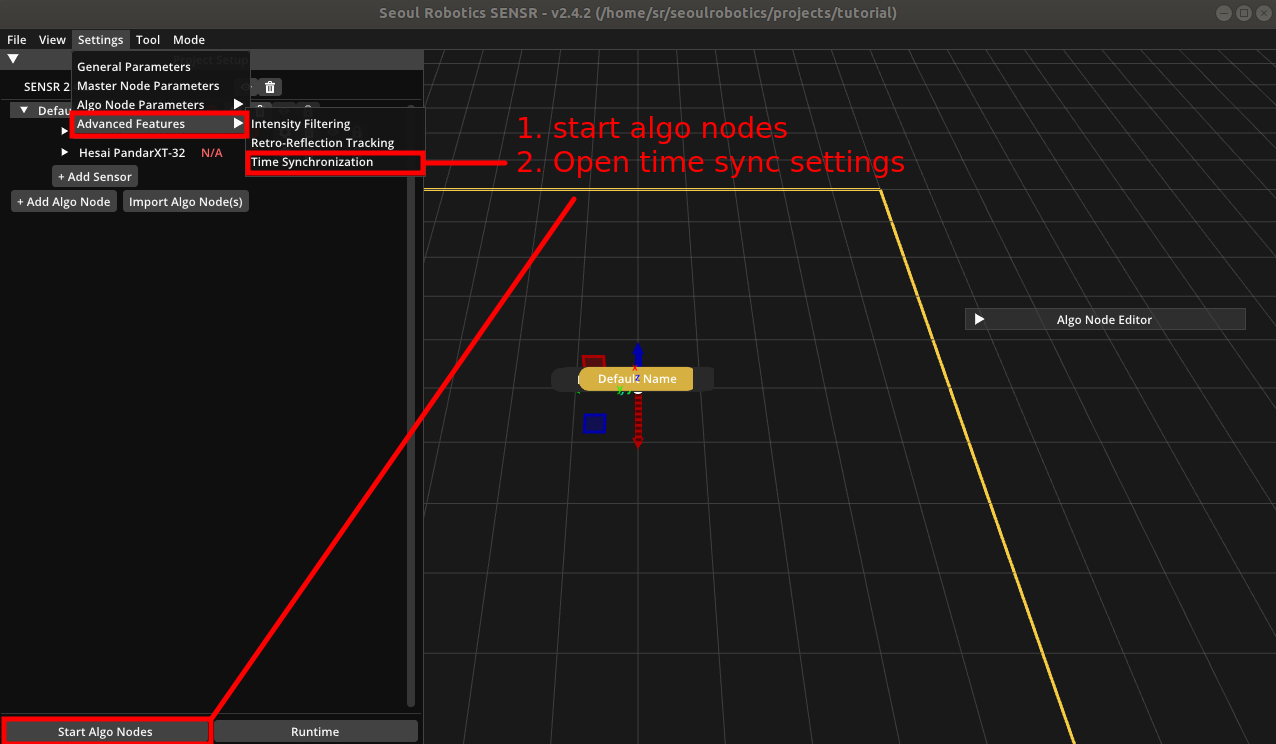
To configure time sync settings, algo nodes must be launched.
Auto Configuration
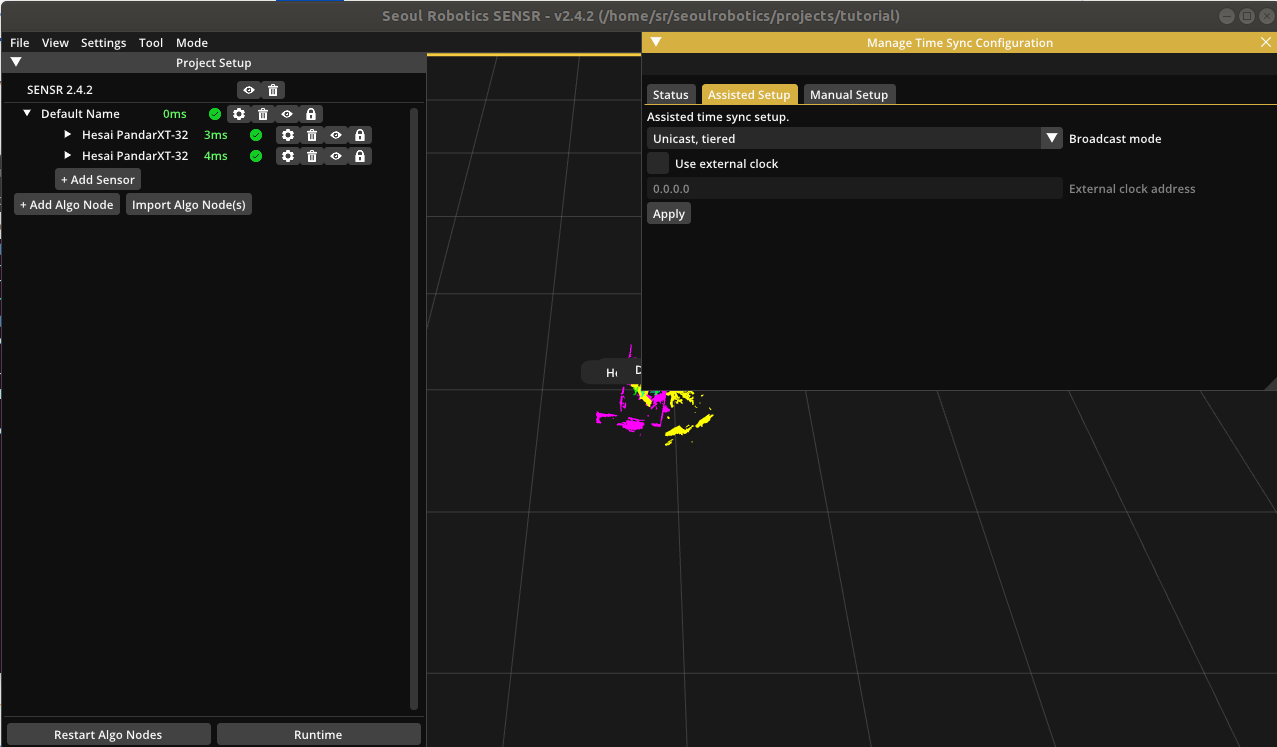
This is the easiest way to configure time synchronization. It will automatically detect current network and will try to generate a time sync settings accordingly.
- Broadcast mode: Theses modes dictate how time synchronization messages will be transferred.
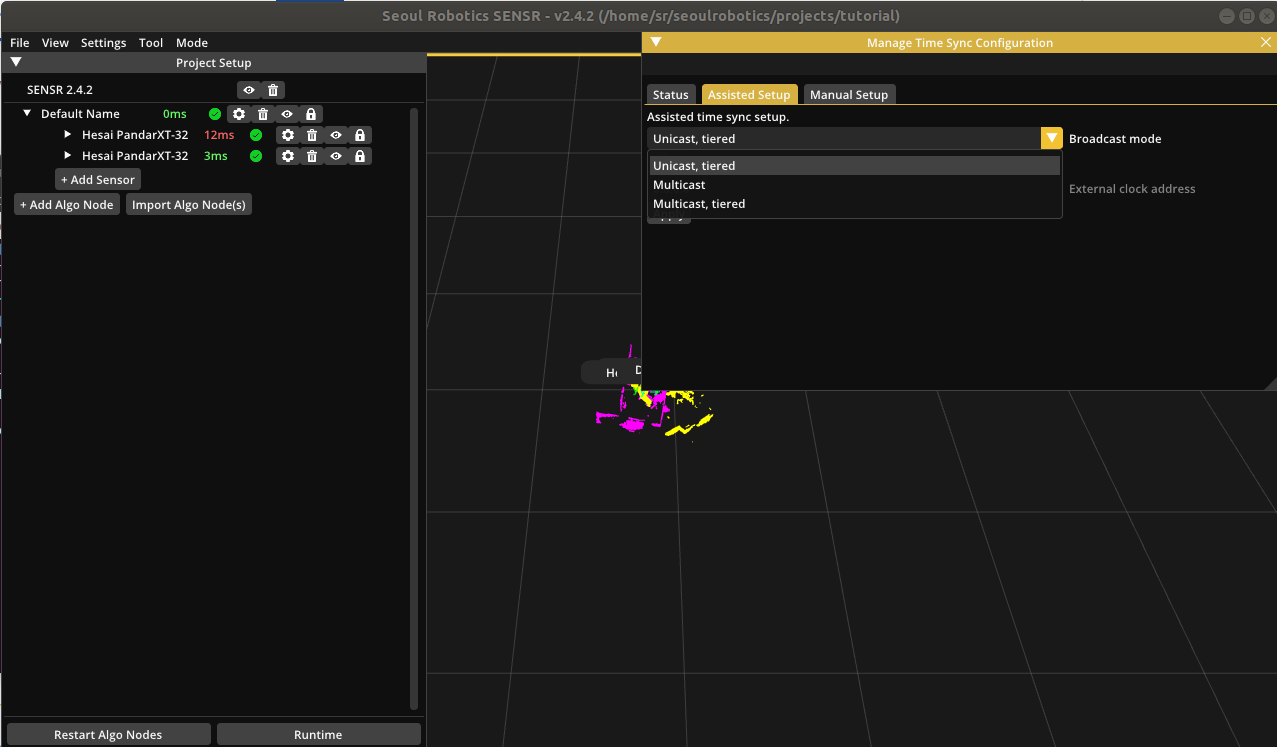
- Unicast Tiered: Messages between compute nodes will be sent in unicast fashion, incurring least traffic on the network bandwidth. Certain networks do not allow multicast messages and this setting should be used in that case. Messages between algo nodes and LPUs are sent in mulitcast mode.
- Multicast: Messages between all compute nodes and lidars will be sent from single source in multicast manner. This is simplest mode, but must ensure all compute nodes and lidars are connected to the clock source. Not compatible on networks that disallows multicast broadcast.
- Multicast Tiered: Messages to all compute nodes and lidars are sent in multicast manner. However, lidars do not receive messages directly from clock source, but instead gets secondary multicast broadcast from connected algo nodes.
- External clock: If an external clock source is used ie) GPS receiver, please insert it's IP address.
- Applying: After adjusting parameters, please click
Applybutton to run the auto configurator and save the generated configuration.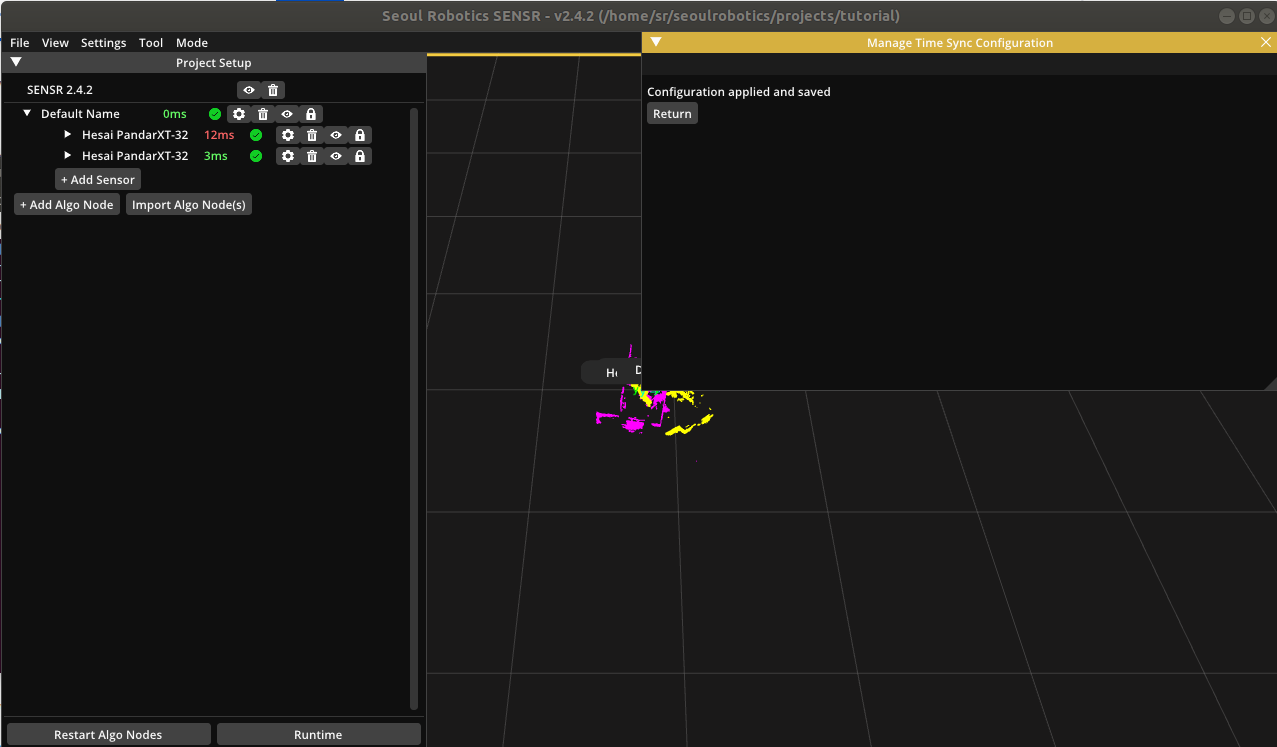 Result page will show if there were any errors during the configuration or if it was successful.
Checking Status
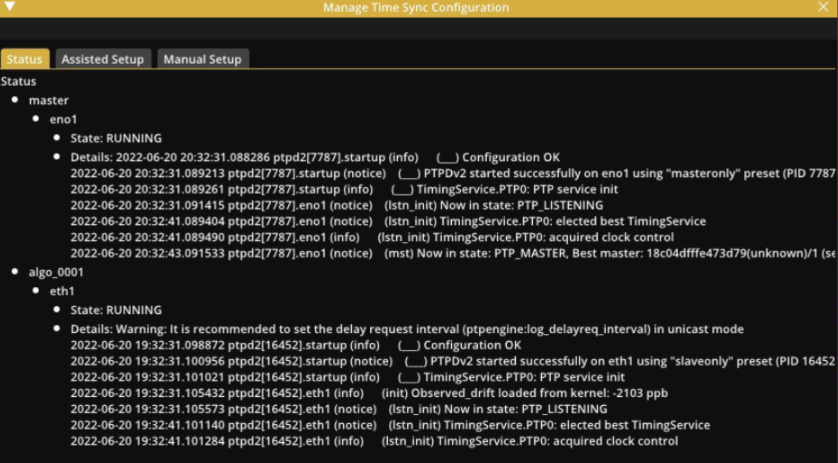
There are few ways of checking time sync configuration. We can check the latency visualizer on the right. N/A means latency info is not available. status fields shows status of underlying time synchronization service and does not mean time synchronization is achieved. Logs for underlying mechanism is more useful, you can check algo node time sync service connected to master node for following message:
(lstn_init) New best master selected: XXXXXXXXXXXXX(unknown)
this means time synchronization is being achieved and system clock will adjust accordingly.
For lidars, at this time there is no unified interface to check time sync status. Please refer to each lidar manual.
Enabling Time Synchronization on Lidars
Please refer to lidar manufacture's manual on enabling and configuring PTP. By default, SENSR broadcast time synchronization signal with following configs:
- Multicast mode
- Domain number
0 ptpengine:transport=ipv4ptpengine:delay_mechanism=E2E
Manual Configuration
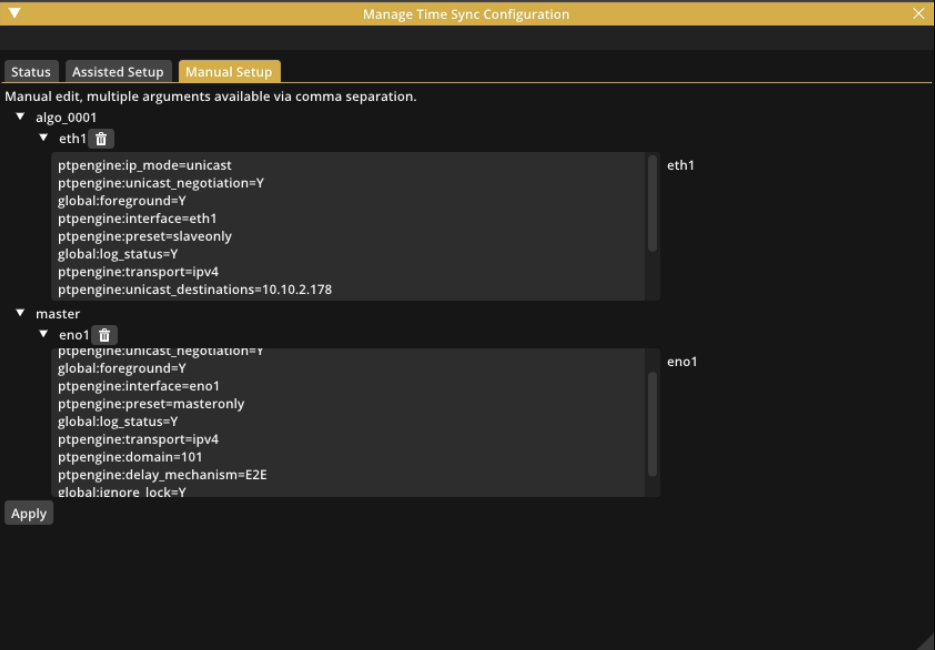 This section exposes underlying
 ptpd configuration parameters for time synchronization. This is used to customize auto-generated configuration from previous steps.
Each nested section is divided into Compute Node --> Network Interface --> ptpd Configuration.
Please refer to ptpd configs for full list of ptpd configs.
Time synchronization is done per network interface basis eg) ethernet ports, wifi. It is important to find which devices are connected to which network interface. Please use following linux command to check connection.
ping DEVICE_TO_CHECK -I INTERFACE_TO_CHECK
Troubleshooting
Time synchronization is heavily network dependent and there are many possibilities of error.
- Trouble in connection between algo node and master node
- Try manually changing
ptpengine:domaininto 0~255 range. (Domain might be used by other PTP instance). Both algo-master node must be set the same. - Try running with
Unicast,tiered, it’s more reliable than multicast version. - Manually add
ptpengine:unicast_destinations = ALGO_NODE_IP0, ALGO_NODE_IP1, ...to Master node network interfaces connected to the algo nodes.
- Trouble connecting to lidar from algo node : Try unicast connection(multicast is default for auto-config with lidars).
Edit algo node network interfaces connected to lidar:
ptpengine:ip_mode=multicasttoptpengine:ip_mode=unicastAdd
ptpengine:unicast_negotiation=YAdd
ptpengine:unicast_destinations = LIDAR_IP0, LIDAR_IP1Change
ptpengine:domaininto 0~255 range
Edit lidar settings (please refer to lidar manual)
Enable PTP
Set domain number to same as above
Set to unicast mode
If possible, set to slave mode
If further options are available, please refer here:
ptpengine:transport=ipv4ptpengine:delay_mechanism=E2E